guide bearing

Guide bearings are essential components in machinery, enabling smooth motion control and reducing friction. They maintain precise alignment, ensuring efficient operation and minimizing wear in various applications.

Types of Guide Bearings

Guide bearings are categorized into sleeve bearings, roller bearings, and ball bearings, each offering distinct advantages based on load capacity, speed, and environmental conditions.

2.1 Sleeve Bearings

Sleeve bearings, also known as plain bearings, are simple and cost-effective guide bearings. They consist of a cylindrical sleeve that facilitates low-friction motion between moving parts. Typically made from materials like bronze, plastic, or composite materials, they are ideal for applications with low to moderate loads and speeds. Sleeve bearings often rely on external lubrication, such as oil or grease, to reduce wear and heat generation. Their straightforward design makes them easy to install and maintain, ensuring smooth operation in various machinery and mechanical systems where simplicity and reliability are key.

2.2 Roller Bearings

Roller bearings are a type of guide bearing that uses cylindrical rollers to reduce friction between moving parts. They are designed to handle high radial and axial loads, making them ideal for heavy machinery and industrial applications. These bearings consist of an outer race, inner race, and rollers held in place by a cage. Roller bearings are typically made from steel but can also be constructed from other durable materials. They are widely used in automotive, aerospace, and manufacturing industries due to their high load-carrying capacity and ability to maintain precision under stress. Proper lubrication and maintenance are essential for optimal performance and longevity.

2.3 Ball Bearings

Ball bearings are a versatile type of guide bearing that uses metal balls to reduce friction between moving parts. They are highly efficient in both radial and axial load applications, making them ideal for a wide range of industries. These bearings consist of an outer race, inner race, and balls held in place by a cage. Ball bearings are known for their high speed and precision capabilities, making them a popular choice in automotive, aerospace, and manufacturing applications. They are available in various types, including sealed and open designs, to suit different operational requirements and environmental conditions.

Materials Used in Guide Bearings

Guide bearings are made from metallic materials, such as steel and bronze, as well as plastic and composite materials for corrosion resistance and ceramic bearings for high-temperature applications.

3.1 Metallic Materials

Metallic materials are widely used in guide bearings due to their exceptional strength and durability. Steel and bronze are common choices, offering excellent load-carrying capacity and resistance to wear. These materials are often alloyed to enhance specific properties, such as corrosion resistance or thermal stability. For instance, stainless steel is preferred in harsh environments, while bearings made from aluminum alloys provide lightweight solutions without compromising performance. The ability of metallic materials to withstand high pressures and maintain dimensional stability makes them ideal for industrial and automotive applications, ensuring reliable operation over extended periods.

3.2 Plastic and Composite Materials

Plastic and composite materials are increasingly used in guide bearings for their corrosion resistance, lightweight, and self-lubricating properties. Nylon and polymer-based composites are popular choices, offering reduced noise and vibration. These materials excel in low-load applications and harsh environments, such as food processing or marine equipment. Composites often combine polymers with reinforcing agents like carbon fiber, enhancing strength and durability. While they may lack the load-carrying capacity of metals, plastics and composites provide cost-effective solutions for applications where high temperatures or heavy stresses are not a concern, making them versatile alternatives in modern bearing technology.

3.3 Ceramic Bearings

Ceramic bearings are made from advanced materials like silicon nitride or zirconia, offering exceptional durability and resistance to wear. They excel in high-temperature environments and are corrosion-resistant, making them ideal for harsh industrial settings. Ceramic bearings are lighter than metal ones, reducing rotational inertia and enabling higher speeds. Their smooth surface finish minimizes friction, enhancing efficiency and reducing noise. Commonly used in aerospace and high-speed machinery, they provide precise movement and long service life. However, they can be brittle under extreme stress, limiting their use in heavy-load applications. Despite this, their self-lubricating properties make them a popular choice for specialized tasks.

Applications of Guide Bearings

Guide bearings are crucial in various industries, ensuring precise movement and reducing friction. They are widely used in automotive, aerospace, and manufacturing sectors for smooth operation and durability.

4.1 Automotive Industry

In the automotive industry, guide bearings play a pivotal role in ensuring the smooth operation of vehicles. They are integral to components such as engine crankshafts, camshafts, and gearboxes, where precise alignment and minimal friction are critical. By maintaining proper lubrication and reducing wear, these bearings contribute to the overall efficiency and longevity of automotive systems. Their durability under high-stress conditions ensures reliable performance, making them indispensable in modern vehicle design and manufacturing. The use of high-quality materials further enhances their effectiveness in meeting the demanding requirements of the automotive sector.

4.2 Aerospace Industry

Guide bearings are critical in the aerospace industry, where precision and reliability are paramount. They are used in aircraft engines, landing gear, and spacecraft mechanisms to ensure smooth operation under extreme conditions. High-temperature alloys and advanced materials are often employed to withstand the stresses of flight. These bearings minimize friction and vibration, enhancing fuel efficiency and passenger comfort. Their durability and resistance to wear are essential for maintaining the integrity of aerospace systems over long missions. The aerospace sector relies heavily on guide bearings to meet the stringent safety and performance requirements of modern aviation and space exploration.

4.3 Manufacturing Industry

Guide bearings play a vital role in the manufacturing industry, ensuring machinery operates smoothly and efficiently. They are used in production lines, conveyor systems, and heavy-duty equipment to maintain alignment and reduce friction. Their durability and ability to handle high loads make them essential for continuous operation in demanding environments. By minimizing wear and tear, guide bearings help reduce downtime and extend equipment lifespan. This contributes to cost savings and increased productivity, making them a cornerstone of modern manufacturing processes. Their reliability ensures consistent product quality and supports the overall efficiency of industrial operations.

Advantages of Using Guide Bearings

Guide bearings offer reduced friction, increased precision, and enhanced durability, ensuring smooth operation and minimizing wear. They also provide noise reduction, improving overall efficiency and reliability in machinery.

5.1 Reduced Friction

One of the primary advantages of guide bearings is their ability to significantly reduce friction between moving parts. This is achieved through their smooth surface finishes and advanced lubrication systems. By minimizing friction, guide bearings prevent excessive heat buildup, which can degrade mechanical components over time. Additionally, reduced friction leads to energy savings, as less force is required to maintain motion. This makes guide bearings particularly beneficial in high-precision applications where efficiency and reliability are critical. The reduction of friction also contributes to quieter operation and extended lifespan of the machinery, making them a vital component in modern engineering solutions.

5.2 Increased Precision

Guide bearings are designed to enhance precision by maintaining exact alignment and movement control in mechanical systems. Their smooth operation ensures minimal deviation, making them ideal for applications requiring high accuracy. By providing consistent and repeatable motion, guide bearings are essential in industries like robotics and CNC machining. The tight tolerances and advanced materials used in these bearings minimize play and vibration, ensuring precise positioning. This level of control is critical in manufacturing and aerospace, where even slight misalignments can lead to significant errors. Increased precision also leads to better product quality and reduced waste, making guide bearings a cornerstone of modern industrial design.

5.3 Durability

Guide bearings are engineered for long-term reliability, with robust materials and designs that withstand wear and tear. High-quality bearings resist deformation under heavy loads, ensuring consistent performance over time. Advanced materials like steel alloys or ceramic compounds enhance durability, reducing the risk of premature failure. Proper lubrication and maintenance further extend their lifespan. Durable guide bearings minimize downtime and reduce replacement costs, making them a critical investment for industrial and mechanical systems. Their ability to handle repetitive motion and harsh conditions ensures reliable operation, even in demanding environments.

5.4 Noise Reduction

Guide bearings play a crucial role in minimizing operational noise by reducing vibration and friction. Advanced designs, such as ball and roller bearings, incorporate smooth surfaces and precise engineering to dampen sound. Materials like bronze or ceramic further enhance noise reduction capabilities. Proper lubrication also helps by eliminating metal-on-metal contact, which is a common source of noise. In applications requiring silent operation, specialized bearings with noise-reducing coatings are often used. This ensures quieter machinery, making them ideal for environments where noise control is essential, such as in consumer electronics or precision instruments.

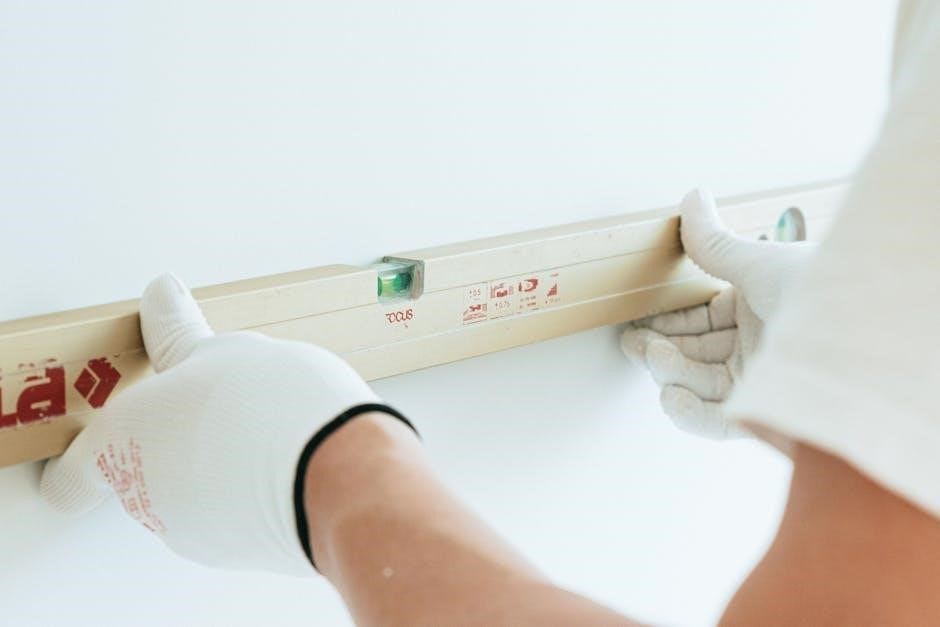
Installation of Guide Bearings

Proper alignment and fit are critical for guide bearings. Ensure surfaces are clean and lubricated before installation. Use specialized tools to avoid damage and follow manufacturer guidelines.

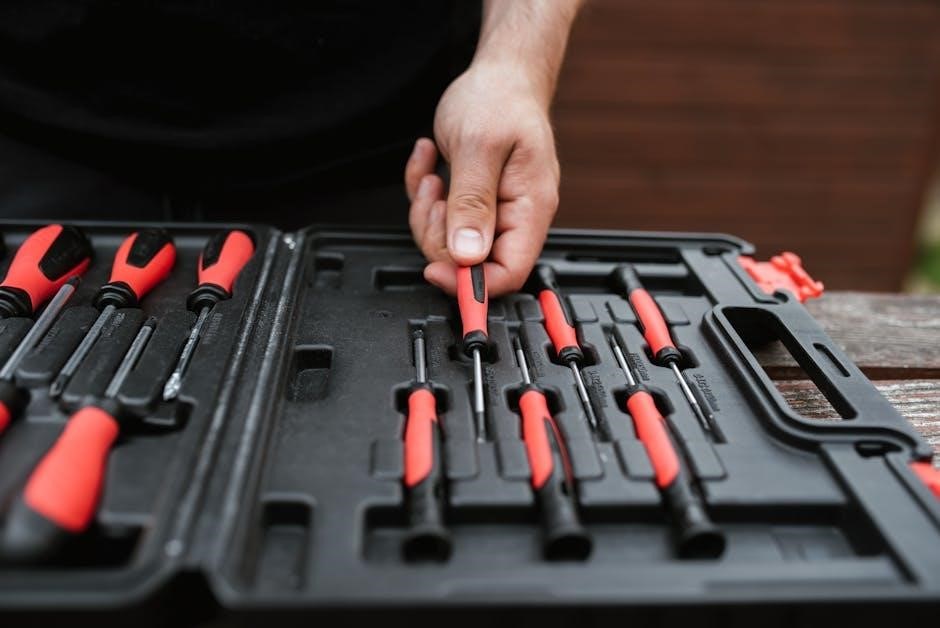
6.1 Best Practices for Installation

Installing guide bearings requires precision to ensure optimal performance and longevity. Always clean and inspect the housing and shaft before installation to remove contaminants. Apply a thin, even layer of high-quality lubricant to mating surfaces. Use alignment tools to prevent misalignment, which can cause uneven wear or premature failure. Gently press or slide the bearing into place, avoiding hammering or force that might damage the components. Follow the manufacturer’s torque specifications for any bolts or fasteners. Finally, test the system under light load to ensure smooth operation before full implementation. Proper installation practices minimize downtime and extend bearing life.

6.2 Tools and Alignment Techniques

Proper tools and alignment techniques are critical for guide bearing installation. Use dial indicators or laser alignment tools to ensure precise shaft and housing alignment. Misalignment can lead to uneven wear and reduced performance. Mount the bearing on a mandrel or in the housing, then measure runout using a dial indicator. Adjust the housing or shaft position as needed to achieve optimal alignment. Utilize shims or spacers for fine adjustments. Always follow the manufacturer’s guidelines for specific tools and techniques. Correct alignment ensures smooth operation, minimizes vibration, and extends the bearing’s lifespan.

Maintenance of Guide Bearings

Regular lubrication, inspection, and cleaning are vital for guide bearings. Ensure proper alignment and follow manufacturer guidelines to prevent wear and extend service life effectively.

7.1 Lubrication Methods

Lubrication is critical for guide bearings to reduce friction and wear. Common methods include grease and oil applications, with grease being ideal for low-speed operations and oil for high-speed or heavy loads. Proper lubrication prevents overheating and corrosion, ensuring smooth operation. Automatic lubrication systems are recommended for continuous machinery use, while manual application is suitable for intermittent operations. Always clean bearings before applying lubricant and avoid over-lubrication, which can attract contaminants. Regular inspection of lubricant levels and condition is essential to maintain optimal performance and extend bearing life. Proper lubrication methods are vital for minimizing wear and ensuring durability in industrial applications.

7.2 Inspection and Replacement Guidelines

Regular inspection of guide bearings is crucial to prevent unexpected failures. Inspect for wear, cracks, or corrosion, and monitor vibration levels for early fault detection. Replace bearings when wear exceeds manufacturer-recommended thresholds or upon showing signs of fatigue. Always follow proper replacement procedures to ensure alignment and fitment. Use specialized tools to avoid damage during removal and installation. Keep records of inspections and replacements for maintenance planning. Replace bearings in pairs if possible, to maintain balance and performance. Always dispose of old bearings responsibly and follow safety guidelines during the process. Timely replacements ensure reliability and minimize downtime in critical applications.

Guide bearings play a vital role in modern machinery, offering precision, durability, and reduced friction. As technology advances, future trends include the development of smarter bearings with embedded sensors for real-time monitoring. Materials like advanced ceramics and composites are expected to gain prominence, offering improved performance in extreme conditions. Automation and predictive maintenance will further enhance bearing reliability. The focus on sustainability will drive innovations in energy-efficient designs and recyclable materials. These advancements will ensure guide bearings remain integral to industries, enabling smarter, more efficient, and environmentally friendly solutions for years to come.

conners scale pdf

The Conners Scale is a widely used assessment tool for evaluating ADHD and behavioral issues in individuals. It provides comprehensive insights through multi-informant reports, including parent, teacher, and self-reports.

1.1 Overview of the Conners Scale

The Conners Scale is a widely recognized assessment tool designed to evaluate ADHD and associated behavioral issues in individuals. It includes versions like the Conners Parent Rating Scale (CPRS), Conners Teacher Rating Scale (CTRS), and Conners Adult ADHD Rating Scales (CAARS). These scales provide a comprehensive multi-informant approach, assessing symptoms such as inattention, hyperactivity, and emotional difficulties. They are used across clinical, educational, and research settings to support accurate diagnoses and treatment monitoring.

1.2 Importance of the Conners Scale in Assessing Behavior

The Conners Scale is a vital tool for assessing ADHD and behavioral issues, offering a comprehensive evaluation of symptoms like inattention, hyperactivity, and emotional difficulties. Its multi-informant approach (parent, teacher, self-report) provides diverse perspectives, enhancing accuracy in diagnosis and treatment monitoring. Widely used in clinical, educational, and research settings, it supports early identification of behavioral challenges and guides effective interventions, making it indispensable for understanding and addressing ADHD-related behaviors.

History and Development of the Conners Scale

The Conners Scale was developed in the late 20th century by C. Keith Conners and has since evolved through revised editions to enhance its diagnostic accuracy.

2.1 Creation and Evolution of the Scale

The Conners Scale was first introduced by C. Keith Conners in the late 20th century, initially focusing on assessing ADHD symptoms. Over the years, it has undergone revisions, including the development of the CPRS-R and CTRS-R forms, to improve its reliability and validity. These updates incorporated feedback from clinicians and researchers, ensuring the scale remains a robust tool for behavioral assessment.

2.2 C. Keith Conners and His Contribution

C. Keith Conners is renowned for developing the Conners Scale, a pivotal tool in assessing ADHD and behavioral disorders. His work laid the foundation for standardized behavioral evaluations, enabling clinicians and researchers to identify and manage symptoms more effectively. Conners’ contributions include creating the CPRS and CTRS forms, which have been widely adopted in clinical and educational settings, significantly advancing the field of behavioral assessment.

Key Features of the Conners Scale

The Conners Scale offers a multi-informant approach, combining parent, teacher, and self-reports to provide a comprehensive assessment of ADHD and behavioral issues. Various versions, such as CPRS, CTRS, and CAARS, cater to different age groups and assessment needs.

3.1 Multi-Informant Approach (Parent, Teacher, Self-Report)

The Conners Scale employs a multi-informant approach, gathering insights from parents, teachers, and self-reports to ensure a well-rounded assessment of behavior. This method captures diverse perspectives, enhancing accuracy in diagnosing ADHD and other issues. Parents provide home-based observations, teachers offer classroom insights, and self-reports allow individuals to share their experiences, creating a comprehensive evaluation. This approach is crucial for understanding behavior across different settings and ensuring reliable results.

3.2 Comprehensive Assessment of ADHD and Behavioral Issues

The Conners Scale provides a thorough evaluation of ADHD symptoms and behavioral concerns. It assesses various aspects, including inattention, hyperactivity, and impulsivity, while also addressing emotional and social difficulties. The scale’s comprehensive nature allows clinicians to identify patterns and severity of symptoms, aiding in accurate diagnosis and treatment planning. This approach ensures a holistic understanding of behavioral challenges, making it a valuable tool for both clinical and educational settings.

3.4 Versions of the Conners Scale (CPRS, CTRS, CAARS)

The Conners Scale is available in multiple versions, including the Conners Parent Rating Scale (CPRS), Conners Teacher Rating Scale (CTRS), and Conners Adult ADHD Rating Scale (CAARS). Each version is tailored to specific informants—parents, teachers, or adults—and assesses ADHD symptoms and behavioral issues. The CPRS and CTRS focus on child behavior, while CAARS addresses adult ADHD, ensuring comprehensive evaluation across different age groups and settings.

Uses of the Conners Scale

The Conners Scale is primarily used for clinical assessment, educational evaluations, and research purposes. It aids in diagnosing ADHD, monitoring treatment progress, and understanding behavioral patterns effectively.

4.1 Clinical Assessment and Diagnosis

The Conners Scale is widely employed in clinical settings to assess ADHD symptoms and behavioral issues. It helps professionals diagnose ADHD by evaluating inattention, hyperactivity, and impulsivity. The scale’s multi-informant approach ensures comprehensive insights, while its standardized format aids in accurate diagnosis. Clinicians use it to identify severity levels and differentiate ADHD from other disorders, making it a valuable tool for forming effective treatment plans and monitoring progress over time.

4.2 Educational and Research Purposes

The Conners Scale is extensively utilized in educational settings to identify students’ behavioral challenges, aiding in the development of tailored learning strategies. In research, it serves as a reliable tool for studying ADHD and behavioral disorders, enabling deeper understanding of their impact. Its comprehensive structure allows educators and researchers to track behavioral changes and assess intervention effectiveness, contributing to improved academic outcomes and informed policy-making in educational and mental health sectors.

4.3 Monitoring Treatment Outcomes

The Conners Scale is invaluable for monitoring treatment outcomes, enabling clinicians to assess the effectiveness of interventions for ADHD and behavioral issues. By regularly administering the scale, professionals can track symptom changes, measure progress, and adjust treatment plans accordingly. This longitudinal approach ensures personalized care and helps determine the efficacy of therapies or medications, providing actionable insights for improved patient outcomes and sustained behavioral improvement over time.

The Conners Scale and ADHD Diagnosis

The Conners Scale plays a crucial role in identifying ADHD symptoms, offering a structured approach to assess attention, hyperactivity, and impulsivity in individuals, aiding accurate diagnosis and intervention.

5.1 Role in Identifying ADHD Symptoms

The Conners Scale is instrumental in identifying ADHD symptoms by assessing key areas such as inattention, hyperactivity, and impulsivity. It provides a comprehensive evaluation of behavioral patterns, enabling clinicians to pinpoint specific traits associated with ADHD. The scale’s structured format ensures consistency in measuring symptoms across different settings and informants, making it a reliable tool for diagnosing ADHD accurately and effectively in both children and adults.

5.2 Differentiation from Other Behavioral Disorders

The Conners Scale aids in distinguishing ADHD from other behavioral disorders by evaluating specific symptom patterns. It assesses inattention, hyperactivity, and impulsivity, while also considering comorbid conditions like anxiety or oppositional behavior. The scale’s detailed structure helps clinicians differentiate ADHD from similar disorders, ensuring accurate diagnoses. Its ability to capture nuanced behavioral differences makes it a valuable tool in clinical and educational settings for precise identification and intervention planning.

Research and Validation of the Conners Scale

The Conners Scale has undergone extensive research, ensuring its reliability and validity in assessing ADHD symptoms. Validity studies confirm its effectiveness across diverse populations, solidifying its credibility.

6.1 Reliability and Validity Studies

The Conners Scale has demonstrated strong reliability and validity through numerous studies. Internal consistency and test-retest reliability are consistently high. Validity is supported by correlations with other ADHD measures, ensuring accurate assessments across diverse populations. Researchers have confirmed its effectiveness in distinguishing ADHD symptoms from other behavioral disorders, making it a trusted tool in clinical and educational settings.

6.2 Cross-Cultural Applications and Adaptations

The Conners Scale has been adapted and validated for use across diverse cultures, ensuring its applicability worldwide. Studies in Russia and other countries demonstrate its effectiveness in assessing ADHD symptoms in different cultural contexts. Cultural sensitivity has been maintained while adapting the scale, making it a reliable tool for cross-cultural research and clinical practice.

Strengths of the Conners Scale

7.1 Comprehensive Coverage of Behavioral Issues

The Conners Scale excels in assessing a broad range of behavioral issues, including ADHD symptoms, emotional difficulties, and social problems, providing a holistic view of an individual’s behavior.

The Conners Scale offers a thorough assessment of various behavioral concerns, including ADHD symptoms, emotional challenges, and social interactions. By gathering insights from parents, teachers, and self-reports, it provides a well-rounded perspective. This multi-informant approach ensures a detailed understanding of an individual’s behavior, making it invaluable for both clinical and educational settings. Its ability to cover a broad spectrum of issues enhances its effectiveness in identifying complex behavioral patterns.

7.2 Ease of Administration and Scoring

The Conners Scale is designed for ease of use, with clear instructions and a structured format. Available in PDF, it ensures accessibility for professionals and parents. The scale includes straightforward scoring guidelines, reducing the risk of errors. Its user-friendly nature makes it efficient for both clinical and educational settings, allowing for quick and accurate assessments of behavioral patterns and ADHD symptoms.

Limitations of the Conners Scale

The Conners Scale may be subject to rater bias, as ratings rely on individual perceptions. Its length and complexity can also make administration challenging for some users.

8.1 Potential for Rater Bias

The Conners Scale may be influenced by rater bias, as ratings depend on individual perceptions and experiences. Parents, teachers, and self-reporters may interpret behaviors differently, leading to variability in scores. This subjectivity can affect the accuracy of assessments, especially if raters have differing perspectives or biases. For example, a teacher may rate a child’s behavior differently than a parent due to distinct environmental contexts. Such discrepancies highlight the importance of using the scale alongside other diagnostic tools to ensure comprehensive evaluation. Additionally, the scale’s reliance on human judgment means it may reflect inherent biases or expectations of the rater, potentially impacting the reliability of results. To mitigate this, using multiple raters and ensuring consistency in administration and interpretation is crucial. This limitation underscores the need for careful consideration when interpreting Conners Scale data, particularly in clinical and educational settings where accurate assessments are critical for decision-making. Furthermore, the scale’s design, while thorough, may not account for all individual differences or cultural factors, which can also influence rater perceptions. Therefore, while the Conners Scale remains a valuable tool, its potential for rater bias should not be overlooked, and steps should be taken to minimize this effect to enhance the validity and reliability of the results. By understanding and addressing these limitations, professionals can use the scale more effectively, ensuring that assessments are as objective and fair as possible.

8.2 Length and Complexity of the Scale

The Conners Scale is notable for its extensive length and complexity, which can make administration and interpretation challenging. With multiple versions and numerous items, it requires significant time and effort from both raters and respondents. This complexity may lead to rater fatigue, potentially affecting the accuracy of responses. While the scale’s comprehensiveness is a strength, its length can be a drawback in settings where time and resources are limited, making it less practical for quick assessments.

Accessing the Conners Scale in PDF Format

The Conners Scale in PDF format is widely available online, offering convenient access to versions like the CPRS-R and CTRS-R, along with scoring sheets for assessments.

9.1 Availability of PDF Versions Online

The Conners Scale in PDF format is readily accessible online, with versions like the CPRS-R and CTRS-R available for download. Many websites offer these forms, including the full manual, scoring sheets, and abbreviated versions. However, it’s essential to ensure the authenticity and copyright compliance when accessing these documents. Official distributors and authorized sellers provide legitimate copies, while third-party sites may offer free versions, though caution is advised to avoid unauthorized use.

9.2 Guidelines for Proper Use and Distribution

The Conners Scale PDF must be used in accordance with copyright laws and publisher guidelines. Ensure all administrations are conducted by trained professionals. Distribution should be restricted to authorized individuals, avoiding unauthorized sharing. Always verify the source of the PDF to maintain authenticity. Follow the manual’s instructions for accurate scoring and interpretation. Proper use ensures ethical assessment and reliable results, upholding the scale’s integrity and effectiveness in clinical and educational settings.

Practical Tips for Using the Conners Scale

Ensure proper training before administering the scale. Provide clear instructions to respondents. Establish rapport to encourage honest answers. Minimize distractions during completion. Follow scoring guidelines carefully for accurate results.

10.1 Ensuring Accurate Responses

To ensure accurate responses, provide clear instructions and establish rapport with respondents. Minimize distractions during completion. Ensure respondents understand the scale’s purpose and importance. Offer examples for ambiguous items. Avoid leading questions. Verify completion of all items. Address any concerns promptly; Ensure respondents are in a calm and focused state. Proper training for administrators is essential for consistent and reliable results.

10.2 Interpreting Results Effectively

Interpreting Conners Scale results requires understanding the scoring guidelines and norms. Compare individual scores to age-specific benchmarks. Identify elevated scores indicating potential behavioral concerns. Consider the rater’s perspective to contextualize responses. Look for consistency across informants to validate findings. Use results to inform diagnostic decisions and treatment plans. Ensure interpretations align with clinical observations and other assessment tools for a comprehensive understanding of the individual’s behavior.

The Future of the Conners Scale

The Conners Scale is expected to evolve with digital advancements, enhancing accessibility and ease of use. Future applications may expand its role in mental health assessments.

11.1 Digital and Technological Advancements

Digital tools are transforming the Conners Scale, enhancing its accessibility and efficiency. Online platforms and mobile apps now enable seamless administration, scoring, and data tracking. PDF versions, widely available, facilitate easy distribution and completion. Integration with electronic health records and real-time reporting capabilities are expected to further streamline the assessment process, making it more convenient for professionals to identify and monitor behavioral issues in diverse settings.

11.2 Expanding Applications in Mental Health

The Conners Scale is increasingly being utilized beyond ADHD assessment, addressing comorbid conditions like anxiety and depression. Its application in monitoring treatment efficacy and personalizing interventions is growing. Researchers are exploring its use in diverse mental health disorders, broadening its role in comprehensive psychological evaluations and enhancing its utility in clinical and therapeutic settings to address a wider range of patient needs effectively.

requiem city c swallow pdf

The Requiem City C Swallow PDF is a comprehensive guide examining urban transformation and its socio-economic impacts, tailored for urban planners, researchers, and enthusiasts․ It offers insights into sustainable development․

1․1 Overview of the Document

The Requiem City C Swallow PDF is a detailed analysis of urban transformation, focusing on socio-economic impacts and sustainable development strategies․ It explores how cities adapt to modern challenges, offering insights into policy-making and community engagement․ The document provides case studies, data-driven analyses, and actionable recommendations, serving as a vital resource for urban planners, policymakers, and researchers interested in fostering resilient and inclusive cities․

1․2 Importance of the Topic

Understanding urban transformation is critical for addressing modern challenges like population growth, climate change, and resource scarcity․ The Requiem City C Swallow PDF highlights the socio-economic impacts of city development, offering insights into sustainable practices and policy-making․ Its relevance lies in providing actionable strategies for creating resilient, inclusive cities, making it essential for urban planners, policymakers, and researchers aiming to shape the future of urban living․

Background and Context

The Requiem City C Swallow PDF emerges from studies on urban dynamics, offering historical insights into city evolution and modern challenges․ Its context is rooted in global urbanization trends․

2․1 Historical Relevance

The Requiem City C Swallow PDF delves into the historical evolution of urban landscapes, tracing societal shifts post-industrialization․ It explores how cities adapted to economic and cultural changes, offering insights into the roots of modern urban challenges․ By examining past trends, the document provides a foundation for understanding contemporary urban planning strategies and their historical precedents․

2․2 Cultural Significance

The Requiem City C Swallow PDF highlights the cultural dimensions of urban transformation, exploring how cities reflect societal values and identity․ It examines the role of heritage, traditions, and community dynamics in shaping urban spaces․ By addressing cultural preservation amidst modernization, the document underscores the importance of maintaining cultural integrity in urban development, offering insights into the interplay between culture and urban planning․

Key Themes and Motifs

The Requiem City C Swallow PDF explores themes of urban decay, renewal, and resilience, while motifs like the swallow symbolize hope and transformation, enriching its narrative․

3․1 Analysis of Major Themes

The Requiem City C Swallow PDF delves into themes of urban transformation, sustainability, and community resilience․ It examines how cities adapt to crises, emphasizing the role of collective action and innovation․ The interplay between decay and renewal is central, highlighting the importance of adaptive reuse and cultural preservation․ These themes are enriched by the motif of the swallow, symbolizing hope and regeneration in the face of urban challenges․

3․2 Symbolism and Metaphors

The Requiem City C Swallow PDF employs rich symbolism, with the city itself serving as a metaphor for resilience and transformation․ The swallow, a recurring motif, represents hope and renewal, mirroring the city’s journey from decay to rebirth․ Natural elements, such as rivers and skies, symbolize flux and adaptability, while urban structures embody the tension between tradition and progress․ These metaphors collectively explore themes of identity, change, and the human spirit’s capacity to endure․

Structure and Organization

The Requiem City C Swallow PDF is meticulously organized, featuring clear headings, subheadings, and bullet points for enhanced readability․ Its logical flow ensures easy navigation, mirroring effective search strategies for optimal accessibility․

4;1 Layout and Formatting

The Requiem City C Swallow PDF features a well-structured layout with clear headings, subheadings, and bullet points, enhancing readability․ The document uses consistent formatting, including bold titles and numbered lists, to organize content logically․ Adequate white space and font sizing ensure readability, while hyperlinks and cross-references improve navigation․ The formatting aligns with best practices for digital documents, making it accessible and user-friendly for readers․

4․2 Navigation and Accessibility

The Requiem City C Swallow PDF is designed with user-friendly navigation features, including bookmarks and hyperlinks for easy access to sections․ The document supports screen reader compatibility, ensuring accessibility for visually impaired readers․ Alt text is provided for images, and headings are properly tagged for semantic structure․ Keyboard navigation is enabled, allowing users to navigate without a mouse․ High contrast mode compatibility further enhances readability for users with visual impairments, making the document accessible to all․

Content Analysis

The Requiem City C Swallow PDF delves into urban transformation, socio-economic impacts, and sustainable development strategies․ It includes detailed case studies, data analyses, and actionable insights for modern city planning challenges․

5․1 Detailed Breakdown of Sections

The Requiem City C Swallow PDF is structured into eight chapters, each addressing distinct aspects of urban transformation․ Chapter 1 introduces the topic, while Chapter 2 explores historical context․ Chapters 3 and 4 analyze key themes and structural elements, respectively․ The document includes case studies, data visualizations, and appendices with supplementary materials, offering a comprehensive exploration of urban challenges and solutions․

5․2 Key Findings and Insights

The Requiem City C Swallow PDF reveals critical insights into urban resilience, emphasizing the role of community engagement and sustainable design․ It highlights the importance of adaptive planning and the integration of technology in urban renewal․ The document underscores the need for inclusive policies to address social inequities, offering actionable strategies for stakeholders to implement meaningful change in urban development․

Language and Style

The Requiem City C Swallow PDF uses clear, precise language to present complex ideas in an accessible and engaging manner for urban planners and enthusiasts effectively․

6․1 Tone and Voice

The Requiem City C Swallow PDF employs a formal yet approachable tone, balancing academic rigor with readability․ The voice is authoritative and insightful, offering deep analysis of urban themes while engaging readers effectively․

6․2 Use of Rhetorical Devices

The Requiem City C Swallow PDF incorporates a variety of rhetorical devices to enhance its narrative and analysis․ Metaphors and similes are used to illustrate complex urban dynamics, while allusions to historical events add depth․ Anaphoras emphasize key points, creating a rhythmic and persuasive flow․ These devices engage readers and make the content more relatable and impactful․

Cultural and Social Implications

The Requiem City C Swallow PDF explores how urban transformations shape cultural identities and social structures, addressing themes of community resilience and adaptation to change․

7․1 Impact on Society

The Requiem City C Swallow PDF highlights the profound societal effects of urban renewal, including the displacement of communities and the loss of cultural heritage․ It emphasizes how such transformations often prioritize economic growth over social equity, leading to increased inequality and social fragmentation․ This critique serves as a call to action for more inclusive urban planning practices that balance development with community needs, ensuring sustainable and equitable growth for all members of society․

7․2 Representation and Diversity

The Requiem City C Swallow PDF underscores the importance of representation and diversity in urban planning, advocating for inclusive policies that amplify marginalized voices․ It critiques the lack of diversity in decision-making processes, which often overlooks the needs of minority communities․ By promoting equitable participation, the document calls for urban designs that reflect the cultural and social diversity of cities, fostering a sense of belonging and identity for all residents․

Author’s Intent and Purpose

The author’s intent is to inform and provoke thought on urban challenges, offering insights and solutions to foster sustainable development while balancing progress with community needs․

8․1 Stated Goals

The stated goals of Requiem City C Swallow PDF focus on exploring urban transformation’s socio-economic impacts․ The author aims to provide actionable insights, fostering sustainable development and balancing progress with community needs․

8․2 Underlying Messages

Beneath its surface, Requiem City C Swallow PDF conveys profound messages about equity, justice, and environmental stewardship․ It critiques the human cost of unchecked urban progress, emphasizing the need for cultural preservation and sustainable practices․ The document underscores the importance of ethical urban planning, advocating for policies that balance development with community well-being and ecological responsibility․

Audience and Reception

The Requiem City C Swallow PDF primarily targets urban planners, researchers, and enthusiasts, offering insights into sustainable development․ Its reception highlights its value as a comprehensive urban transformation resource․

9․1 Target Audience

The primary audience for the Requiem City C Swallow PDF includes urban planners, researchers, and enthusiasts interested in sustainable development․ These individuals likely engage with content through specific search queries, seeking detailed insights into urban transformation․ By understanding their intent—whether informational, navigational, or transactional—the PDF caters to their needs for comprehensive resources on socio-economic impacts and innovative urban strategies․

9․2 Reader Feedback and Reviews

Readers have praised the Requiem City C Swallow PDF for its comprehensive insights into urban transformation․ Many urban planners and researchers appreciate its detailed analysis and practical strategies for sustainable development․ The document is often described as a valuable resource for understanding socio-economic impacts, with readers highlighting its clear structure and accessibility․ Overall, the feedback underscores its relevance and utility in the field of urban studies․

Practical Applications

The Requiem City C Swallow PDF provides actionable insights for urban planners, offering strategies for sustainable development and community engagement, making it a valuable tool for real-world applications․

10․1 Real-World Uses

The Requiem City C Swallow PDF serves as a practical resource for urban planners, offering strategies to address challenges like population growth and environmental sustainability; It provides case studies and actionable insights, enabling professionals to implement effective solutions in real-world scenarios․ Additionally, its comprehensive analysis makes it a valuable tool for policymakers aiming to create resilient and inclusive urban environments․

10․2 Implementation Strategies

The document outlines actionable steps for integrating its insights into urban planning․ Key strategies include stakeholder collaboration, phased development, and technology integration․ These approaches ensure sustainable and equitable growth, aligning with global urban development goals․ By fostering community engagement and leveraging data-driven solutions, cities can effectively implement the proposed strategies, achieving long-term resilience and prosperity․

The Requiem City C Swallow PDF provides a detailed analysis of urban transformation, offering valuable insights for sustainable development and strategic urban planning․

11․1 Summary of Key Points

The Requiem City C Swallow PDF delves into urban transformation, exploring socio-economic impacts and sustainable development strategies․ It highlights challenges in modern city planning, offering practical solutions for balanced growth․ The document emphasizes the importance of integrating technology and community needs, providing a roadmap for future urban designs․ Its comprehensive analysis makes it a valuable resource for policymakers, architects, and urban enthusiasts seeking insights into modern city development․

11․2 Final Thoughts and Recommendations

The Requiem City C Swallow PDF serves as a compelling guide for understanding urban evolution and its challenges․ It is recommended for policymakers, architects, and urban planners seeking innovative solutions․ To enhance its value, future editions could include more case studies and visual aids․ Emphasizing community engagement and sustainable practices will further strengthen its practical applications, making it a indispensable resource for shaping smarter cities․

Further Reading and Resources

For deeper insights, explore scholarly articles on urban transformation and access the Requiem City C Swallow PDF for comprehensive analysis․ Additional resources include urban planning journals and official city reports․

12․1 Additional Materials

For further exploration, consider supplementary resources like urban development case studies, white papers on city planning, and academic journals focusing on socio-economic impacts․ Websites like Urban Studies and CityLab offer valuable insights․ Additionally, webinars and podcasts on urban transformation provide practical perspectives․ Tools like urban mapping software and data analytics platforms can enhance understanding․ Refer to the Requiem City C Swallow PDF for a curated list of recommended materials․

12․2 References and Citations

The Requiem City C Swallow PDF cites academic articles, urban studies, and policy documents as primary sources․ References include works from Google Scholar, JSTOR, and Urban Studies journals․ Specific citations highlight research on urban renewal and socio-economic impacts․ The document adheres to APA citation style, ensuring credibility and academic rigor․ For a detailed list of references, refer to the PDF’s bibliography section․

black and decker trimmer and edger manual

Safety Precautions

Always wear protective eyewear and gloves․ Ensure the guard is installed to prevent injury and avoid motor overheating․ Keep children and pets away․ Do not use in wet conditions or near open flames․ Properly charge batteries and avoid overcharging․ Follow all instructions in the manual to ensure safe operation․

1․1 Essential Safety Features

The Black+Decker trimmer/edger features a lock-out button to prevent accidental start-ups, ensuring operator safety․ The automatic feed system eliminates the need to bump the head on the ground, reducing vibration and potential accidents․ A protective guard is included to deflect debris, and the tool is designed to automatically shut off if it overheats․ Always use the recommended 0․065-inch diameter line to maintain performance and safety․ Proper battery charging and storage are also critical to prevent fire hazards․

1․2 Handling and Operational Precautions

Always maintain a firm grip on the handle and keep the trimmer/edger at a comfortable distance from your body․ Avoid touching the cutting line during operation as it moves at high speed․ Never operate the tool in wet conditions or near water sources to prevent electrical hazards․ Ensure the auxiliary handle is securely adjusted for optimal control․ Regularly inspect the tool for damage or wear, especially the line and guard, to ensure safe and efficient performance․ Store the tool in a dry, secure location when not in use․

1․3 Environmental and Usage Warnings

Do not use the trimmer/edger in extreme temperatures or during rainy conditions to avoid damage․ Avoid using the tool near flammable materials or in enclosed spaces․ Keep the area clear of debris to ensure proper function․ Do not submerge the tool in water or expose it to excessive moisture․ Store the battery in a cool, dry place to maintain its efficiency․ Properly dispose of used trimmer lines and batteries according to local regulations to minimize environmental impact․ Always follow eco-friendly practices when using and maintaining the tool․

Product Features and Specifications

The Black+Decker trimmer/edger features a 20V MAX lithium battery, lightweight design, and automatic feed system for efficient cutting․ It includes an adjustable handle and dual-functionality for trimming and edging․

2․1 Key Components of the Trimmer and Edger

The trimmer/edger includes a 20V MAX lithium-ion battery for reliable power, a lightweight ergonomic design for easy maneuverability, and an automatic feed system that eliminates manual line advancement․ It also features a dual-function head for switching between trimming and edging modes, an adjustable auxiliary handle for comfort, and a spool housing that holds the cutting line․ These components work together to deliver efficient performance and versatility for lawn maintenance tasks․

2․2 Technical Specifications and Battery Details

The Black+Decker trimmer/edger operates on a 20V MAX lithium-ion battery, providing consistent power for cutting․ It weighs approximately 2585 grams, making it lightweight and easy to handle․ The battery charges in 3․25 hours using the LCS200 charger or 1․3 hours with the LBXR20 fast charger․ The trimmer is designed for 0․065-inch diameter line, ensuring optimal performance․ Compatible with various Black+Decker chargers, this model offers a reliable and efficient energy solution for lawn care tasks․

Assembly and Setup

Begin with unboxing and attaching the auxiliary handle․ Adjust the handle height for comfort and ensure proper balance․ Install the spool and edge guide as instructed․

3․1 Unboxing and Initial Assembly

Carefully unpack the trimmer/edger, ensuring all components are included․ Attach the auxiliary handle by aligning the clips and tightening the screws․ Secure the guard to prevent accidental start-ups․ Insert the spool into the housing, making sure it clicks into place․ Charge the battery fully before first use, following the charger instructions․ Familiarize yourself with the controls, such as the trigger and lock-off button, to ensure safe and efficient operation․ Proper assembly ensures optimal performance and safety․

3․2 Adjusting the Auxiliary Handle and Height

To adjust the auxiliary handle, locate the adjustment clips or screws․ Loosen them to position the handle comfortably for your height․ Secure it tightly to ensure stability․ For height adjustment, find the mechanism near the collar or similar component․ Move it up or down as needed, then lock it in place․ Proper adjustment ensures ergonomic comfort and efficient trimming․ Always ensure the handle is securely locked to prevent movement during operation․ This adjustment enhances control and reduces fatigue while using the trimmer/edger․

3․3 Installing the Spool and Edge Guide

To install the spool, remove the spool housing by turning it counterclockwise․ Insert the new spool, ensuring it clicks into place․ Replace the housing securely․ For the edge guide, attach it to the trimmer head using the provided screws or clips․ Tighten firmly to maintain alignment․ Proper installation ensures smooth operation and prevents line feeding issues․ Always use genuine Black+Decker parts for compatibility․ Follow the manual’s specific instructions for your model to avoid installation errors․ Correct installation is crucial for optimal performance and safety․

Operating Instructions

Start the trimmer/edger by pulling the lock-out button and squeezing the trigger․ Use the automatic feed system for consistent line length․ Maintain proper technique for efficient trimming and edging․

4․1 Starting the Trimmer/Edger and Lock-Out Mechanism

To start, ensure the battery is fully charged and properly inserted․ Locate the lock-out button on the handle․ Pull the lock-out button back and squeeze the trigger to activate the trimmer/edger․ Always engage the lock-out mechanism when not in use to prevent accidental start-ups․ This safety feature ensures the device remains inactive until intentionally activated․ Regularly check the lock mechanism for proper function to maintain safety standards․

4․2 Trimming and Edging Techniques

Hold the trimmer/edger at a slight angle for effective cutting․ For trimming, maintain a steady, consistent motion, keeping the cutting line parallel to the ground․ When edging, use the edge guide to create clean, defined borders․ For tight spaces, adjust the auxiliary handle for better control․ Avoid overloading the spool with excess line, as this can reduce performance․ Regularly inspect the line for wear and replace it as needed to ensure optimal results․ Always work in small, manageable sections for precise outcomes․

4․3 Using the Automatic Feed System

The automatic feed system simplifies line advancement, ensuring consistent cutting performance․ Avoid bumping the trimmer head on the ground, as this can damage the mechanism․ Use only 0․065-inch diameter round line, as specified, to maintain proper function․ When the line becomes worn or breaks, the system automatically feeds more․ For optimal results, keep the spool properly aligned and avoid overfilling․ Regularly clean the spool housing to prevent line tangling and ensure smooth operation․ Always follow the manual’s guidelines for the best experience․

Maintenance and Care

Regularly clean the trimmer head and spool housing to prevent debris buildup․ Store the tool in a dry place, away from direct sunlight․ After use, recharge the battery to maintain its lifespan․ Always inspect for damaged or worn parts and replace them promptly․ Proper maintenance ensures optimal performance and extends the product’s lifespan․

5․1 Cleaning and Storage Tips

For optimal performance, clean the trimmer head and spool housing after each use․ Remove any tangled grass or debris using a soft brush or cloth․ Store the tool in a dry, cool place, away from direct sunlight to prevent battery degradation․ Regularly inspect the cutting line for wear and tear․ When storing for extended periods, ensure the battery is fully charged to maintain its capacity․ Proper cleaning and storage extend the life of your Black+Decker trimmer and edger․

5․2 Replacing the Trimmer Line and Spool

To replace the trimmer line, disconnect the battery and remove the spool housing․ Use only 0․065-inch diameter round line (AF-100 recommended)․ Cut the line to the recommended length and insert it into the spool․ Ensure proper alignment and avoid overfilling, as this may cause feeding issues․ Reattach the spool securely and test the automatic feed system․ Always refer to the manual for specific instructions to maintain optimal performance and avoid damage to the trimmer․

5․3 Battery Maintenance and Charging

Charge the battery on a flat, stable surface away from flammable materials․ Avoid overcharging, as it can reduce battery life; Use only the provided Black+Decker charger․ Store batteries in a cool, dry place during off-seasons․ Clean terminals with a soft cloth to ensure proper connections․ Never charge a damaged battery․ If the battery does not charge, refer to the troubleshooting section or contact customer support․ Proper maintenance ensures optimal performance and extends battery lifespan․ Always follow safety guidelines when handling batteries․

Troubleshooting Common Issues

Common issues include motor overheating, line feeding problems, and battery charging malfunctions․ Ensure the guard is installed correctly to prevent overheating․ Clean the spool regularly to resolve line feeding issues․ For battery problems, reset the charger or replace the battery if necessary․ Always refer to the manual for detailed solutions․

6․1 Motor Overheating and Performance Problems

Motor overheating can occur if the guard is not installed or if the trimmer is used excessively․ To resolve, turn off the device and let it cool․ Ensure the air vents are clear of debris․ Avoid overloading the motor by trimming thick or wet grass․ Regularly cleaning the unit and using the correct line diameter can prevent performance issues․ Always follow the manual’s maintenance guidelines to ensure optimal operation and extend the motor’s lifespan․

6․2 Line Feeding Issues and Solutions

Common issues with the automatic feed system include the line not feeding properly or getting tangled․ Ensure the correct 0․065-inch diameter line is used, as specified in the manual․ If the line doesn’t advance, stop the trimmer, remove and re-spool the line correctly․ Clean the spool housing regularly to prevent debris buildup․ Avoid bumping the trimmer head on the ground, as this can disrupt the feeding mechanism․ Refer to the manual for proper restringing and maintenance tips to resolve feeding problems effectively․

6․3 Battery Charging and Power Problems

If the trimmer/edger has low power or doesn’t turn on, check the battery charge level․ Ensure the battery is properly seated and charged for the recommended time․ Avoid using incompatible chargers, as they may damage the battery․ If the battery doesn’t charge, inspect the charging port for debris or corrosion․ Clean the contacts gently with a soft cloth․ If issues persist, contact Black+Decker customer support for assistance or replacement․ Always use original Black+Decker chargers to maintain battery health․

Warranty and Customer Support

Black+Decker products are backed by a limited warranty covering defects in materials and workmanship․ For assistance, contact customer service toll-free or visit their official website․

7․1 Warranty Information and Coverage

Black+Decker offers a limited warranty for its trimmer and edger products, covering defects in materials and workmanship for a specified period․ The warranty typically lasts for 2-5 years, depending on the model․ It covers repairs or replacements for faulty components due to manufacturing issues․ However, damage caused by misuse, normal wear, or improper maintenance is not covered․ For detailed warranty terms, refer to the product manual or visit the official Black+Decker website․

7․2 Contacting Black+Decker Customer Service

For assistance, visit Black+Decker’s official website or call their toll-free customer service hotline․ Representatives are available to address questions, troubleshooting, and warranty claims․ You can also submit inquiries through their online support form․ Ensure to have your product model number and purchase details ready for efficient service․ Additionally, the website provides access to downloadable manuals, FAQs, and repair resources, making it a comprehensive support hub for all your trimmer and edger needs․

Eco-Friendly and Energy Efficiency

The Black+Decker trimmer/edger uses energy-efficient 20V MAX lithium-ion batteries, reducing carbon footprint․ Its automatic feed system minimizes line waste, promoting eco-friendly operation and sustainable gardening practices effectively․

8․1 Energy-Saving Features

The Black+Decker trimmer/edger features a 20V MAX lithium-ion battery, providing efficient energy use and longer runtime․ The battery’s advanced technology reduces charging time while maintaining power․ An optimized automatic feed system minimizes line waste, ensuring less energy is spent on unnecessary trimming․ The energy-efficient design promotes sustainable gardening by reducing overall power consumption and environmental impact․ This eco-conscious approach helps users save energy while maintaining high performance․

8․2 Eco-Friendly Battery and Recycling Options

The Black+Decker trimmer/edger uses a rechargeable 20V MAX lithium-ion battery, reducing the need for disposable batteries and minimizing waste․ The battery is designed for recyclability, promoting environmental sustainability․ Users can participate in Black+Decker’s recycling program or local e-waste facilities to responsibly dispose of old batteries․ Proper recycling helps conserve natural resources and reduces landfill contamination․ This eco-friendly approach aligns with sustainable practices, encouraging users to contribute to a greener environment while maintaining their gardening needs․

signode strapping machine manual pdf

This manual provides essential guidance for safe and efficient operation of Signode strapping machines, covering installation, maintenance, and troubleshooting procedures for optimal performance and compliance with safety standards.

Overview of the Signode Strapping Machine

The Signode Strapping Machine is designed for efficient and reliable strapping of packages, pallets, and other loads. Models like the LBX-2000 and SP-300 are built for durability and low maintenance, catering to various packaging needs. These machines operate with plastic straps, including polypropylene and polyester, ensuring secure and consistent sealing. Engineered for safety and performance, they are ideal for industrial and commercial use, providing a robust solution for strapping applications.

Importance of the Manual for Safe and Efficient Operation

This manual is crucial for ensuring the safe and efficient operation of Signode strapping machines. It provides detailed instructions for installation, operation, and maintenance, helping users avoid potential hazards. By following the guidelines, operators can maximize machine performance, reduce downtime, and extend equipment lifespan. The manual also outlines essential safety protocols, such as proper strap handling and emergency procedures, to prevent accidents and ensure compliance with industry standards.

Safety Instructions and Precautions

Always disconnect power before maintenance and avoid body contact with moving parts. Ensure safety interlocks function properly and use only approved straps for secure operation.

General Safety Guidelines

Always follow safety guidelines to ensure safe operation. Disconnect power before performing maintenance or repairs. Never use steel straps, as they are not compatible. Ensure all safety interlocks are functioning properly before use. Only trained personnel should operate or service the machine. Wear protective gear, including gloves and safety glasses. Regularly inspect the machine for wear or damage. Never reach into the strap chute or machine enclosure while power is on. Follow all instructions in the manual to prevent accidents and ensure efficient operation.

Emergency Stop and Lockout Procedures

The emergency stop button must be easily accessible and used immediately in case of an emergency. Always disconnect and lock out power before servicing the machine. Ensure the strap chute area is clear before restarting. Use approved lockout/tagout devices to prevent accidental startup. Regularly test the emergency stop system to ensure proper function. Follow detailed lockout procedures in the manual, especially for models like the LBX-2000. Never bypass safety features, as this can lead to serious injury. Always verify the machine is fully stopped before performing any maintenance or repairs.

Installation and Setup

Unpack and inspect the machine for damage. Place it on a level surface, ensuring stability. Connect power and air supply as specified in the manual. Test the machine before regular use to ensure proper functioning.

Unpacking and Initial Inspection

Carefully unpack the Signode strapping machine from its shipping container. Inspect the machine for any visible damage or dents. Verify that all components, including the strapping head, dispenser, and power cord, are included. Ensure the machine is clean and free from debris. Refer to the manual for a detailed list of parts and accessories. Conduct a thorough visual inspection before powering on the machine to ensure safe and proper operation. This step is crucial for preventing operational issues and ensuring longevity of the equipment.

Power Requirements and Air Pressure Settings

Ensure the machine is connected to a power supply matching its voltage and current ratings. For pneumatic models, set the air pressure according to the manual’s specifications, typically between 60-90 PSI. Use a filter-regulator-lubricator unit to maintain clean, dry air. Incorrect pressure settings can lead to poor strap tension or machine malfunction. Always consult the manual for exact power and air pressure requirements to ensure optimal performance and safety; Proper settings are crucial for efficient operation and longevity of the equipment.

Operating the Signode Strapping Machine

Start by powering on the machine, ensuring all safety interlocks are functional. Load the strap correctly, adjust tension settings, and cycle the machine to secure packages safely and efficiently.

Basic Operation and Cycle Explanation

The Signode strapping machine operates by first powering on and ensuring all safety interlocks are engaged. Load the plastic strap into the dispenser, threading it through the strapping head. For semi-automatic models, place the package on the table, position the strap, and activate the cycle. Automatic models may require minimal intervention, as the machine detects and secures the package. Adjust strap tension via the control panel to ensure a secure seal. Always use the emergency stop if needed. Follow the manual for detailed cycle explanations and operational guidelines to ensure safe and efficient strapping.

Adjusting Strap Tension and Strap Type

Strap tension can be adjusted using the control panel or tension knob to ensure proper securing of packages. For optimal performance, use Signode-recommended plastic straps, such as polypropylene or polyester. Avoid using steel straps, as they are incompatible with this machine. Adjustments should align with the material’s thickness and package requirements. Refer to the manual for specific tension settings and strap compatibility guidelines to maintain efficiency and safety during operation. Proper adjustment ensures consistent sealing and prevents damage to the machine or packages. Always follow manufacturer recommendations for strap type and tension settings.

Maintenance and Troubleshooting

Regular maintenance ensures optimal performance. Inspect and clean the machine daily, lubricate moving parts weekly, and replace worn components. Troubleshoot common issues like jammed straps or low tension by resetting the machine or adjusting settings as outlined in the manual.

Daily and Weekly Maintenance Tasks

Daily maintenance involves inspecting the machine for wear, cleaning debris, and ensuring proper strap feed. Lubricate moving parts weekly to prevent friction. Check the strap dispenser and brake system for alignment and tension. Replace worn seals or damaged components promptly. Perform a thorough inspection of electrical connections and pneumatic hoses weekly. Log maintenance activities to track machine health. Refer to the manual for specific procedures and recommended lubricants. Regular upkeep ensures reliable operation and extends equipment lifespan, minimizing downtime and ensuring safety.

Common Issues and Their Solutions

Common issues with Signode strapping machines include improper strap feeding, inconsistent tension, and machine stoppage. For feeding problems, clean the dispenser and ensure proper alignment. If tension is uneven, adjust the tension settings or replace worn straps. If the machine stops unexpectedly, check for jams, ensure power supply stability, and verify air pressure levels. Regular lubrication of moving parts and timely replacement of worn components can prevent many issues. Always refer to the manual for specific troubleshooting steps to restore functionality quickly and safely.

Signode Strapping Machine Models

Signode offers various models like the LBX-2000 and SP-300, designed for reliability and efficiency in packaging. These machines cater to different strapping needs, ensuring optimal performance and ease of use.

LBX-2000 and SP-300 Model Specifications

The LBX-2000 and SP-300 are prominent models designed for reliability and efficiency. The LBX-2000 is a maintenance-free strapping machine built in the USA, ideal for plastic straps and safe handling. It features a strap chute area with safety interlocks. The SP-300 is a power strapping machine designed for consistent performance. Both models are compatible with polypropylene and polyester straps, ensuring versatility for various packaging needs. They are engineered to meet high industry standards, providing durable and efficient strapping solutions for industrial and commercial applications.

Differences Between Semi-Automatic and Automatic Machines

Semi-automatic machines, like the LBX-2000, require operator intervention to initiate the strapping cycle, offering control for specific packaging needs. Automatic machines, such as the SP-300, operate with minimal user input, streamlining high-volume workflows. Semi-automatic models are ideal for smaller operations, while automatic machines are designed for efficiency in large-scale industrial settings. Both ensure reliable performance but cater to different productivity requirements, making them suitable for varied applications in packaging and strapping tasks.

Parts and Accessories

These components are vital for maintaining the Signode strapping machine’s performance, including the strap dispenser, brake system, compatible straps, and seals, ensuring efficient and safe operations.

Strap Dispenser and Brake System

The strap dispenser, located inside the machine’s cabinet, supplies strapping material to the strapping head, while the brake system prevents strap over-run. These components ensure smooth operation and proper strap tension. Regular maintenance is crucial to avoid wear and tear. Always use Signode-approved straps and follow manual guidelines for optimal performance and safety. Proper care of these parts extends machine lifespan and ensures reliable strapping results. Refer to the manual for detailed maintenance and adjustment instructions.

Compatible Straps and Seals

The Signode strapping machine is designed for use with plastic straps, specifically polypropylene and polyester, ensuring reliable and secure strapping. Steel straps are not compatible with this machine. For optimal performance, use Signode-approved straps and seals, as they are engineered to work seamlessly with the machine’s mechanisms. Proper strap and seal selection ensures consistent tension, tight sealing, and minimal wear on the machine. Always refer to the manual or contact Signode support for recommendations on compatible products tailored to your specific machine model.

Regulatory Compliance and Warranty

Signode strapping machines comply with industry standards, ensuring safety and reliability. The warranty covers defects in materials and workmanship, providing service support and parts replacement as specified.

Compliance with Industry Standards

Signode strapping machines are designed to meet rigorous industry standards, ensuring reliability and safety. Compliance with regulatory requirements guarantees optimal performance and durability. Adherence to these standards includes proper material handling, secure sealing, and operator safety. Regular updates ensure alignment with evolving regulations. Compliance certification is provided, confirming adherence to quality and safety norms. This ensures machines operate efficiently while maintaining workplace safety and product integrity. Compliance also extends to environmental standards, promoting sustainable packaging solutions. All models are thoroughly tested to meet or exceed industry expectations for strapping equipment.

Warranty Information and Service Support

Signode strapping machines are backed by comprehensive warranty programs, ensuring coverage for parts and labor under specified conditions. The warranty period varies by model and usage, with details outlined in the manual. For service support, authorized Signode representatives are available to assist with repairs, maintenance, and troubleshooting. Customers can contact Signode through dedicated phone lines or visit their official website for assistance. Regular maintenance using genuine Signode parts is recommended to maintain warranty validity and ensure optimal performance. Timely support ensures minimal downtime and sustained productivity.

dap note cheat sheet pdf

DAP notes provide a structured format for documenting client sessions, focusing on Data, Assessment, and Plan. They simplify note-taking, ensuring clarity and consistency in therapy documentation.

What are DAP Notes?

DAP notes are a concise documentation method used by therapists and clinicians. They consist of three sections: Data (client observations), Assessment (clinician’s interpretation), and Plan (next steps). This structured format simplifies note-taking, ensuring clarity and consistency in therapy documentation while maintaining client progress tracking.

DAP Note Template and Examples

A DAP note template guides documentation with sections for Data, Assessment, and Plan. Examples provide practical models, helping professionals structure their notes effectively and consistently.

Structure of a DAP Note

A DAP note is divided into three clear sections: Data, Assessment, and Plan. Data captures observations, client quotes, and objective details. Assessment interprets the session, linking findings to treatment goals. Plan outlines next steps, strategies, and referrals. This structure ensures concise, organized documentation, aiding in efficient client care and compliance with professional standards.

Examples of DAP Notes

Examples of DAP notes illustrate practical applications. Data includes client statements like, “I feel overwhelmed,” and observations such as tearfulness. Assessment might link these to depression symptoms. Plan could outline referrals to support groups. These examples guide therapists in applying the DAP format effectively, ensuring consistency and clarity in documentation.

How to Customize the Template

Customizing a DAP note template involves tailoring it to specific client needs. Add sections for treatment goals or progress tracking. Modify the structure to include client quotes or behavioral observations. Use clear headings for Data, Assessment, and Plan to maintain organization. Ensure the template aligns with your practice’s requirements, enhancing documentation efficiency and client care.

How to Write a DAP Note

Start by documenting Data, including client observations and quotes. Follow with Assessment, analyzing the session. Conclude with a clear Plan for next steps. Stay concise, objective, and focused. Use the DAP note cheat sheet for quick guidance and ensure all sections are well-organized for effective documentation.

Data Section

The Data section captures objective observations about the client, including mood, appearance, and speech patterns. It also documents subjective client statements or quotes. This section should be concise, focusing on relevant information without interpretation. Use the DAP note cheat sheet to ensure accuracy and completeness in recording factual details about the session.

Assessment Section

The Assessment section involves analyzing the Data to identify patterns, progress, or areas needing attention. It offers your professional interpretation of the client’s status, linking observations to treatment goals. Keep it objective and focused on clinical relevance, using the DAP note cheat sheet to guide concise and meaningful assessments that inform the next steps in care.

Plan Section

The Plan section outlines actionable steps for the client’s next session or at-home activities. It includes specific goals, strategies, or interventions to address issues identified in the Assessment. Use clear, measurable objectives and document any homework or referrals. Reference the DAP note cheat sheet to ensure consistency and effectiveness in structuring this section for optimal client progress and accountability.

Tips for Writing Better DAP Notes

Focus on clarity, use client quotes, and maintain objectivity to ensure effective DAP notes. Prioritize concise language and relevant details for better documentation and client outcomes.

Be Concise and Clear

Conciseness is key to effective DAP notes. Focus on essential details, avoiding unnecessary jargon. Use bullet points or checklists to streamline information. Ensure each section—Data, Assessment, and Plan—is straightforward and to the point. This clarity improves readability and reduces documentation errors; Incorporate direct client quotes to add context without elaboration. Keeping notes concise saves time and enhances focus on client care and outcomes.

Incorporate Client Quotes

Including direct client quotes enhances the accuracy and authenticity of DAP notes. Quotes capture the client’s voice and perspective, providing context for their thoughts and feelings. Use quotes sparingly but strategically to illustrate key points or emotional states. This practice adds depth to the documentation and helps track progress over time. Ensure quotes are relevant and concise to maintain clarity in the note.

Maintain Objectivity

Maintaining objectivity in DAP notes ensures unbiased documentation. Focus on observable client behaviors, verbatim quotes, and factual data. Avoid subjective interpretations or personal opinions. Use clear, neutral language to describe assessments and plans. This approach enhances the reliability and professionalism of your notes, making them more effective for tracking client progress and facilitating collaborative care among healthcare providers.

DAP Note Cheat Sheet

A quick reference guide for structuring DAP notes, covering Data, Assessment, and Plan sections. Helps mental health professionals document sessions efficiently with key components and practical tips.

Overview of the Cheat Sheet

The DAP note cheat sheet offers a concise guide for documenting client sessions. It includes sections for Data, Assessment, and Plan, providing clear examples and tips to streamline the note-taking process. Designed for mental health professionals, the cheat sheet ensures consistency and efficiency in therapy documentation, making it an essential tool for managing caseloads effectively.

Key Components of the Cheat Sheet

The cheat sheet includes sections for Data, Assessment, and Plan, with examples and tips. It covers subjective observations, client quotes, and actionable next steps. Designed for mental health professionals, it ensures thorough documentation while saving time. The format is simple, making it easy to reference during or after sessions, and it includes templates for quick note-taking.

How to Use the Cheat Sheet

Start by identifying the main sections: Data, Assessment, and Plan. Use the templates provided for quick note-taking during sessions. The cheat sheet is designed to save time, ensuring all critical elements are covered. It’s ideal for mental health professionals managing multiple cases, as it streamlines documentation and keeps notes organized and efficient for future reference.

Where to Download the Cheat Sheet

The DAP note cheat sheet is available for download from various online sources, including academic institutions like the University of Florida and mental health resource websites. It can also be found as a digital download on platforms offering therapy tools. Simply search for “DAP note cheat sheet PDF” to access and print the document for quick reference during client sessions.

DAP notes offer a clear, structured method for documenting client interactions, enhancing both efficiency and professionalism. The cheat sheet serves as an invaluable resource, guiding therapists to create concise and organized notes. By utilizing this tool, professionals can streamline their documentation process, ensuring consistency and quality in every session. Downloading the cheat sheet is a practical step toward mastering the DAP note format.

DAP notes are a structured method for documenting client sessions, focusing on Data, Assessment, and Plan. A cheat sheet provides a quick reference guide for creating effective notes efficiently.

DAP notes are a structured documentation method used by therapists, standing for Data, Assessment, and Plan. They provide a clear and organized way to record client sessions, ensuring consistency and effectiveness in therapy documentation. A cheat sheet offers a quick reference guide for creating concise and effective notes, aiding professionals in maintaining accurate and efficient records.

Template and Examples

A DAP note template provides a clear structure for documenting sessions, while examples offer practical demonstrations. The cheat sheet includes templates and sample notes, guiding professionals in creating accurate records.

Structure

A DAP note is divided into three sections: Data, Assessment, and Plan. The Data section records observations, client quotes, and session details. The Assessment interprets the client’s progress and behaviors. The Plan outlines next steps, goals, and interventions. This structure ensures clarity and organization, making it easier to track client progress over time. The cheat sheet provides a quick reference guide to mastering this format.

Examples

Examples of DAP notes illustrate how to effectively document sessions. They include client quotes, observations, and interventions. For instance, a note might detail a client’s emotional state, key statements, and the therapist’s strategies. The cheat sheet provides sample templates and case scenarios, demonstrating how to apply the DAP format in various clinical situations, ensuring clarity and consistency in documentation practices.

How to Write

Learn to write effective DAP notes using a structured approach. Start with Data, followed by Assessment, and conclude with a Plan. The cheat sheet provides a quick reference guide.

Data

The Data section captures objective and subjective information. Include client observations, mood, appearance, and direct quotes. Note significant behaviors, speech patterns, and any relevant background information. This section provides a factual foundation for the Assessment and Plan, ensuring clarity and continuity in documentation. Use the cheat sheet as a quick reference guide to structure your Data effectively.

Assessment

The Assessment section interprets the Data, linking observations to treatment goals and progress. Clearly articulate your clinical impressions, identifying patterns or changes. Maintain objectivity, avoiding personal opinions. Use the cheat sheet to ensure your Assessment is concise and focused, providing a clear rationale for the next steps in the client’s care plan. This section bridges Data and Plan effectively.

Plan

The Plan outlines actionable next steps, including specific interventions, strategies, or referrals. It should align with treatment goals and address the client’s immediate needs. Clearly define tasks for both the client and therapist, such as homework or follow-up actions. Ensure the Plan is realistic, measurable, and time-bound. Use the cheat sheet to guide the development of a clear, focused, and client-centered Plan section.

Tips

Use clear and concise language, focus on key points, and maintain a professional tone. Incorporate client quotes to add context and ensure objectivity in documentation.

Be Concise

Being concise is crucial in DAP notes. Focus on key observations, avoiding unnecessary details. Stick to factual data, clear assessments, and actionable plans. This ensures notes are efficient and effective, saving time while maintaining clarity. Use the cheat sheet to guide brevity, ensuring documentation remains focused and relevant, without sacrificing essential information.

Use Quotes

Incorporating client quotes enhances DAP notes by adding authenticity. Quotes capture the client’s voice, providing context and clarifying their perspective. This practice ensures notes are engaging and focused. Use the cheat sheet to guide effective quote integration, making your documentation more impactful while maintaining clarity and conciseness.

Cheat Sheet

A DAP note cheat sheet is a quick reference guide for structuring notes. It includes key sections like Data, Assessment, and Plan to enhance documentation clarity and efficiency.

Overview

The DAP note cheat sheet offers a concise guide for creating structured and effective documentation. It simplifies the process by outlining key components such as Data, Assessment, and Plan. This tool is particularly useful for mental health professionals, providing a quick reference to ensure consistency and clarity in their notes. It’s accessible as a PDF for easy use during sessions.

Components

The DAP note cheat sheet includes essential components like Data, Assessment, and Plan sections. It also features checklists for subjective and objective observations, ensuring comprehensive documentation. Additionally, it incorporates tips for maintaining conciseness and objectivity, with space for client quotes to enhance accuracy. These components streamline the note-taking process, making it efficient and organized for healthcare professionals.

How to Use

The DAP note cheat sheet guides you through creating efficient notes by focusing on Data, Assessment, and Plan sections. Start with Data by jotting observations, then move to Assessment for analysis, and finish with Plan for next steps. Regularly review the cheat sheet to refine your documentation skills and ensure compliance with professional standards, keeping it handy for quick reference during sessions.

The DAP Note Cheat Sheet is a valuable tool for enhancing documentation efficiency. It provides clear guidelines and examples, helping professionals maintain organized and effective client records. By using this resource, therapists can streamline their workflow and ensure high-quality care. Embrace this cheat sheet to elevate your practice and improve client outcomes consistently.

DAP notes are a widely used documentation method in therapy, offering a clear structure for session notes. They consist of Data, Assessment, and Plan sections, ensuring organized and efficient documentation. This guide provides insights and resources, including a DAP Note Cheat Sheet, to help professionals master this effective documentation technique.

generac 5500 generator owners manual

Welcome to the Generac 5500 Generator Owner’s Manual, your comprehensive guide to safe operation, installation, and maintenance. This manual provides essential information for optimal performance and troubleshooting.

1.1 Purpose of the Manual

This manual provides essential guidance for the safe and effective use of the Generac 5500 Generator. It outlines key safety precautions, installation requirements, and operating procedures. The manual also covers routine maintenance, troubleshooting, and warranty information to ensure optimal performance and longevity of the generator. By following the instructions in this manual, users can operate the generator confidently and efficiently, minimizing risks and maximizing reliability.

1.2 Important Safety Information

The Generac 5500 Generator requires strict adherence to safety guidelines to prevent accidents. Always operate the generator outdoors in well-ventilated areas to avoid carbon monoxide exposure. Never use the generator indoors or in enclosed spaces. Follow all safety precautions outlined in this manual, including proper load management and electrical connections. Failure to comply may result in injury, property damage, or voidance of the warranty. Read and understand all safety information before initial startup.

Key Features and Specifications of the Generac 5500 Generator

The Generac 5500 Generator delivers 5500 watts of power at 120/240VAC and 60 Hz, ideal for residential and commercial use. It features a gasoline engine with manual start and is designed for portability, making it suitable for various applications.

2.1 Power Output and Voltage Ratings

The Generac 5500 Generator provides a maximum power output of 5500 watts (5.5 kW) at 120/240VAC and 60 Hz. Designed for both residential and commercial use, it delivers reliable power for various applications. The generator operates at a single phase, ensuring compatibility with standard electrical systems. Always ensure the load does not exceed the maximum continuous rating to maintain safety and efficiency. It meets rigorous safety standards for dependable performance.

2.2 Engine Type and Fuel Requirements

The Generac 5500 Generator is powered by a reliable 389cc OHV (Overhead Valve) engine, designed for efficient performance. It operates on gasoline, with a fuel tank capacity of approximately 5.5 gallons. The engine requires 5W30 oil for lubrication, as specified in the manual. Regular maintenance, including oil changes and filter replacements, ensures optimal engine performance and longevity. Always refer to the manual for specific fuel and oil recommendations to maintain warranty compliance and safety standards.

2.3 Portability and Design Features

The Generac 5500 Generator features a durable design with solid wheels and a folding handle, enhancing portability. Its compact frame and balanced weight distribution make it easy to transport. The generator includes a sturdy steel frame for added durability and an integrated lifting eye for convenient relocation. These design elements ensure the unit remains mobile while delivering reliable power, making it ideal for both residential and commercial use in various settings.

Safety Guidelines for Operation

Critical safety guidelines ensure safe operation. Always follow manual instructions, avoid indoor use, and keep the generator away from flammable materials. Prevents carbon monoxide risks.

3.1 General Safety Precautions

Adhere to all safety guidelines to prevent hazards. Use the generator outdoors only, away from buildings and flammable materials. Ensure proper ventilation to avoid carbon monoxide risks; Keep children and pets away. Read the manual thoroughly before operation. Never operate in wet conditions or touch electrical parts. Ground the generator properly to prevent shock. Follow all instructions for startup, shutdown, and maintenance to ensure safe and reliable performance.

3.2 Environmental Considerations

Operate the generator outdoors to prevent carbon monoxide buildup. Ensure proper fuel storage and disposal to avoid contamination. Regularly inspect for leaks and maintain the unit to minimize emissions. Follow local regulations for noise and emissions. Keep the area clean to prevent environmental impact. Always adhere to eco-friendly practices during operation and maintenance to protect the environment and ensure safe energy generation.

3.3 Emergency Shutdown Procedures

In case of an emergency, immediately turn off the generator and disconnect the load. Switch off the circuit breaker or transfer switch to halt power output. Do not restart until the issue is resolved. Always follow the manual’s specific shutdown instructions to ensure safety. Regularly inspect the unit to prevent unexpected shutdowns and maintain proper functionality. Adhere to these procedures to protect both the generator and connected equipment from potential damage.

Installation and Setup Instructions

Proper site preparation and level placement are crucial. Follow assembly steps carefully and perform initial startup as outlined. Ensure all safety guidelines are followed for reliable operation.

4.1 Site Preparation and Placement

Ensure the generator is placed on a level, firm, and dry surface outdoors. Choose a well-ventilated area, away from flammable materials. Maintain a minimum distance of 5 feet from any building or enclosure. Avoid placing in low-lying areas prone to water collection. Ensure proper drainage and avoid direct exposure to harsh weather conditions. Secure the generator to prevent movement during operation. Always follow local building codes and safety regulations for installation.

4.2 Assembly and Initial Startup

Begin by unpacking and inspecting the generator for any damage. Check the oil level and ensure all components are securely attached. Follow the manual’s assembly instructions carefully. Before starting, ensure the generator is on a level surface and all safety guards are in place. Start the engine with no load connected, allowing it to run for a few minutes to stabilize. Gradually add loads as instructed in the manual to avoid sudden power surges.

Operating the Generac 5500 Generator

Read the safety rules first. Ensure the generator is on a level surface and check the oil level before starting. Start the engine with no load connected and allow it to run for a few minutes to stabilize. Gradually add loads as instructed in the manual to avoid power surges.

5.1 Starting and Stopping the Generator

Ensure the generator is on a level surface and all safety precautions are followed. Check oil and fuel levels before starting. Pull the choke for a cold engine, turn the ignition switch to start, and gradually release the choke as the engine warms up. Allow the generator to run at no load for a few minutes before connecting any devices. To stop, disconnect all loads, let the generator run for 5 minutes to cool down, then turn off the engine and switch.

5.2 Load Management and Power Distribution

Always calculate the total power requirements of connected devices to avoid overloading the generator. The Generac 5500 can deliver up to 5,500 watts of power. Distribute loads evenly across available outlets to prevent circuit overloading. Use approved extension cords with the correct gauge to handle the power load. Never exceed the generator’s rated capacity, as this can damage equipment or cause safety hazards. Ensure all connections are secure and follow the recommended power distribution guidelines outlined in the manual.

Maintenance and Troubleshooting

Regular maintenance ensures optimal performance. Check oil levels, air filters, and spark plugs. Refer to the troubleshooting section for solutions to common issues and repair guidance.

6.1 Regular Maintenance Schedule

Perform routine checks every 50 hours of operation. Change engine oil and filter, inspect spark plugs, and clean or replace air filters. Check fuel system for leaks and ensure connections are secure. Lubricate moving parts as specified. Inspect the battery terminals and cables for corrosion. Review the manual for detailed schedules to ensure longevity and reliability of your Generac 5500 generator.

6.2 Common Issues and Solutions

Common issues include low oil shutdown, faulty spark plugs, or clogged air filters. Solve by checking oil levels, replacing spark plugs, and cleaning filters. For no-start conditions, ensure the choke is properly set and fuel is adequate. If the generator overheats, turn it off and inspect for blockages. Addressing these issues promptly ensures reliable performance and extends the generator’s lifespan. Always refer to the manual for specific troubleshooting guidance.

Warranty and Customer Support

Generac offers a comprehensive warranty covering parts and labor for defects. Contact customer support at 1-888-GENERAC for assistance. Visit generac.com for resources.

7.1 Warranty Coverage and Conditions

The Generac 5500 Generator is backed by a 2-year limited warranty for residential use, covering parts and labor for defects in materials and workmanship. For commercial use, a 1-year warranty applies. Proper installation, maintenance, and operation as per the manual are required to maintain warranty validity. Warranty coverage excludes damage from misuse, neglect, or unauthorized modifications. Refer to the manual for full terms and conditions.

7.2 Contacting Generac Customer Service

For assistance with your Generac 5500 Generator, contact customer service at 1-888-GENERAC (1-888-436-3722). Support is available Monday through Friday, 8 AM to 5 PM CT. Visit generac.com for online resources, troubleshooting guides, and warranty information. The Generac team is ready to help with inquiries, parts, and service needs, ensuring your generator operates efficiently and safely.

Additional Resources

Visit generac.com for digital manuals, guides, and support. Additional resources include troubleshooting tips and contact information for customer service at 1-888-GENERAC.

8.1 Accessing Digital Manuals and Guides

Visit the official Generac website to access digital versions of the 5500 generator owner’s manual. Manuals are available in PDF format for free download, including quick setup, repair, and owner’s guides. Use the product lookup tool to find specific documentation for your model. The website also provides troubleshooting tips, wiring diagrams, and safety guidelines. For assistance, contact Generac customer support at 1-888-GENERAC or refer to the manual for detailed instructions.

8.2 Recommended Tools and Accessories

For optimal performance and maintenance, use the following tools and accessories: oil with the correct viscosity, a funnel, and a service kit. An altitude kit is required for operation above 5,000 feet. A durable cover protects the unit from weather conditions. Heavy-duty extension cords and a wheel kit enhance portability. These items ensure safe and efficient operation. Visit the Generac website for a full list of compatible accessories for your 5500 generator.

a dirty guide to a clean home

“A Dirty Guide to a Clean Home” is a joyful housekeeping guide by TikTok star Melissa Dilkes Pateras‚ blending practical skills with humor and approachable advice․

1;1 Overview of the Book and Its Author

Melissa Dilkes Pateras‚ a TikTok star and homekeeping expert‚ brings her signature humor and expertise to A Dirty Guide to a Clean Home․ With over 20 years in social services‚ Melissa offers a fresh‚ approachable take on cleaning‚ laundry‚ and home repairs․ Co-authored with journalist Carla Sosenko‚ this guide is packed with practical tips and joyful encouragement․ Melissa’s goal is to make housekeeping enjoyable‚ proving that maintaining a clean home doesn’t have to be a chore․ Her relatable voice and creative solutions have resonated with millions online․

1․2 The Unique Approach to Housekeeping

Melissa’s approach to housekeeping is refreshingly unconventional‚ blending humor with practicality․ She emphasizes that cleaning should be enjoyable and tailored to individual lifestyles․ Her philosophy rejects the idea of transforming homes into sterile‚ Instagram-perfect spaces‚ instead focusing on creating systems that simplify life․ With a mix of DIY solutions‚ organizational hacks‚ and a dash of humor‚ Melissa’s method makes housekeeping accessible and even fun‚ proving that maintaining a clean home can be both efficient and joyful without losing one’s personal touch or sanity in the process․

The Joy of Housekeeping

Melissa’s guide transforms housekeeping into a joyful experience‚ proving that cleaning and organizing can be a celebration of life‚ not a chore‚ inspiring happiness in everyday tasks․

2․1 How to Make Cleaning Fun and Enjoyable

Melissa’s guide reveals how to turn cleaning into a delightful experience by embracing creativity and humor․ She suggests adding music‚ games‚ or even a glass of wine to make chores enjoyable․ Her approachable personality shines through‚ encouraging readers to view housekeeping as a celebration of life rather than a burden․ By reframing cleaning as a form of self-care and empowerment‚ she helps transform mundane tasks into moments of joy and accomplishment․

2․2 The Importance of Mindset in Maintaining a Clean Home

Melissa emphasizes that mindset is key to maintaining a clean home․ She encourages embracing positivity and reframing cleaning as a form of self-care․ By shifting your perspective‚ chores become less daunting and more empowering․ Melissa’s approach helps reduce stress and anxiety‚ making it easier to stay motivated․ Her philosophy fosters a sense of control and satisfaction‚ proving that the right mindset can transform cleaning into a fulfilling experience that enhances overall well-being․

Cleaning Hacks You Can’t Live Without

Discover essential cleaning hacks and DIY solutions using household items to make cleaning easier‚ more efficient‚ and even enjoyable‚ transforming chores into a breeze․

3․1 Essential Tips for Tackling Tough Cleaning Jobs

Melissa shares practical strategies for handling stubborn stains‚ grout‚ and tile․ Her methods emphasize efficiency and creativity‚ turning daunting tasks into manageable routines with a touch of humor․

3․2 DIY Cleaning Solutions Using Household Items

Melissa highlights simple‚ eco-friendly cleaning solutions using everyday items like baking soda‚ vinegar‚ and lemon․ Her creative hacks transform basic products into effective cleaners‚ from natural disinfectants to scrubbers‚ making cleaning both affordable and sustainable․ These DIY recipes not only tackle tough messes but also reduce chemical use‚ aligning with her philosophy of joyful‚ practical housekeeping․

Laundry Day Made Easy

Laundry day becomes stress-free with Melissa’s clever hacks‚ like folding fitted sheets effortlessly and tackling stubborn stains with simple‚ effective techniques that make chores enjoyable․

4․1 Folding Hacks: Mastering the Fitted Sheet

Fitted sheets can be notoriously tricky to fold‚ but Melissa’s clever hack simplifies the process․ By taming the chaos with straightforward steps‚ you’ll transform a messy sheet into a neat‚ compact rectangle․ This game-changing technique ensures your linens stay organized and your laundry day becomes a breeze․ Say goodbye to the frustration and hello to a smarter way to manage your bedding!

4․2 The Secret to Removing Stubborn Stains

Melissa’s approach to tackling tough stains is both practical and transformative․ She shares her go-to method for eliminating even the most stubborn marks‚ emphasizing the power of common household items like baking soda and vinegar․ With her clear‚ step-by-step guidance‚ you’ll learn how to pre-treat and remove stains effortlessly․ Her tips not only save time but also ensure your clothes look fresh and clean‚ making laundry day less daunting and more manageable․

Basic Home Repairs for Everyone

Melissa’s guide simplifies home repairs‚ making them accessible to all․ With a focus on essential tools and quick fixes‚ she turns daunting tasks into stress-free solutions․

5․1 Essential Tools Every Homeowner Should Have

Melissa emphasizes the importance of having the right tools for basic home repairs․ A hammer‚ screwdriver set‚ pliers‚ tape measure‚ level‚ and utility knife are must-haves․ These tools empower homeowners to tackle small fixes and prevent minor issues from escalating․ By having these essentials on hand‚ anyone can handle quick repairs confidently‚ aligning with the book’s mission of making home maintenance stress-free and accessible for everyone․

5․2 Quick Fixes for Common Household Issues

Melissa shares practical solutions for everyday household problems․ From tightening wobbly chairs with caulk to unclogging drains with baking soda‚ she offers simple fixes․ Her tips emphasize quick‚ effective solutions using items like dryer balls for odor control․ These hacks empower homeowners to address issues without stress‚ aligning with her philosophy of making home maintenance manageable and stress-free for everyone․

The Art of Organization

Melissa transforms chaotic spaces into serene environments with creative‚ practical organizing systems․ Her approach emphasizes decluttering and tailored solutions‚ making organization both achievable and enjoyable for everyone․

6․1 Decluttering Strategies for a More Organized Home

Melissa offers practical decluttering strategies‚ emphasizing the importance of mindset and intentional organization․ Her approach encourages tackling clutter head-on‚ creating systems to maintain order‚ and embracing a minimalist yet functional lifestyle․ By focusing on what truly adds value‚ readers can transform chaotic spaces into serene environments that foster productivity and peace of mind․ Melissa’s tips make decluttering achievable and even enjoyable‚ helping everyone create a home that feels organized and clutter-free․

6․2 Creating Systems That Actually Work

Melissa provides actionable tips for building systems that simplify daily life․ From assigning “homes” for belongings to creating maintainable routines‚ her strategies focus on functionality and ease․ She emphasizes the importance of adaptability‚ encouraging readers to tailor systems to their unique needs․ By implementing these practical solutions‚ anyone can create a more efficient and organized home environment that reduces stress and saves time․ Melissa’s approach ensures that systems are not only effective but also sustainable for the long term․

Beyond Cleaning: The Bigger Picture

A clean home extends beyond tidiness; it enhances mental health‚ boosts productivity‚ and fosters overall well-being‚ creating a space that nurtures both body and mind effectively․

7․1 How a Clean Home Can Improve Mental Health

A clean home significantly impacts mental health by reducing stress‚ promoting clarity‚ and fostering a sense of control․ A tidy environment can alleviate anxiety‚ improve focus‚ and enhance overall well-being․ Melissa emphasizes that a clean space isn’t just about aesthetics; it’s a tool for mental clarity and emotional stability‚ helping individuals create a sanctuary that supports their health and happiness․ By prioritizing cleanliness‚ one can cultivate a calmer‚ more organized mindset that positively influences daily life and mental resilience․

7․2 The Connection Between Cleanliness and Productivity

A clean home fosters productivity by creating a focused and efficient environment․ Clutter-free spaces enhance concentration‚ reduce distractions‚ and streamline tasks․ Melissa highlights how organized systems‚ like a well-structured workstation‚ can boost efficiency․ A tidy home not only saves time but also reduces mental fatigue‚ allowing for clearer thinking and better problem-solving․ By maintaining a clean space‚ individuals can achieve more with less effort‚ aligning with the book’s philosophy of making housekeeping a tool for a more productive life․

Melissa Pateras’s guide redefines housekeeping as a joyful‚ empowering process‚ proving that a clean home is not just tidy but a foundation for a happier‚ more productive life․

8․1 Final Thoughts on Embracing the Dirty Guide Philosophy

Melissa Pateras’s “Dirty Guide” philosophy reshapes housekeeping into a joyful‚ empowering experience․ By blending humor with practical advice‚ she proves that maintaining a clean home can be fun and fulfilling․ Her approach emphasizes self-acceptance and creativity‚ encouraging readers to embrace imperfection while building systems that work for them․ The book leaves readers with a renewed sense of confidence‚ showing that a clean home isn’t just about tidiness—it’s about creating a space that supports mental well-being‚ productivity‚ and happiness․

cuisinart ice cream maker manual

Welcome to the Cuisinart Ice Cream Maker Manual! This guide provides essential information to help you safely operate‚ maintain‚ and enjoy your ice cream maker.

1.1 Overview of the Cuisinart Ice Cream Maker Models

Cuisinart offers a variety of ice cream maker models‚ each designed to cater to different needs and preferences. Popular models include the ICE-20‚ ICE-21‚ and ICE-30BCU‚ which provide automatic operation for ice cream‚ frozen yogurt‚ and sorbet. The ICE-100 model includes advanced features like a built-in timer and pre-cooling function. These models vary in capacity‚ functionality‚ and additional features‚ ensuring there’s an option for every user‚ from casual enthusiasts to dedicated dessert creators.

1.2 Importance of Reading the Manual Before Use

Reading the Cuisinart Ice Cream Maker manual is crucial for safe and effective operation. It provides essential safety precautions‚ step-by-step instructions‚ and troubleshooting tips. The manual ensures you understand the machine’s features‚ proper ingredient preparation‚ and maintenance routines. By following the guidelines‚ you can avoid common mistakes‚ such as improper freezing of the bowl or overloading the machine. It also covers warranty details and customer support options‚ helping you maximize your product’s performance and longevity. Always read the manual carefully before first use to ensure optimal results and safety.

Safety Precautions and Cautions

Always follow safety guidelines to ensure safe operation. Keep electrical components away from water‚ avoid overloading the machine‚ and supervise children during use.

2.1 General Safety Guidelines

Always read the instruction manual carefully before using the Cuisinart Ice Cream Maker. Ensure all components are properly assembled and placed on a stable surface. Avoid overfilling the mixing bowl‚ as this can lead to spillage during churning. Keep the appliance out of children’s reach and ensure they are supervised when nearby. Regularly inspect electrical cords for damage‚ and never submerge the unit in water. Handling hot or moving parts without protection is strictly advised against. Make sure the freezer bowl is pre-chilled according to the manufacturer’s instructions to ensure optimal performance and safety. Never operate the machine if it appears damaged or malfunctioning. Always unplug the unit when not in use to prevent accidental start-ups. Adhering to these guidelines will help ensure a safe and enjoyable ice cream-making experience. Proper care and maintenance of the appliance will also extend its longevity and efficiency. By following these simple precautions‚ users can create delicious frozen treats without compromising safety. The Cuisinart Ice Cream Maker is designed for ease of use‚ but it requires attention to safety details to function effectively. Always prioritize caution when preparing ingredients and operating the machine. This will not only protect the user but also ensure the best results in making ice cream. The machine’s automatic features are designed to simplify the process‚ but user responsibility remains key to safe operation. Avoiding common hazards and adhering to the provided instructions will ensure a pleasant and hazard-free experience. Additionally‚ storing the appliance correctly when not in use will prevent potential accidents. The Cuisinart Ice Cream Maker is a valuable kitchen tool when used responsibly and with attention to safety guidelines.

2.2 Electrical Safety Tips

Always ensure the Cuisinart Ice Cream Maker is placed on a stable‚ dry surface away from water sources. Never submerge the electrical components in water or expose them to moisture. Avoid using damaged cords or plugs‚ as this can lead to electric shock. Keep the cord away from hot surfaces‚ sharp objects‚ or children. Unplug the machine when not in use to prevent accidental start-ups. Regularly inspect the power cord for signs of wear or damage.

2.3 Child Safety Considerations

Keep children away from the ice cream maker while it is in operation. Never allow them to touch moving parts or attempt to remove ice cream while the machine is running. Supervise children closely when they are near the appliance. Teach them to avoid hot or moving components. Ensure loose clothing or long hair is secured to prevent accidental entanglement. Store the machine out of reach when not in use to prevent unauthorized access.

Understanding the Product Components

Understanding the components of your Cuisinart Ice Cream Maker is crucial for effective use. Key parts include the freezer bowl‚ churn‚ and motor. Accessories like the instruction booklet and recipe guide enhance functionality. Familiarizing yourself with these elements ensures smooth operation and delicious results.

3.1 Key Parts of the Ice Cream Maker

The Cuisinart Ice Cream Maker features a freezer bowl‚ churn‚ and motor. The freezer bowl pre-chills ingredients‚ while the churn mixes and aerates. The motor powers the churning process. Additional components include a spout for easy ingredient addition and a transparent lid for monitoring progress. These parts work together to create smooth‚ creamy ice cream‚ frozen yogurt‚ or sorbet. Understanding each part ensures efficient and enjoyable use of the machine.

3.2 Accessories and Additional Features

The Cuisinart Ice Cream Maker often comes with accessories like additional freezer bowls‚ recipe booklets‚ and measuring tools. Some models include features like a built-in timer or a spout for mixing-ins. Optional accessories‚ such as extra churns or storage containers‚ enhance versatility. These additions allow users to experiment with new recipes and flavors‚ making the machine more adaptable to various culinary needs and preferences for homemade treats.

Operating the Cuisinart Ice Cream Maker

Discover how to effortlessly create delicious ice cream with step-by-step guidance on preparing ingredients‚ churning‚ and customizing flavors for perfect homemade treats every time.

4.1 Step-by-Step Churning Process

Begin by ensuring the freezer bowl is pre-chilled for 6-24 hours. Next‚ mix your base ingredients thoroughly. Pour the mixture into the machine‚ following the max fill line. Turn it on and let it churn for 20-30 minutes. Monitor consistency—soft-serve is ready when thickened. Stop the machine once desired texture is achieved. Transfer to an airtight container for firmer results. Always follow safety guidelines to avoid motor overheating‚ as the machine may automatically shut off for protection.

4.2 Preparing Ingredients for Churning

Before churning‚ ensure all ingredients are pre-chilled in the refrigerator for at least 2 hours. Mix the base thoroughly‚ avoiding air bubbles. Add-ins like nuts or fruit should be finely chopped and no larger than a chocolate chip. Overloading the machine can affect performance‚ so adhere to the recommended capacity. Pre-chill the freezer bowl for 6-24 hours to ensure optimal churning results. Always follow the manual’s guidelines for ingredient preparation to achieve the best texture and consistency.

Recipe Ideas and Customization Options

Discover delicious and creative recipes for classic and unique flavors. Experiment with mix-ins‚ bases‚ and ingredients to craft personalized treats that suit every taste and preference perfectly.

5.1 Classic Ice Cream Recipes

Start with timeless favorites like vanilla‚ chocolate‚ and strawberry. These recipes are simple yet delicious‚ using fresh cream‚ sugar‚ and natural flavorings. The manual includes step-by-step instructions for perfect churning. Classic recipes are a great foundation for beginners‚ ensuring smooth and creamy results every time. They also serve as a base for experimenting with mix-ins and unique twists‚ allowing you to create personalized treats effortlessly at home.

5.2 Unique and Creative Flavor Combinations

Elevate your ice cream game with unique flavors like mango-passion fruit‚ salted caramel‚ or matcha-green tea. Experiment with mix-ins such as nuts‚ candy pieces‚ or fresh fruit for added texture and taste. The manual encourages creativity‚ offering tips for layering flavors and incorporating unexpected ingredients. From boozy infusions to vegan options‚ these innovative recipes inspire you to craft one-of-a-kind desserts that impress family and friends with minimal effort.

Maintenance and Cleaning Tips

Regularly clean and dry the machine after use to prevent residue buildup. Store the freezer bowl properly to maintain its efficiency for future churning sessions.

6.1 Proper Cleaning of the Machine

Always clean the ice cream maker after each use to prevent residue buildup. Wash the freezer bowl‚ lid‚ and churn blade with warm soapy water‚ then rinse thoroughly. Avoid using abrasive cleaners or scrubbers to prevent damage. Dry all parts with a soft cloth to prevent water spots. Regular cleaning ensures optimal performance and longevity of your Cuisinart Ice Cream Maker. Some parts may also be dishwasher-safe for added convenience.

6.2 Storage and Longevity Tips

Store the ice cream maker in a cool‚ dry place to maintain its performance. Keep the freezer bowl in the freezer when not in use for quick access. Regularly cleaning and drying the machine prevents residue buildup. Avoid exposing the unit to extreme temperatures or humidity. Proper storage and maintenance ensure your Cuisinart Ice Cream Maker lasts for years‚ providing consistent results. Always refer to the manual for specific storage instructions tailored to your model.

Troubleshooting Common Issues

Troubleshooting common issues like motor overheating and frozen bowls is essential for optimal performance. Refer to the manual for solutions and maintenance tips to ensure longevity.

7.1 Motor Overheating Solutions

Motor overheating can occur due to thick mixtures or prolonged operation. To resolve this‚ stop the machine‚ allow it to cool‚ and ensure the mixture is at the correct consistency. If the motor overheats frequently‚ check for overloading or improper bowl preparation. Regularly cleaning and maintaining the machine can also prevent this issue. Always refer to the manual for specific troubleshooting steps to avoid damaging the motor. Proper care ensures smooth operation and longevity.

7.2 Addressing Frozen Bowl Issues

If the mixing bowl becomes frozen or stuck‚ allow it to thaw at room temperature or run under warm water. Ensure the bowl is properly prepared by freezing it for the recommended 6-8 hours before use. Avoid overfilling‚ as this can cause the bowl to freeze unevenly. Regularly cleaning the bowl and ensuring it is dry before freezing can prevent such issues. Proper preparation and maintenance will help maintain optimal performance and extend the bowl’s lifespan.

Warranty and Customer Support

The Cuisinart Ice Cream Maker comes with a limited one-year warranty. For inquiries or support‚ contact Cuisinart’s customer service via their official website or phone.

8.1 Understanding the Warranty Coverage

The Cuisinart Ice Cream Maker is backed by a limited one-year warranty‚ covering defects in materials and workmanship. During this period‚ Cuisinart may repair or replace defective parts at its discretion. However‚ the warranty does not cover damage caused by misuse‚ neglect‚ or normal wear and tear. To ensure coverage‚ users must adhere to the manual’s guidelines and maintain proper usage. Always keep your purchase receipt and product registration for warranty validation.

8.2 Contacting Cuisinart Customer Service

To contact Cuisinart customer service‚ visit their official website for support options‚ including phone‚ email‚ and live chat. You can also refer to the manual for a dedicated support hotline. For troubleshooting or warranty inquiries‚ submit a request online or call the toll-free number provided in the booklet. Ensure to have your product model and purchase details ready for efficient assistance.

With your Cuisinart Ice Cream Maker‚ crafting delicious treats is effortless. Experiment with recipes‚ maintain your machine‚ and enjoy creating sweet memories with every churn!

9.1 Maximizing Your Ice Cream Maker Experience

To maximize your experience with the Cuisinart Ice Cream Maker‚ ensure the freezer bowl is pre-chilled for optimal performance. Experiment with diverse ingredients and recipes to create unique flavors. Regularly clean and maintain the machine to prolong its lifespan. By following the manual’s guidelines and exploring new recipes‚ you can unlock the full potential of your ice cream maker and enjoy endless delicious treats.

9.2 Encouragement to Experiment and Enjoy

Embrace the joy of creating custom flavors with your Cuisinart Ice Cream Maker! Experiment with unique ingredients and recipes to craft personalized treats. From classic vanilla to innovative mix-ins‚ the possibilities are endless. Share your creations with family and friends‚ and enjoy the satisfaction of homemade goodness. Don’t hesitate to try new combinations—every batch is an opportunity to discover a delicious favorite. Happy churning and savoring the sweetness of your efforts!

what is community based instruction

Definition of Community-Based Instruction

Community-Based Instruction (CBI) is an educational approach where students learn academic and functional skills in natural community settings through direct, systematic instruction.

1.1 Overview of CBI

Community-Based Instruction (CBI) involves teaching academic and functional skills in natural community settings to provide real-life experiences. It focuses on practical skills training, promoting skill generalization and inclusion. CBI is designed for students with disabilities, offering sustained and repeated instruction outside the classroom. This approach enhances transition to adult life, vocational preparation, and independent living. By integrating meaningful community engagement, CBI ensures students apply learned skills in authentic environments, fostering independence and readiness for post-school life.

1.2 Key Characteristics of CBI

Community-Based Instruction (CBI) emphasizes learning in real-world settings, focusing on skill generalization and practical application. It involves systematic, sustained instruction tailored to individual needs, promoting inclusivity for students with disabilities. CBI integrates academic and functional skills, preparing students for adult life and employment. Evidence-based practices ensure effectiveness, with instruction occurring in community environments to foster independence and social integration.

Purpose and Benefits of Community-Based Instruction

Community-Based Instruction (CBI) aims to enhance skill generalization, promote independence, and prepare students for adult life through real-life experiences, fostering inclusion and practical skill development.

2.1 Promoting Skill Generalization

Community-Based Instruction (CBI) emphasizes the application of skills learned in real-world environments, enabling students to generalize these skills across various settings. By teaching academic and functional skills in natural community contexts, CBI helps students adapt and apply what they learn to diverse situations, fostering independence and practical competence. This approach ensures that students can use their skills effectively in everyday life, promoting long-term success and integration into society.

2.2 Enhancing Transition to Adult Life

Community-Based Instruction (CBI) plays a pivotal role in preparing students for adult life by teaching practical skills in real-world environments. This approach focuses on fostering independence, vocational training, and social interactions, all of which are essential for a smooth transition. By engaging in tasks relevant to adult living, students gain confidence and competence, enabling them to navigate societal expectations and responsibilities effectively. CBI supports inclusion and reduces reliance on external support systems, empowering individuals for lifelong success.

2.3 Supporting Inclusion of Students with Disabilities

Community-Based Instruction (CBI) actively supports the inclusion of students with disabilities by providing opportunities to interact with peers in natural community settings. This approach reduces stigma and segregation, fostering social acceptance and collaboration. By integrating students into diverse environments, CBI ensures equitable access to education and promotes self-advocacy. It aligns with legal standards like IDEA, emphasizing inclusion and individualized education in the least restrictive environment, preparing students for inclusive adult life experiences.

How Community-Based Instruction Works

Community-Based Instruction involves teaching students in natural community settings, focusing on skill development through direct, systematic instruction tailored to real-life contexts and environments.

3.1 Locations for CBI

Community-Based Instruction occurs in various natural settings, such as grocery stores, parks, libraries, public transportation, and local businesses. These locations provide real-life environments where students can apply and generalize skills. Instruction may focus on specific tasks like shopping, navigating, or interacting with community members. The choice of location depends on the skills being taught and the student’s individual needs, ensuring practical and relevant learning experiences.

3.2 Instructional Strategies in CBI

Community-Based Instruction employs strategies like task analysis, role-playing, and direct instruction to teach skills in real-world contexts. Systematic prompting, reinforcement, and feedback are used to ensure learning. Instruction is often individualized, focusing on the student’s needs and abilities. These strategies help students generalize skills across environments, promoting independence and successful community integration. The goal is to make learning meaningful and applicable to everyday life.

Skills Taught Through Community-Based Instruction

Community-Based Instruction focuses on teaching academic, functional, and vocational skills, preparing students for independent living, employment, and community participation through real-life applications and practical experiences.

4.1 Academic and Functional Skills

Community-Based Instruction emphasizes teaching academic and functional skills in real-world settings. Students learn to apply math, reading, and communication skills in practical scenarios, such as using public transportation or shopping. Functional skills, like time management and problem-solving, are also prioritized to enhance independence. This approach ensures learners can generalize skills across different environments, fostering confidence and readiness for everyday challenges.

4.2 Independent Living and Vocational Skills

Community-Based Instruction (CBI) focuses on teaching independent living and vocational skills to prepare students for adulthood. Students learn essential life skills, such as cooking, budgeting, and using public transportation, in real-world environments. Vocational training includes job-specific tasks and workplace etiquette, fostering employability. These skills are taught in natural settings, like homes or workplaces, to promote self-sufficiency and ease the transition to independent living and employment.

Real-Life Applications of CBI

CBI applies to real-world settings such as grocery stores, parks, and workplaces, teaching students practical skills for self-sufficiency and societal integration.

5.1 Examples of Community Settings

Community-Based Instruction often occurs in settings like grocery stores, parks, public transportation, libraries, cafes, and workplaces. These environments provide real-world contexts for learning practical skills, such as shopping, navigating, and interacting socially. For example, students might practice purchasing items at a store or using a bus schedule. These settings enhance skill acquisition and application, making learning meaningful and directly applicable to everyday life. This approach is particularly beneficial for students with disabilities, fostering independence and confidence.

5.2 Success Stories and Outcomes

Community-Based Instruction has proven effective in enhancing students’ independence and skill development. Many students with disabilities have shown significant improvement in social interactions, vocational skills, and daily living tasks. Success stories highlight increased confidence and self-reliance, preparing them for adult life. Educators and families often report positive outcomes, demonstrating CBI’s impact on long-term success and community integration.

Evidence-Based Support for CBI

Community-Based Instruction is an evidence-based practice supported by research, demonstrating its effectiveness in skill development and successful transition to adult life for students with disabilities.

6.1 Research on Effectiveness

Research consistently demonstrates the effectiveness of Community-Based Instruction (CBI) in enhancing skill development and promoting successful transitions for students with disabilities. Studies highlight improved skill generalization, increased independence, and better preparation for adult life. Data collection and assessments show that CBI fosters meaningful real-world applications of academic and functional skills, leading to positive outcomes. Evidence-based practices underscore CBI’s role in creating inclusive and supportive learning environments that align with individual student needs and goals.

6.2 Data Collection and Assessment in CBI

Data collection and assessment in CBI involve systematic observation, skill tracking, and progress monitoring to evaluate student performance in real-world settings. These methods ensure instruction is aligned with individual goals and community demands. Continuous data collection helps refine teaching strategies and measure skill mastery. Assessments are often informal, focusing on functional tasks, and provide valuable insights for future planning and accountability in student learning outcomes.

Challenges and Solutions in Implementing CBI

Implementing CBI faces challenges like location availability and transportation. Solutions include collaborating with local businesses, staff training, and coordinating transportation to ensure accessibility and effective instruction.

7.1 Common Challenges

Implementing CBI often faces challenges such as limited community partnerships, transportation logistics, and scheduling conflicts. Additionally, finding trained staff and resources can be difficult. Location availability and accessibility issues may also arise, requiring creative solutions to ensure successful skill generalization in real-world settings.

7.2 Strategies to Overcome Barriers

Strategies to overcome CBI challenges include fostering strong community partnerships, providing staff training, and leveraging technology for remote instruction. Flexibility in scheduling and utilizing available resources can address logistical issues. Collaboration with local businesses and organizations ensures accessible learning environments. Additionally, incorporating student and family input helps tailor instruction to individual needs, enhancing effectiveness and engagement in community-based learning experiences.

Future Trends in Community-Based Instruction

Future trends in CBI include integrating technology, emphasizing real-world applications, and adapting instruction to diverse student needs and post-school goals.

8.1 Evolving Goals and Practices

Community-Based Instruction is evolving to focus on personalized learning and real-world applications. New teaching methods emphasize technology integration and community partnerships. Goals now prioritize independent living and vocational training, adapting to student needs and post-school goals; This shift ensures CBI remains relevant and effective, supported by evidence-based practices and collaboration with local organizations.

8.2 Integration with Other Educational Approaches

Community-Based Instruction (CBI) is increasingly integrated with other educational approaches, such as project-based learning and vocational training, to enhance student outcomes. By combining CBI with universal design for learning (UDL), educators can create accessible, community-based experiences. This integration allows for a more holistic education, blending academic and practical skills while fostering collaboration between schools and community organizations to support diverse learners effectively.

1 2 3