singer simple manual

Welcome to the Singer Simple manual, your guide to setting up and operating the machine.
It covers key features like stitch patterns and automatic functions to help you maximize your sewing experience.

1.1 Purpose and Importance of the Manual

This manual serves as a comprehensive guide for setting up, operating, and maintaining your Singer Simple sewing machine. It provides essential safety precautions, step-by-step instructions, and troubleshooting tips to ensure optimal performance. Designed for both beginners and experienced users, the manual helps you unlock the machine’s full potential while promoting safe and efficient sewing. By following the guidelines, you can extend the machine’s longevity and enjoy a seamless sewing experience. Singer’s commitment to quality and sustainability is reflected in this detailed resource.

1.2 Overview of the Singer Simple Sewing Machine

The Singer Simple sewing machine is an essential tool for sewing enthusiasts, offering a blend of simplicity and functionality. Designed for both beginners and intermediate users, it features 32 stitch patterns, variable stitch length and width, and a one-step buttonhole. The machine also includes a free arm, ideal for handling complex projects like cuffs and collars. Its automatic design ensures ease of use, making it perfect for a variety of fabric types. Singer’s reputation for quality and user-friendly designs shines through in this versatile machine.

Key Features of the Singer Simple Sewing Machine

The Singer Simple sewing machine offers 32 stitch patterns, variable stitch length and width, and a one-step buttonhole. It includes a free arm for complex projects and automatic features for ease of use.

2.1 Stitch Patterns and Customization Options

The Singer Simple sewing machine offers 32 built-in stitch patterns, including straight, zigzag, and decorative options. Users can customize stitch length and width to suit various fabrics and projects. The one-step buttonhole feature creates professional-looking buttonholes effortlessly. With adjustable settings, sewers can tailor stitches for specific needs, ensuring precise results. These features cater to both beginners and intermediate users, providing flexibility and creativity in sewing projects.

2.2 Automatic Functions and Ease of Use

The Singer Simple sewing machine features automatic functions designed to simplify sewing. It includes automatic threading, tension adjustment, and a one-step buttonhole, making it user-friendly. The machine’s intuitive controls allow easy selection of stitches and settings. A free arm design enables sewing of cylindrical items like sleeves. Its lightweight and portable design make it easy to handle and transport. These features ensure a smooth and efficient sewing experience, catering to both beginners and experienced sewers.

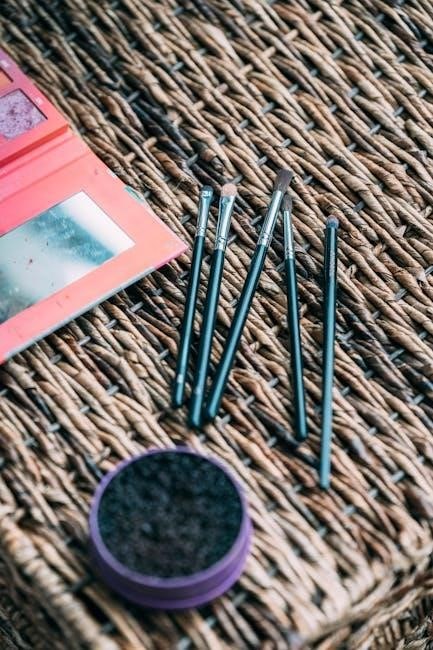
2.3 Compatibility with Singer Branded Accessories

The Singer Simple sewing machine is designed to work seamlessly with Singer-branded accessories, ensuring optimal performance and compatibility. Using genuine Singer needles, bobbins, and feet is recommended for best results. These accessories are tailored to the machine’s specifications, enhancing stitching quality and durability. Compatibility ensures easy integration and maintenance, preserving the machine’s longevity. Always refer to the manual for a list of approved accessories to maximize your sewing experience and maintain warranty coverage.

Setting Up and Basic Operation

Unbox and assemble the machine, then thread it carefully. Insert the bobbin, select your stitch, and begin sewing. Follow the manual for smooth operation.

3.1 Unboxing and Initial Assembly

Start by carefully unboxing the Singer Simple sewing machine and its accessories. Ensure all components, like the machine, bobbin, needles, and foot, are included. Read the manual thoroughly before assembly; Attach the sewing machine head to the base, if required, and ensure all parts are securely tightened. Familiarize yourself with the machine’s layout, including the spool pins, tension dials, and stitch selectors. Proper assembly ensures smooth operation and prevents damage. Follow the manual’s step-by-step guide for accurate setup and safe use.

3.2 Threading the Machine and Bobbin Setup

Start by inserting the bobbin into the bobbin case, ensuring it’s seated properly. Thread the machine by guiding the thread through the spool pin and tension discs. Pull gently to remove excess slack. Use the handwheel to lower the needle slightly, then pull the thread to bring up the bobbin thread. Ensure both threads are evenly tensioned for balanced stitching. Always use Singer-branded needles and follow the manual’s threading diagram for accurate setup. Proper threading ensures smooth operation and prevents thread breakage during sewing.

3.3 Selecting the Right Needle and Fabric

Choose the appropriate needle based on fabric type: heavy-duty for thick materials, sharp for woven fabrics, and ballpoint for knits. Always use Singer-branded needles for compatibility and optimal performance. Select fabric that suits your project, ensuring it aligns with the machine’s stitch patterns. Match the stitch type to the fabric weight for professional results. Proper needle and fabric selection ensures smooth stitching, prevents damage, and enhances sewing efficiency. Refer to the manual for specific recommendations tailored to your Singer Simple sewing machine.

Safety Precautions and Maintenance

Ensure safe operation by following guidelines in the manual. Regularly clean and lubricate the machine to maintain performance. Store the machine properly when not in use.

  • Avoid using damaged accessories.
  • Keep children away during operation.
  • Refer to the manual for troubleshooting tips.

4.1 Essential Safety Guidelines for Users

Always read the manual before using the Singer Simple sewing machine. Keep children supervised and avoid operating the machine near water. Use only Singer-branded needles for optimal performance. Never use the machine for industrial purposes or near flammable materials. Ensure proper threading and bobbin setup to avoid mechanical issues. Store the machine in a dry, cool place when not in use. Regularly clean and maintain the machine to ensure safe and efficient operation. Consult the manual for detailed safety instructions and guidelines.

  • Supervise children during operation.
  • Avoid using the machine near water.
  • Use only Singer-branded accessories.
  • Keep the machine away from flammable materials.
  • Store the machine properly when not in use.

4.2 Regular Maintenance Tips for Longevity

Regular maintenance ensures your Singer Simple sewing machine runs smoothly and lasts longer. Clean the machine after use to remove lint and debris. Lubricate moving parts as recommended in the manual. Check and replace needles regularly to prevent damage. Use only Singer-branded accessories for compatibility. Store the machine in a dry, dust-free environment. Avoid overloading the machine, and ensure proper threading to prevent jams. Schedule professional servicing annually for optimal performance and longevity.

  • Clean the machine regularly to remove lint.
  • Lubricate moving parts as instructed.
  • Replace needles to prevent damage.
  • Use Singer-branded accessories only.
  • Store in a dry, dust-free area.

4.3 Troubleshooting Common Issues

Troubleshoot common issues with your Singer Simple sewing machine by following these tips. If thread bunches, check for proper threading and tension. For machine not turning on, ensure power supply and foot pedal are functioning. Fabric not feeding smoothly? Ensure feed dogs are up. If stitches are uneven, adjust stitch length or width. For jammed fabric, gently remove it and rethread. Refer to the manual for detailed solutions to ensure optimal performance and resolve issues quickly.

  • Check threading for thread bunching issues.
  • Inspect power supply if the machine won’t start.
  • Adjust feed dogs for smooth fabric feeding.
  • Correct stitch settings for even stitching.
  • Gently remove fabric during jams.

Advanced Features and Techniques

Explore advanced features like variable stitch length and width, one-step buttonhole, and free arm for complex projects to enhance your sewing skills and creativity.

  • Variable Stitch Length/Width: Customize stitches for different fabrics.
  • One-Step Buttonhole: Create professional buttonholes effortlessly.
  • Free Arm: Simplify sewing cuffs, sleeves, and other curved projects.

5.1 Exploring Variable Stitch Length and Width

The Singer Simple allows precise control over stitch length and width, enabling customization for various fabrics and projects. Adjust the stitch length for dense or loose stitching and modify the width for decorative or heavy-duty sewing. Use the dial controls to set your preferred measurements, ensuring optimal results. This feature is particularly useful for delicate fabrics, thick materials, and intricate designs. Experiment with different settings to achieve professional-looking seams and hems. Refer to your manual for specific model adjustments and guidelines.

  • Stitch Length: Ideal for adjusting seam strength and fabric drape.
  • Stitch Width: Perfect for decorative stitching or heavy-duty projects.

5.2 Mastering the One-Step Buttonhole Feature

The Singer Simple’s one-step buttonhole feature simplifies creating professional-looking buttonholes automatically. Place your fabric under the buttonhole foot, select the buttonhole option, and let the machine sew perfect buttonholes in one go. This feature saves time and ensures consistent results, ideal for dresses, shirts, and home decor projects. Follow the manual’s guide for precise measurements and thread setup to achieve flawless buttonholes every time. This feature is perfect for beginners and experienced sewers alike, offering convenience and precision.

  • Automatic Operation: Sew perfect buttonholes effortlessly.
  • Consistent Results: Ideal for garments and home decor.

5.3 Using the Free Arm for Complex Projects

The Singer Simple’s free arm feature provides easy access for sewing hard-to-reach areas like cuffs, sleeves, and pant hems. By detaching the auxiliary bed, you can maneuver fabric effortlessly, ensuring precise stitching for complex projects. This feature is ideal for tailoring, quilting, and delicate fabric work, offering greater control and versatility. Follow the manual’s guidance to engage the free arm and unlock new creative possibilities for your sewing endeavors.

  • Enhanced Accessibility: Sew intricate areas with ease.
  • Improved Control: Perfect for detailed and large projects.

Download the Singer Simple manual online for comprehensive guidance, ensuring easy access to setup, maintenance, and troubleshooting tips to enhance your sewing experience.

6.1 Final Tips for Maximizing Your Sewing Experience

To get the most out of your Singer Simple sewing machine, always use Singer-branded needles for optimal performance. Regularly clean and oil the machine to maintain its longevity. Experiment with stitch patterns and adjust lengths for different fabrics. Utilize the free arm for hemming pants or sewing cylindrical items. Keep the manual handy for quick reference. By following these tips, you can enhance your sewing skills and enjoy a seamless experience with your Singer Simple machine.

6.2 How to Access the Full Manual Online

Visit Singer’s official website and navigate to the Manuals and Updates page. Enter your machine’s model number, such as Singer Simple 3210, 3221, or 3223, in the search bar. Download the PDF manual for free, which includes detailed instructions, stitch guides, and troubleshooting tips. This convenient online access aligns with Singer’s Green Initiative to reduce environmental impact. Ensure you always use the latest version for the most accurate information and guidance to enhance your sewing experience with the Singer Simple machine.

battelle developmental inventory 2 pdf

Overview of the Battelle Developmental Inventory 2 (BDI-2)

The Battelle Developmental Inventory 2 (BDI-2) is a comprehensive assessment tool for early childhood development, designed for children from birth to 7 years, 11 months. It evaluates key developmental domains and provides valuable insights for educators and professionals to support individualized learning and intervention strategies.

The Battelle Developmental Inventory 2 (BDI-2) is a comprehensive, standardized assessment tool designed to evaluate the developmental progress of children from birth to 7 years, 11 months. It is rooted in the concept of developmental milestones, which are critical skills and behaviors that children typically master sequentially, from simple to complex. The BDI-2 assesses five key domains: Personal-Social, Adaptive, Motor, Communication, and Cognitive development. This tool is widely used by early childhood educators, psychologists, and healthcare professionals to identify developmental strengths and needs, ensuring timely interventions. Its norm-referenced design provides standard scores, making it a reliable resource for understanding a child’s developmental status. The BDI-2 is also flexible, allowing for accommodations and modifications to meet the needs of children with disabilities or special requirements.

Key Features and Domains of the BDI-2

The BDI-2 is structured around five key developmental domains: Personal-Social, Adaptive, Motor, Communication, and Cognitive. Each domain is further divided into subdomains, totaling 13, which provide a detailed understanding of a child’s abilities. The Personal-Social domain assesses interpersonal skills and self-awareness, while the Adaptive domain evaluates daily living skills. The Motor domain focuses on gross and fine motor abilities, and the Communication domain measures receptive and expressive language skills. The Cognitive domain explores problem-solving and thinking abilities. These domains collectively offer a holistic view of a child’s development, enabling professionals to identify strengths and areas needing support. The tool’s design ensures comprehensive coverage of early childhood development, making it an essential resource for educators and healthcare providers.

Age Range and Applicability

The BDI-2 is designed for children from birth to 7 years, 11 months, making it a versatile tool for assessing early childhood development. It is applicable for all children within this age range, including those with special needs or disabilities. The inventory is suitable for various settings, such as schools, clinics, and home environments, and can be administered by professionals like psychologists, educators, and therapists. Its broad applicability ensures that it can be used for screening, comprehensive assessments, and monitoring developmental progress over time. The BDI-2 is particularly useful for identifying developmental delays and supporting intervention planning. Its flexibility and comprehensive scope make it a valuable resource for understanding the developmental needs of young children across diverse contexts.

Domains Assessed by the BDI-2

The BDI-2 evaluates five key developmental domains: Personal-Social, Adaptive, Motor, Communication, and Cognitive, each containing 2-3 subdomains, providing a comprehensive assessment of early childhood development.

Personal-Social Domain

The Personal-Social domain of the BDI-2 assesses a child’s ability to interact socially and develop emotional intelligence. It focuses on skills such as self-awareness, cooperation, and empathy. This domain evaluates how children form relationships, understand social norms, and demonstrate independence. It also measures their ability to express emotions appropriately and engage in group activities. By examining these aspects, the BDI-2 helps identify areas where a child may need additional support, ensuring they develop healthy social and emotional behaviors. This domain is crucial for early childhood development, as it lays the foundation for future interpersonal skills and emotional well-being.

Adaptive Domain

The Adaptive domain of the BDI-2 evaluates a child’s ability to perform daily living tasks and self-care skills, essential for independence. It assesses areas such as feeding, dressing, and using the bathroom, as well as safety awareness and responsibility. This domain also measures a child’s ability to adapt to routines and demonstrate independence in completing tasks. By identifying strengths and challenges in these areas, the BDI-2 helps professionals provide targeted support for children with special needs. The Adaptive domain is crucial for understanding a child’s practical life skills and their ability to function independently in various settings, such as home or school. It provides valuable insights into how children navigate everyday tasks and adapt to their environment effectively.

Motor Domain

The Motor domain of the BDI-2 assesses a child’s ability to perform physical tasks, focusing on both gross and fine motor skills. Gross motor skills include activities like walking, running, jumping, and balancing, while fine motor skills involve smaller movements, such as using hands to manipulate objects. This domain evaluates how well a child coordinates their body and hand movements to achieve specific tasks. It also measures overall physical development and the ability to integrate motor skills with other developmental areas. By identifying strengths and challenges in the Motor domain, professionals can provide targeted interventions to support physical growth and coordination. This domain is essential for understanding a child’s ability to engage in age-appropriate physical activities and maintain overall motor proficiency.

Communication Domain

The Communication domain of the BDI-2 evaluates a child’s ability to understand and use language effectively. It assesses both receptive communication, such as listening and comprehension, and expressive communication, including verbal and non-verbal methods of conveying thoughts and ideas. This domain measures how well a child can follow directions, identify objects, and engage in meaningful conversations. It also examines the development of speech sounds, vocabulary, and sentence structure. The Communication domain is essential for identifying delays or difficulties in language development and provides insights for early intervention. By evaluating these skills, professionals can support children in improving their communication abilities, which are critical for social interactions and academic success. This domain is a key component of the BDI-2, offering a comprehensive understanding of a child’s language development from birth to age 7 years, 11 months.

Cognitive Domain

The Cognitive domain of the BDI-2 assesses a child’s problem-solving skills, memory, and understanding of cause-and-effect relationships. It evaluates how children process information, recognize patterns, and demonstrate logical thinking. This domain measures developmental milestones such as object permanence, spatial awareness, and the ability to categorize objects. It also examines a child’s ability to understand and use symbols, which is crucial for early literacy and numeracy skills. The Cognitive domain provides insights into a child’s intellectual growth and helps identify any delays in cognitive development. By assessing these skills, professionals can support children in building a strong foundation for academic success. This domain is essential for understanding a child’s thinking processes and their ability to learn and adapt in various environments, from birth to age 7 years, 11 months.

Administration and Scoring

The BDI-2 is administered by professionals or individual service providers using standardized procedures. Scoring involves evaluating responses to determine developmental levels and identify strengths or needs.

Administration Methods

The BDI-2 is administered by professionals or individual service providers, ensuring standardized procedures. The assessment is child-friendly, with items designed to engage young children. Examiners progress through subdomains, determining the child’s developmental level. Accommodations and modifications are available for children with special needs or disabilities. The process involves observing and interacting with the child to gather accurate data on their skills and behaviors. This method ensures a comprehensive understanding of the child’s developmental progress, aligning with early childhood educational goals and intervention strategies.

Scoring Mechanisms

The BDI-2 utilizes a standardized scoring system, converting raw scores into standard scores and age equivalents. Each domain and subdomain is scored separately, providing a comprehensive profile of a child’s abilities. Raw scores are summed and compared to normative data, yielding standard scores with a mean of 100 and a standard deviation of 15. Age equivalents are also provided to interpret developmental levels. The assessment includes 13 subdomains across five developmental areas, ensuring detailed insights into a child’s progress. Scoring guides professionals in identifying strengths, weaknesses, and developmental delays, aiding in targeted intervention planning and support strategies for early childhood education and development;

Interpreting Results

Interpreting BDI-2 results involves analyzing standard scores, age equivalents, and percentile ranks to understand a child’s developmental status. Standard scores, with a mean of 100 and a standard deviation of 15, indicate how a child’s performance compares to peers. Age equivalents provide a developmental age for each domain, helping identify delays or advancements. Percentile ranks offer a relative standing within the normative sample. Results are used to identify strengths, areas of concern, and developmental milestones achieved. This information guides intervention planning, instructional strategies, and support services. By understanding these scores, educators and professionals can tailor approaches to meet individual needs, fostering optimal development and addressing any identified gaps in early childhood education.

Uses of the BDI-2

Monitoring Developmental Progress

The BDI-2 is a valuable tool for tracking developmental milestones and identifying areas needing support. It allows professionals to monitor growth, ensuring timely interventions in early childhood education.

Screening for Developmental Milestones

The BDI-2 is widely used for screening developmental milestones in early childhood, helping identify typical or delayed development. It assesses five key domains: Personal-Social, Adaptive, Motor, Communication, and Cognitive. By evaluating these areas, the BDI-2 provides insights into a child’s overall developmental status. Its standardized approach ensures reliable results, making it an effective tool for early detection of delays or disorders. Professionals use the BDI-2 to screen for school readiness and to identify children who may require further assessment or intervention. This early screening supports timely interventions, promoting better developmental outcomes for young children.

Comprehensive Assessment

The BDI-2 serves as a comprehensive assessment tool for evaluating early childhood development across five key domains: Personal-Social, Adaptive, Motor, Communication, and Cognitive. Designed for children from birth to 7 years, 11 months, it provides in-depth insights into a child’s developmental strengths and areas needing support. The inventory includes 450 items, with each domain divided into subdomains to ensure a thorough evaluation. Professionals use the BDI-2 to gather detailed information for creating individualized education plans, especially for children with special needs. Its norm-referenced design allows for standardized scoring, making it a reliable resource for understanding developmental progress. This comprehensive approach supports educators and practitioners in developing targeted intervention strategies to promote healthy growth and learning outcomes.

The BDI-2 is a valuable tool for monitoring developmental progress in children from birth to 7 years, 11 months. It allows professionals to track growth over time by assessing changes in the five key domains: Personal-Social, Adaptive, Motor, Communication, and Cognitive. The inventory’s standardized structure ensures consistency in measuring developmental milestones, making it easier to identify patterns of progress or delays. Regular use of the BDI-2 helps educators and practitioners adjust interventions and support strategies to meet the evolving needs of children. Its detailed subdomains provide a clear framework for documenting improvements and guiding individualized plans. This longitudinal approach supports early identification of developmental challenges and informs targeted support to promote healthy growth and learning outcomes.

Importance of the BDI-2 in Early Childhood Education

The BDI-2 plays a critical role in early childhood education by providing educators with a comprehensive understanding of children’s developmental strengths and needs. Its focus on key domains ensures that professionals can identify early signs of developmental delays or challenges, enabling timely interventions. By aligning with IDEA requirements, the BDI-2 supports inclusive education and individualized learning plans. It also serves as a valuable tool for monitoring progress and adjusting teaching strategies to meet the diverse needs of young learners. This assessment helps educators promote school readiness, foster healthy development, and create supportive learning environments. Its standardized and norm-referenced design makes it a reliable resource for making data-driven decisions in early childhood education settings.

a visual analogy guide to human anatomy

Welcome to A Visual Analogy Guide to Human Anatomy, a transformative learning resource that simplifies complex anatomical concepts through engaging visual comparisons․ By leveraging everyday analogies, this guide makes intricate structures and systems more relatable and memorable․ Perfect for students and educators, it bridges traditional textbooks with interactive, visually driven tools, enhancing understanding and retention․ Dive into a world where anatomy comes alive through creativity and clarity, inspired by Paul A․ Krieger’s innovative approach to visual learning․

Overview of Visual Analogies in Learning

Visual analogies are powerful tools that simplify complex concepts by relating them to familiar objects or experiences․ In the context of anatomy, they transform intricate structures into relatable metaphors, making learning engaging and accessible; For instance, comparing the skeleton to a framework or muscles to rubber bands helps students visualize and remember their functions․ These analogies create mental connections, enhancing memory retention and comprehension․ By bridging the gap between abstract ideas and everyday knowledge, visual analogies make anatomy less intimidating and more interactive, fostering a deeper understanding of the human body’s intricate systems․

The Importance of Visual Learning in Anatomy

Visual learning is indispensable in anatomy, where complex structures and systems must be understood spatially․ Traditional methods often overwhelm students with textual information, while visual tools like diagrams, models, and analogies provide clarity․ These methods allow learners to grasp relationships between components, making abstract concepts tangible․ Visual aids enhance memory retention, as images and metaphors create lasting mental connections․ They also facilitate active learning, enabling students to engage with material through labeling, coloring, and interactive exercises․ By integrating visual analogies, anatomy education becomes more accessible, fostering a deeper and more intuitive understanding of the human body’s intricate design and function․

Structure and Purpose of the Guide

A Visual Analogy Guide to Human Anatomy is meticulously structured to simplify complex anatomical concepts․ It combines detailed illustrations with relatable analogies, creating a bridge between abstract ideas and everyday experiences․ The guide is divided into sections focusing on core concepts, visual analogies, and interactive activities․ Each chapter builds upon the last, ensuring a logical progression of learning․ Its primary purpose is to enhance retention and engagement through visual and tactile methods, such as labeling exercises and quizzes․ By offering a comprehensive yet accessible approach, the guide empowers students to master anatomy with confidence, making it an invaluable resource for both classroom and self-directed study․

Core Concepts of Human Anatomy

This section explores foundational anatomical principles, introducing basic terminology and major body systems․ Visual analogies simplify complex structures, aiding comprehension and retention through relatable comparisons and interactive tools․

Basic Anatomical Terminology

Understanding basic anatomical terminology is essential for grasping human anatomy․ Terms like anterior, posterior, proximal, and distal describe spatial relationships․ Visual analogies, such as comparing the body to a map or compass, simplify these concepts․ The guide uses relatable comparisons to help students remember terms like sagittal, transverse, and coronal planes․ Interactive labeling exercises and coloring activities reinforce learning, making complex terminology accessible․ By mastering these basics, students build a strong foundation for understanding more intricate anatomical structures and systems․ This approach ensures clarity and engagement, making anatomy less intimidating for learners at all levels․

Major Body Systems and Their Functions

Understanding major body systems is crucial for comprehending human anatomy․ Systems like the skeletal, muscular, and nervous systems work interdependently․ Visual analogies simplify these complexities, such as comparing the skeletal system to a framework or the muscular system to a pulley system․ The guide uses relatable comparisons to explain how the circulatory system acts like a delivery network and the digestive system functions like a recycling plant․ By breaking down each system’s role and interactions, learners gain a holistic view of the body․ Interactive tools and 3D models further enhance understanding, making complex physiological processes accessible and engaging for students of all levels․

Visual Analogies Explained

Visual analogies simplify complex anatomical concepts by comparing body structures to familiar objects․ They enhance learning by making abstract ideas relatable and easier to visualize, improving retention and understanding․

What Are Visual Analogies?

Visual analogies are powerful learning tools that compare complex anatomical structures to familiar, everyday objects or concepts․ By bridging the gap between abstract biological systems and relatable imagery, they simplify comprehension․ For instance, likening the spine to a flexible rod or the skull to a protective helmet makes these concepts more accessible․ These comparisons leverage prior knowledge, enhancing memory retention and engagement․ Visual analogies are particularly effective in anatomy, where intricate systems can overwhelm learners․ They create mental frameworks that transform abstract ideas into tangible, understandable visuals, fostering deeper understanding and making anatomy more approachable for students at all levels․

Examples of Effective Analogies in Anatomy

Visual analogies in anatomy transform complex structures into relatable concepts․ For instance, the spine is often compared to a flexible rod, emphasizing its dual role of support and mobility․ Neurons can be likened to electrical wires, highlighting their function in transmitting signals․ Similarly, the circulatory system is often visualized as a delivery network, with blood vessels acting as highways and the heart as the central pump․ These comparisons make abstract biological processes more tangible, aiding learners in grasping intricate relationships․ By linking anatomy to everyday objects, visual analogies enhance comprehension and retention, proving invaluable for students and educators alike in mastering human anatomy․

Paul A․ Krieger’s Approach

Paul A․ Krieger’s innovative method combines visual analogies with interactive tools, simplifying anatomy through relatable comparisons and engaging visuals, making complex concepts accessible and memorable for learners․

Paul A․ Krieger, a renowned educator and author, has pioneered the use of visual analogies in teaching human anatomy․ His work focuses on simplifying complex anatomical concepts through relatable comparisons, making learning engaging and effective․ Krieger’s innovative approach emphasizes creativity and interactivity, ensuring students grasp intricate structures and systems effortlessly․ His guidebooks, such as A Visual Analogy Guide to Human Anatomy, are widely acclaimed for their unique blend of visual aids and hands-on activities․ By bridging traditional textbooks with modern, visually driven tools, Krieger’s methods have revolutionized anatomy education, inspiring students and educators alike to embrace a more intuitive learning process․

Key Features of the Visual Analogy Guide

A Visual Analogy Guide to Human Anatomy offers a unique learning experience through its innovative use of visual comparisons․ The guide features detailed anatomical illustrations paired with relatable analogies, making complex structures easier to understand․ It includes interactive exercises such as labeling and coloring activities, which reinforce retention․ Additionally, the guide incorporates mnemonic devices and conceptual illustrations to deepen comprehension․ Designed for students in introductory anatomy courses, it is both affordable and comprehensive․ The integration of visual analogies, hands-on activities, and clear explanations makes it an essential resource for learners seeking a engaging and effective way to master human anatomy․

Learning Activities and Tools

The guide offers interactive quizzes, 3D models, and hands-on exercises like labeling and coloring to enhance engagement and retention in key anatomy learning effectively․

Labeling and Coloring Exercises

Labeling and coloring exercises are core components of the guide, offering students hands-on learning opportunities to engage with anatomical structures․ By identifying and coloring specific features, learners can better visualize and retain complex details․ These exercises complement visual analogies, reinforcing memory through active participation․ The guide provides black-and-white diagrams that students can personalize, fostering creativity while deepening understanding․ This tactile approach simplifies intricate concepts, making them more accessible and memorable․ Ideal for visual learners, these activities encourage self-directed study and mastery of human anatomy in an interactive and enjoyable manner, aligning with the guide’s mission to enhance traditional learning methods effectively․

Interactive Quizzes and 3D Models

Interactive quizzes and 3D models are dynamic tools within the guide, enhancing student engagement and understanding․ These features allow learners to test their knowledge through self-assessment quizzes, providing immediate feedback to reinforce learning․ 3D models offer immersive exploration of anatomical structures, enabling students to visualize complex systems from multiple angles․ By interacting with these models, learners can better grasp spatial relationships and functional connections․ These resources, combined with visual analogies, create a comprehensive and engaging learning experience․ They cater to diverse learning styles, making anatomy more accessible and fostering deeper comprehension for students at all levels of study․

Applications Beyond Education

Visual analogies extend beyond classrooms, aiding in branding, design, and medical research․ They simplify complex concepts, enhancing patient education and professional communication, making anatomy accessible to broader audiences․

Visual Analogies in Branding and Design

Visual analogies are increasingly used in branding and design to create compelling, relatable identities․ By drawing parallels between anatomical structures and brand elements, designers simplify complex ideas, making them memorable and engaging․ For instance, likening a brand’s core values to the skeletal system—symbolizing strength and support—can resonate deeply with audiences․ This approach not only enhances visual appeal but also communicates abstract concepts effectively․ Brands leverage these analogies to craft intuitive logos, marketing campaigns, and packaging, ensuring their messaging is both creative and accessible․ This innovative strategy bridges the gap between art and science, making design more impactful and meaningful․

Medical Research and Patient Education

Visual analogies are instrumental in medical research and patient education by elucidating complex biological concepts․ For example, the analogy of Muller glia cells acting as light guides in the retina can help explain how these cells direct light to photoreceptors, aiding in low-vision research․ In patient education, comparing surgical procedures to everyday activities, like likening cataract surgery to cleaning a camera lens, makes treatments more relatable․ Researchers use analogies to communicate findings effectively, while patients benefit from clearer explanations of their conditions and care options․ This method enhances understanding, fosters better doctor-patient communication, and empowers individuals to take an active role in their health management, making medical information more accessible and engaging․

Digital Integration and Future Trends

The integration of visual analogies into digital platforms, such as interactive eBooks and online resources, revolutionizes anatomy education․ Enhanced with 3D models and AR/VR technologies, these tools provide immersive learning experiences, enabling students to explore complex anatomical structures dynamically․ As digital adoption grows, resources like A Visual Analogy Guide to Human Anatomy are evolving to include interactive quizzes, self-assessment tools, and real-time visualizations, making anatomy education more accessible and engaging for future learners․

Interactive eBooks and Online Resources

The digital evolution of A Visual Analogy Guide to Human Anatomy enhances learning through interactive eBooks and online resources․ These platforms incorporate self-assessment quizzes, 3D anatomical models, and real-time visualizations, allowing students to engage with complex structures dynamically․ Digital tools enable users to label diagrams, explore layers of anatomy, and test their knowledge through interactive exercises․ Accessible on various devices, these resources provide flexibility for modern learners․ The integration of visual analogies with cutting-edge technology creates a comprehensive and immersive educational experience, making anatomy more accessible and engaging for students worldwide․

The Role of AR/VR in Anatomy Education

Augmented Reality (AR) and Virtual Reality (VR) are revolutionizing anatomy education by offering immersive, three-dimensional explorations of the human body․ These technologies enable students to interact with detailed anatomical models, visualizing complex structures from any angle․ AR enhances traditional learning by overlaying digital information onto real-world objects, while VR creates fully immersive environments for in-depth exploration․ Both technologies complement visual analogies by providing interactive, spatial understanding of anatomical relationships․ This innovative approach not only boosts engagement but also improves retention, making AR/VR invaluable tools for modern anatomy education․ Their integration with visual analogy guides promises to redefine how students learn and visualize human anatomy․

our father in latin pdf

The Pater Noster, or “Our Father,” is a sacred Christian prayer rooted in Latin tradition. Its historical and cultural significance spans centuries, serving as a cornerstone of liturgical worship. This prayer, attributed to Jesus, emphasizes divine reverence, forgiveness, and spiritual guidance, resonating deeply in religious and educational contexts. Its Latin version remains a vital part of Catholic heritage, often featured in PDF resources for easy access and study.

1.1 Historical Significance of the Lord’s Prayer

The Pater Noster, or “Lord’s Prayer,” holds profound historical significance as a divine teaching attributed to Jesus Christ. It is a cornerstone of Christian worship, tracing its roots to the New Testament. The prayer’s enduring influence is evident in its inclusion in ancient manuscripts and its role in shaping liturgical practices. Its translation into Latin solidified its place in Catholic tradition, becoming a unifying element across centuries. As a model for prayer, it reflects the essence of Christian spirituality and remains a vital part of religious heritage.

1.2 Importance of Latin in Religious Texts

Latin has historically served as the universal liturgical language of the Catholic Church, fostering unity across diverse cultures. Its use in religious texts like the Pater Noster ensures a consistent and sacred expression of faith. The Latin version of the prayer preserves its original spiritual intent and theological depth, making it a vital part of religious manuscripts and chants. Its enduring presence in PDF resources and Gregorian chants underscores its significance in maintaining traditions and inspiring devotion.

The Latin Text of the Pater Noster

The Latin version of the Pater Noster is a foundational religious text, offering a direct translation of the prayer as taught by Jesus. Its precise wording and structure have been preserved for centuries, making it a cornerstone of Christian liturgy. The Latin text is widely available in PDF formats, ensuring accessibility for spiritual and educational purposes, and remains a vital part of religious and cultural heritage.

2.1 Original Latin Version

The original Latin version of the Pater Noster is a timeless rendition of the prayer, preserving its sacred essence. It begins with Pater noster, qui es in caelis, emphasizing divine reverence. The text reflects early Christian liturgy, with precise theological phrasing. Available in various PDF documents, this version is cherished for its authenticity and historical significance. Its Latin form has been a cornerstone of religious practice, offering a profound connection to the prayer’s origins and enduring spiritual relevance across centuries.

2.2 English Translation and Comparison

The English translation of the Pater Noster faithfully captures the essence of the Latin original, maintaining its spiritual depth. Comparing both versions reveals the prayer’s universal appeal, with phrases like “Our Father, who art in heaven” mirroring Pater noster, qui es in caelis. Many PDF resources provide side-by-side texts, aiding study and reflection. This comparison highlights the prayer’s enduring theological and linguistic beauty, bridging ancient traditions with modern accessibility for global worshippers.

PDF Resources and Downloads

Pater Noster PDFs are widely available, offering the Latin prayer alongside English translations. These documents often include additional prayers like Ave Maria and Gloria Patri, serving as comprehensive resources for worship and study. Many PDFs are free to download, providing convenient access to this sacred text for personal reflection or liturgical use.

3.1 Free PDF Downloads of the Pater Noster

Free PDF downloads of the Pater Noster are readily available online, offering the Latin text of the Lord’s Prayer. These documents often include the prayer in full, sometimes repeated for easy reference. Many PDFs feature both Latin and English translations, making them accessible for bilingual study. Some versions include complementary prayers like the Ave Maria and Gloria Patri, creating a comprehensive resource for spiritual practice. Websites such as those linked to religious archives or educational platforms provide these downloads, ensuring wide accessibility for personal or communal worship.

3.2 Accompanying Prayers in Latin PDFs

Latin PDFs of the Pater Noster often include complementary prayers like the Ave Maria (Hail Mary) and Gloria Patri (Glory Be). These documents provide a holistic collection of essential Catholic prayers, frequently presented in both Latin and English. This bilingual format aids in language learning and spiritual practice, making the resources versatile for worship and education. The inclusion of multiple prayers in a single PDF creates a convenient tool for those seeking to deepen their devotion or study Latin liturgical texts.

Musical Interpretations

The Pater Noster has inspired numerous musical compositions, from Gregorian chants to modern arrangements by composers like Igor Stravinsky. These interpretations enrich its spiritual and cultural significance.

4.1 Gregorian Chant Versions

The Pater Noster is prominently featured in Gregorian chant traditions, with versions sourced from ancient manuscripts like the Graduale Romanum. These chants, often performed during liturgical services, reflect the prayer’s solemnity and spiritual depth. Composers such as Igor Stravinsky have also adapted the Latin text into choral arrangements, blending tradition with modern musical expression. The Gregorian interpretations remain a cornerstone of sacred music, preserving the prayer’s historical and cultural essence for generations.

4.2 Modern Musical Arrangements

Modern composers have reimagined the Pater Noster in diverse musical styles, blending tradition with contemporary influences. Artists like Igor Stravinsky and Knut Nystedt have created choral and orchestral arrangements, infusing the Latin text with fresh harmonic and rhythmic interpretations. These pieces, often available as PDF downloads, showcase the prayer’s timeless relevance. From minimalist settings to grand symphonic works, modern arrangements continue to inspire spiritual reflection while appealing to a broad audience, ensuring the prayer’s enduring presence in both liturgical and cultural contexts.

Historical and Cultural Context

The Pater Noster holds profound historical and cultural significance as a foundational Christian prayer. Its Latin version has inspired art, music, and literature, reflecting its enduring spiritual influence.

5.1 Development of the Prayer in Latin

The Pater Noster in Latin emerged as a liturgical staple, preserving its theological depth. Early Christian communities adapted the prayer into Latin, ensuring its accessibility and endurance. Its structure and phrasing were refined over centuries, aligning with liturgical practices. The Latin version became a unifying element in Christian worship, transcending linguistic barriers. This evolution underscores the prayer’s adaptability and its role in shaping religious identity. Available in PDF formats, it remains a vital resource for spiritual and educational purposes.

5.2 Iconography and Art Inspired by the Pater Noster

The Pater Noster has inspired rich iconography, reflecting its spiritual essence. Artworks often depict celestial themes, emphasizing divine elements like heaven and God’s kingdom. Russian iconography from the 17th century, such as the Pater Noster Cycle, illustrates biblical scenes tied to the prayer. These visual interpretations, found in PDF resources, showcase the prayer’s enduring influence on religious art, blending theology with cultural expression across centuries and traditions.

Educational and Religious Uses

The Pater Noster is widely used in liturgical services and educational settings, teaching Latin to students. It is also included in PDF resources with accompanying prayers, fostering spiritual and linguistic connections.

6.1 Role in Liturgical Services

The Pater Noster holds a central role in liturgical services worldwide. Recited in Latin, it unifies congregations in a shared spiritual tradition. Its inclusion in liturgical rituals, such as the Mass, underscores its enduring relevance. Many churches provide PDF versions of the prayer for worshipers, ensuring accessibility and uniformity. This practice not only preserves the prayer’s historical roots but also enriches the spiritual experience of the faithful, connecting them to centuries of devotional practice.

6.2 Teaching the Prayer in Latin

Teaching the Pater Noster in Latin is essential for preserving its historical and spiritual significance. Educational resources, including PDF guides, provide Latin texts with translations and pronunciation aids. These materials help learners grasp the prayer’s structure, vocabulary, and grammatical nuances. By studying the Latin version, students connect with centuries of religious tradition, fostering a deeper understanding of its theological and cultural importance. This practice is widely adopted in classrooms and religious instruction, ensuring the prayer’s legacy endures for future generations.

Linguistic Analysis

The Pater Noster in Latin is a masterclass in concise, sacred language. Its structure and syntax reflect the prayer’s enduring theological depth, preserved through centuries of liturgical use.

7.1 Grammar and Syntax in the Latin Version

The Latin Pater Noster exhibits a structured grammar and syntax, reflecting its sacred origins. The prayer begins with the vocative case (Pater noster), addressing God directly. The use of the imperative mood (sanctificetur, adveniat, fiat) emphasizes divine commands. Simple and precise, the sentence structure conveys profound theological concepts, such as forgiveness (dimítte nobis débita nostra) and divine will (fiat volúntas túa). This clarity ensures the prayer’s universality and enduring relevance in liturgical and educational contexts.

7.2 Transliteration and Pronunciation Guide

The Latin Pater Noster is often transliterated to aid pronunciation for non-Latin speakers. Each syllable is carefully rendered to preserve the prayer’s liturgical integrity. For example, Pater noster, qui es in caelis is transliterated as “Pah-ter noh-strer, kwee es in chay-lees.” This system ensures clarity and devotion in recitation.

Classical Latin pronunciation differs slightly from ecclesiastical Latin. Resources like PDF guides and audio recordings provide detailed pronunciation keys, helping learners master the prayer. Such tools are invaluable for both liturgical and educational settings, ensuring the Pater Noster is recited with reverence and accuracy worldwide.

Comparative Analysis

A comparative analysis of the Pater Noster reveals variations in Latin manuscripts and translations. These differences provide insights into the prayer’s evolution and cultural adaptation across centuries.

8.1 Differences in Various Latin Manuscripts

The Pater Noster exhibits slight variations across Latin manuscripts, reflecting linguistic and regional influences. Some texts include minor differences in wording or structure, such as verb endings or phrase order. Punctuation and capitalization also vary, impacting interpretation. These differences highlight the prayer’s evolution over centuries and its adaptation across diverse liturgical traditions. Scholars study these variations to trace the prayer’s historical development and understand its theological nuances in different cultural contexts.

8.2 Evolution Across Different Centuries

The Pater Noster has undergone a fascinating evolution over centuries, adapting to linguistic and liturgical changes. From its origins in early Christianity to its widespread use in medieval liturgy, the prayer’s Latin text remained relatively stable. The Renaissance and Enlightenment periods saw increased scholarly interest, while modern times introduced digital formats like PDFs for broader accessibility. This evolution reflects the prayer’s enduring spiritual significance and its adaptation to cultural and technological advancements across the ages.

Modern Applications

The Pater Noster is widely used in digital and educational contexts, with PDF downloads offering easy access to its Latin text and translations. It remains a vital worship tool, integrating seamlessly into modern religious practices and educational curricula, ensuring its relevance in contemporary society.

9.1 Digital Access to Pater Noster PDFs

The Pater Noster is widely available in digital formats, with numerous PDF resources offering the Latin text alongside English translations. These documents, accessible via platforms like Google Drive and Yandex, provide bilingual versions, enabling easy study and comparison. Many PDFs include additional prayers, such as the Ave Maria and Gloria Patri, making them comprehensive tools for religious and educational purposes. They are often free to download, ensuring global accessibility for learners and worshippers alike.

9.2 Contemporary Uses in Worship and Education

The Pater Noster remains a vital component of modern worship, often recited in Latin during liturgical services to maintain its traditional essence. Its use extends to educational settings, where it is taught to students learning Latin or studying religious texts. The prayer’s universal message of divine connection and forgiveness continues to inspire contemporary adaptations in music and art. Its enduring relevance ensures its place in both spiritual practices and academic curricula, bridging ancient traditions with modern applications.

The Pater Noster, in its timeless elegance, remains a universal symbol of faith and devotion. Its Latin roots inspire spiritual reflection and linguistic study, transcending centuries.

10.1 Summary of Key Points

The Pater Noster holds profound religious and cultural significance. Available in PDF formats, it provides easy access to its Latin text, fostering spiritual and educational use. Its historical roots, linguistic beauty, and universal appeal make it a cornerstone of worship. The prayer’s themes of divine reverence, forgiveness, and guidance resonate across generations, ensuring its enduring relevance in both liturgical and personal devotion.

10.2 Final Thoughts on the Pater Noster

The Pater Noster remains a timeless and universal prayer, deeply rooted in Christian tradition. Its Latin form preserves its historical and liturgical essence, while PDF resources ensure its accessibility for modern worship and study. The prayer’s themes of forgiveness, divine guidance, and humility continue to inspire spiritual growth. As a bridge between past and present, the Pater Noster endures as a powerful expression of faith, connecting believers across generations and cultures in reverence and devotion.

sunbeam iron model gcbsm 423 disassembly instructions

Welcome to our guide on disassembling the Sunbeam Iron Model GCBSM 423. This guide provides detailed‚ easy-to-follow instructions for safely maintaining or repairing your iron.

Safety Precautions Before Disassembly

Before starting the disassembly of your Sunbeam Iron Model GCBSM 423‚ ensure your safety and the integrity of the appliance. Always unplug the iron from the electrical outlet to prevent any risk of electric shock. Avoid disassembling the iron if it has been damaged‚ dropped‚ or has a frayed cord‚ as this could lead to further issues or hazards. Never attempt to disassemble the iron yourself if you are unsure about the process‚ as incorrect reassembly can cause malfunctions or safety risks. For complex repairs‚ consult an authorized Sunbeam service center. Additionally‚ keep the iron out of reach of children and avoid leaving it unattended while plugged in. Always follow the manufacturer’s guidelines and take necessary precautions to ensure a safe working environment.

Inspecting and Preparing the Iron for Disassembly

Begin by unplugging the iron and allowing it to cool completely. Inspect the cord for any damage‚ fraying‚ or exposed wires‚ ensuring it’s safe to handle during disassembly.

Step-by-Step Cord Inspection and Preparation

Start by carefully examining the cord for visible damage‚ such as cracks‚ fraying‚ or exposed wiring. If any damage is found‚ replacement is necessary. Next‚ unplug the iron and ensure it is cool. For the new cord‚ strip the wire ends as needed‚ following the replacement cord’s instructions. Ensure sufficient wire length for secure connections. This step is crucial for safety and proper functionality. Always refer to the Sunbeam Iron Model GCBSM 423 manual for specific guidelines on handling electrical components. Proper preparation now prevents potential issues during reassembly and ensures the iron operates safely and efficiently.

Disassembling the Sunbeam Iron Model GCBSM 423

Begin by unplugging the iron and allowing it to cool completely. Carefully flip the iron over to access the screws securing the bottom plate. Remove these screws to expose internal components for further inspection or repair.

Removing the Bottom Plate and Accessing Internal Components

To remove the bottom plate of the Sunbeam Iron Model GCBSM 423‚ start by ensuring the iron is unplugged and completely cool. Flip the iron over to access the screws securing the bottom plate. Use a Phillips screwdriver to remove these screws carefully. Once the screws are removed‚ gently pry the bottom plate away from the main unit. Be cautious‚ as some components may still be connected internally.

With the bottom plate removed‚ you will gain access to the internal components‚ such as the heating element‚ wiring‚ and steam system. Use this opportunity to inspect for any visible damage or wear. Take note of the layout and connections to ensure proper reassembly later. If you plan to replace parts‚ now is the time to install new components. Work in a well-lit‚ static-free environment to prevent damage to sensitive electrical parts.

Disconnecting the Old Cord and Identifying Connections

Once the bottom plate is removed‚ locate the old cord connected to the iron’s internal components. Gently pull the cord to access the wiring and connectors. Use a screwdriver to remove any screws or clips securing the cord to the iron’s chassis; Carefully disconnect the wires from their respective terminals‚ taking note of their positions for later reference.

Identify the connections to ensure proper reinstallation of the new cord. The old cord may be attached to the heating element‚ thermostat‚ or other internal systems. Use a multimeter if necessary to verify live wires and ensure no power is present. After disconnecting‚ set the old cord aside and prepare the area for installing the new one. This step is critical for ensuring safety and proper functionality during reassembly.

Replacing the Cord and Reassembling the Iron

Replacing the cord involves installing a new one securely and reassembling the iron to restore functionality and safety. Ensure all connections are secure and the iron operates correctly.

Installing the New Cord and Securing Connections

Begin by preparing the new cord for installation. If necessary‚ strip the ends of the wires to ensure proper connections. Refer to the Sunbeam Iron Model GCBSM 423 manual for specific wiring instructions. Locate the terminal points inside the iron where the old cord was connected. Carefully attach the new cord to the correct terminals‚ ensuring secure connections. Tighten any screws or clips to hold the cord firmly in place. Double-check all connections to avoid loose wires‚ which could lead to safety hazards or malfunction. Once the cord is installed‚ route it through the iron’s cord clamp or retaining mechanism to prevent it from coming loose during use. Finally‚ test the iron by plugging it in and verifying that it operates correctly. Proper installation ensures safety and optimal performance of the appliance.

Reattaching the Bottom Plate and Finalizing Assembly

After installing the new cord and securing all connections‚ reattach the bottom plate carefully. Align the plate with the screw holes on the iron’s base and insert the screws. Tighten them firmly in a star pattern to ensure even pressure and avoid warping the plate. Once the bottom plate is securely in place‚ inspect the iron for any visible gaps or misalignments. Plug in the iron and test its functionality by setting it to a low heat setting for a few minutes. Ensure the cord is properly routed through any provided clamps or retainers to prevent it from being pinched or damaged. Finally‚ unplug the iron and allow it to cool before storing or using it. Proper reassembly ensures the iron operates safely and efficiently‚ maintaining its performance and longevity.

Troubleshooting Common Issues During Disassembly

Damaged or stuck components may hinder disassembly. Inspect for frayed cords or rusted screws. If parts are stubborn‚ consult the manual or seek professional assistance to avoid further damage.

Identifying and Resolving Potential Problems

During disassembly‚ you may encounter issues like stuck screws or damaged components. First‚ inspect the cord for fraying or exposed wires‚ which may require replacement. If screws are rusted‚ apply a rust remover and let it sit before attempting removal. Be cautious of internal electrical connections to avoid short circuits. If components are stubborn‚ do not force them‚ as this could cause further damage. Instead‚ refer to the Sunbeam Iron Model GCBSM 423 manual for specific guidance. If you are unsure about any step‚ consider consulting a professional to ensure safe and effective repairs. Proper identification and resolution of these issues will help maintain the iron’s functionality and safety.

Maintenance Tips After Disassembly and Reassembly

Regularly clean the iron’s soleplate and steam vents to prevent mineral buildup. Store the iron in a dry place to avoid rust. Always unplug it when not in use to ensure safety and longevity.

Ensuring Optimal Performance and Longevity

To maintain your Sunbeam Iron Model GCBSM 423’s performance‚ regularly descale it to remove mineral deposits‚ especially if you use tap water. This prevents clogs in the steam vents and ensures even heat distribution. After disassembly and reassembly‚ inspect all connections for tightness and integrity. Store the iron in a cool‚ dry place to prevent rust and electrical issues. Avoid using abrasive cleaners on the soleplate‚ as they can damage the coating. Instead‚ use a damp cloth to wipe away residue. Always follow the manufacturer’s guidelines for temperature settings and fabric types to avoid overheating. By adhering to these maintenance tips‚ you can extend the lifespan of your iron and keep it functioning at its best.

committal service pdf

The committal service is a solemn ceremony marking the final farewell. Often held at gravesides or crematoriums, it provides closure. The service’s PDF outlines the order, prayers, and readings for a respectful tribute.

1.1 Definition and Purpose

A committal service is a formal ceremony where the deceased is entrusted to their final resting place. It serves as a meaningful ritual, offering closure and comfort to mourners. The service, often outlined in a PDF, includes prayers, readings, and symbolic acts, ensuring dignity and respect. Its purpose is to honor the deceased and provide a structured farewell, guiding participants through the emotional process of letting go.

1.2 Historical Background

The committal service has deep roots in religious and cultural traditions, symbolizing the transition of the soul to eternal rest. Historically, it was integral to funeral rites, particularly in Christian practices, where prayers and readings emphasized divine mercy; Over time, the service evolved, incorporating varied rituals while retaining its core purpose of honoring the deceased. The PDF format has modernized access, preserving its historical significance for contemporary use.

Structure of a Committal Service

The committal service structure includes an order of events, prayers, and readings, providing a respectful and organized farewell. The PDF details this sequence for a dignified tribute.

2.1 Order of Events

The committal service follows a structured order, typically beginning with a procession, followed by opening prayers, scripture readings, and hymns. The service includes a committal prayer, the placement of the coffin or ashes, and a final blessing. The Queen’s committal service, for example, featured a procession, hymns, and the breaking of the Wand of Office, symbolizing the end of her reign. This sequence ensures dignity and closure.

2.2 Prayers and Readings

The committal service incorporates meaningful prayers and readings, often drawn from religious texts, to honor the deceased. These include the Lord’s Prayer, Psalms, and passages like Revelation 1:5-6. The service may also feature personalized selections, such as favorite hymns or poems, to reflect the individual’s life. Prayers are typically led by the officiant, emphasizing comfort for mourners and the soul’s peaceful transition, as seen in Queen Elizabeth’s service at Windsor.

2.3 Role of the Officiant

The officiant plays a central role in the committal service, leading prayers, readings, and eulogies. They provide spiritual guidance, ensuring the service honors the deceased and offers comfort to mourners. In Queen Elizabeth’s committal, the Dean of Windsor conducted the service, emphasizing dignity and respect. The officiant coordinates the ceremony, ensuring all elements flow smoothly, while offering blessings and final words of farewell.

Cultural and Religious Variations

Cultural and religious variations greatly influence the committal service. Christian traditions emphasize prayers and hymns, while non-Christian practices incorporate diverse rituals, reflecting the deceased’s heritage and beliefs.

3.1 Christian Traditions

The Christian committal service is a solemn ceremony rooted in faith, typically held at gravesides or crematoriums. It often includes specific prayers, hymns, and readings from the Bible, such as Revelation 1:5-6, to honor the deceased. The minister leads the congregation in committal prayers, emphasizing the belief in eternal life. This tradition provides comfort and closure to mourners, offering a final farewell that aligns with Christian beliefs and practices.

3.2 Non-Christian Practices

Non-Christian committal services vary widely, reflecting diverse cultural and religious traditions. Many involve specific rituals, such as Buddhist chants or Hindu ceremonies, to honor the deceased. Some cultures incorporate symbolic acts, like scattering ashes in sacred locations, to promote spiritual harmony. These practices often emphasize connection with nature or ancestors, providing comfort and closure for mourners while respecting the deceased’s beliefs and heritage.

The Significance of the Committal Service PDF

The committal service PDF is a vital resource, offering structure and guidance for the ceremony. It ensures accessibility to prayers, readings, and order of events, aiding in respectful planning and participation.

4.1 Availability and Access

The committal service PDF is widely accessible, often available for download on official websites or through funeral directors. It provides a convenient digital format, ensuring ease of access for planning and participation. Many ceremonies, like Queen Elizabeth’s, offer the PDF online, allowing mourners to follow the service respectfully. This accessibility ensures all participants can prepare and engage meaningfully in the final farewell.

4.2 Content and Format

The committal service PDF typically includes prayers, hymns, and readings, providing a structured format for the ceremony. It outlines the order of events, ensuring a dignified and meaningful tribute. For instance, Queen Elizabeth’s service included specific hymns like “O Taste and See” and featured the Choir of St George’s Chapel. The PDF often reflects the life of the deceased, offering comfort and closure to mourners while maintaining traditional or personalized elements.

Notable Examples

Queen Elizabeth’s committal service at Windsor Castle exemplified dignity and tradition, featuring hymns and the Choir of St George’s Chapel, setting a standard for such ceremonies.

5.1 Queen Elizabeth’s Committal Service

Queen Elizabeth’s committal service, held at St George’s Chapel, Windsor Castle, was a poignant farewell. The service, attended by royal family and close guests, featured prayers led by the Dean of Windsor and the Rector of Sandringham. The Choir of St George’s Chapel performed under James Vivian, with organ music by Mr. Bond. The service concluded with the King breaking the Wand of Office, a symbolic gesture marking the end of her reign. The Order of Service PDF was shared publicly, detailing the structure and tributes.

5.2 Other Prominent Figures

Prominent figures like Mele Fisiifelila Taufa and Ms. Rambo Swatzenegger have had committal services reflecting their legacies. Taufa’s service at Frenchs Forest Cemetery included a detailed order of events and readings, while Ms. Swatzenegger’s service featured personalized elements. These services, often documented in PDF programs, highlight the importance of honoring their lives with dignity and respect, ensuring their memories endure for loved ones and admirers alike.

Symbolism and Rituals

The committal service incorporates symbolic acts like the breaking of the Wand of Office, signifying the end of earthly duties. Rituals honor the deceased’s journey.

6.1 The Breaking of the Wand of Office

The breaking of the Wand of Office is a poignant ritual during the committal service, symbolizing the end of earthly duties. This act, historically performed for British monarchs, signifies the transfer of authority and marks the final farewell. During Queen Elizabeth’s service, the wand was broken, and the Grenadier Guards’ Queen’s Company Badge was placed in her coffin, honoring her lifelong service.

6.2 Other Symbols and Gestures

Beyond the wand, flowers and wreaths are often placed to honor the deceased, symbolizing love and remembrance. The Queen’s Company Badge was laid in Elizabeth’s coffin, representing her military ties. Hymns like “All Creatures of Our God and King” are sung, while the choir’s music adds solemnity. These symbols and gestures collectively honor the deceased, offering comfort and closure to mourners during the committal service.

Preparation and Planning

Preparation involves selecting a venue, date, and officiant. Coordination with funeral directors ensures smooth execution, honoring the deceased’s wishes and providing comfort to grieving families.

7.1 Involvement of Family and Friends

Family and friends play a crucial role in planning the committal service, often contributing to readings, eulogies, or personal anecdotes. Their involvement ensures the service reflects the deceased’s personality and legacy, offering emotional support to loved ones. Coordination with the officiant and funeral directors helps integrate these personal elements seamlessly, creating a meaningful and personalized farewell ceremony.

7.2 Coordination with Funeral Directors

Funeral directors coordinate logistics, ensuring the committal service aligns with the family’s wishes. They manage venue setup, order of events, and necessary documentation. Directors also assist in preparing the service program, including prayers and readings. Their expertise ensures a smooth process, allowing families to focus on paying their respects while honoring the deceased with dignity and respect.

Music and Hymns

Music and hymns play a vital role in committal services, offering comfort and reflection. Traditional choices like hymns and classical pieces are often selected, while personalized selections honor the deceased’s preferences, creating a meaningful tribute.

8.1 Traditional Choices

Traditional music and hymns are often chosen for their solemnity and comforting familiarity. Pieces like “Abide with Me” and “The Lord is My Shepherd” are common, offering solace and reflection; Classical compositions, such as Chopin’s “Funeral March,” may also be included to create a dignified atmosphere. These selections provide a sense of continuity and shared experience, helping mourners connect with their emotions during the committal service.

8.2 Personalized Selections

Personalized music and hymns add a deeply emotional and unique dimension to the committal service. Families often choose songs that held special meaning to the deceased, reflecting their personality or life journey. For instance, Queen Elizabeth’s service featured hymns selected by the royal family. This personal touch creates a heartfelt farewell, offering comfort and a sense of connection to the deceased’s legacy, making the service truly memorable.

Final Thoughts and Reflections

The committal service offers a poignant moment for reflection, allowing loved ones to honor the deceased and find solace in shared memories, fostering emotional closure and healing.

9.1 The Emotional Impact

The committal service is a poignant moment, evoking profound emotions as loved ones confront the finality of loss. It provides a structured space for grief, offering comfort through shared rituals and prayers. The service’s emotional weight helps mourners process their feelings, fostering a balance between sorrow and celebration of life, while the PDF guide ensures a meaningful and personalized tribute to the deceased.

9.2 Closure and Healing

The committal service offers a sense of closure, helping mourners transition from grief to healing. It provides a structured ritual to honor the deceased, allowing loved ones to say goodbye. The service’s PDF guide ensures a meaningful and personalized ceremony, fostering emotional comfort. This final act of farewell enables families to begin the healing process, finding solace in shared memories and collective support.

shark rotator professional user manual

Welcome to the Shark Rotator Professional User Manual! This guide provides essential information to help you understand and optimize your vacuum’s performance‚ features‚ and maintenance․ Reading this manual ensures safe and effective use of your Shark Rotator Professional‚ maximizing its cleaning capabilities and longevity․ Discover how to unlock its full potential with detailed instructions and expert tips․

1․1 Overview of the Shark Rotator Professional

The Shark Rotator Professional is a versatile and powerful upright vacuum designed for efficient cleaning․ It features advanced technologies like Lift-Away‚ enabling above-floor cleaning‚ and is equipped with strong suction power and specialized tools for pet hair and embedded dirt․ Lightweight and maneuverable‚ it ensures a seamless cleaning experience across various surfaces․

1․2 Importance of Reading the User Manual

Reading the Shark Rotator Professional User Manual is crucial for understanding its features‚ operation‚ and maintenance․ It ensures safe usage‚ highlights key functions‚ and provides troubleshooting tips‚ maximizing performance and longevity․ Familiarizing yourself with the manual helps you unlock the vacuum’s full potential and maintain its efficiency for years to come effectively․

Understanding Your Shark Rotator Professional Model

Understanding your Shark Rotator Professional model is key to unlocking its features and capabilities․ Identify your model number to access specific guides‚ ensuring proper use and maintenance tailored to your device․

2․1 Identifying Your Model Number

To identify your Shark Rotator Professional model number‚ check the rating label on the back or bottom of the main unit․ It is usually located near the barcode or in the manual provided with your vacuum․ This number is essential for accessing specific guides‚ troubleshooting‚ and ensuring compatibility with accessories․ Always verify it before reaching out for support or ordering parts․

2․2 Key Features and Components

Your Shark Rotator Professional features advanced swivel steering for easy maneuverability‚ a powerful motor for strong suction‚ and the innovative Lift-Away technology․ It includes a detachable pod for above-floor cleaning‚ various attachments like the pet hair tool‚ and a large-capacity dustbin․ These components work together to provide a versatile and efficient cleaning experience across different surfaces and spaces․

Technical Specifications of the Shark Rotator Professional

The Shark Rotator Professional boasts a powerful motor with strong suction capabilities‚ lightweight design‚ and advanced filtration system․ It features a spacious dustbin‚ ergonomic handle‚ and innovative Lift-Away technology for versatile cleaning․ Technical details ensure optimal performance across various surfaces and spaces․

3․1 Motor Power and Suction Capabilities

The Shark Rotator Professional features a powerful motor designed to deliver strong suction‚ capturing dust‚ dirt‚ and allergens efficiently․ Its advanced suction capabilities ensure thorough cleaning‚ tackling various surfaces and embedded debris with ease‚ while the motor’s design enhances airflow for consistent performance․

3․2 Weight and Dimensions

The Shark Rotator Professional is designed for portability‚ weighing approximately 15․5 pounds‚ making it lightweight and easy to maneuver․ Its compact dimensions ensure it fits seamlessly into tight spaces‚ allowing for effortless cleaning of various areas without strain‚ while maintaining robust performance and functionality․

3․3 Dustbin Capacity and Filtration System

The Shark Rotator Professional features a spacious 0․88-quart dustbin‚ allowing extended cleaning sessions without frequent emptying․ Equipped with an advanced filtration system‚ it captures 99․9% of dust‚ dander‚ and allergens as small as 0․3 microns‚ ensuring cleaner air and a healthier environment‚ while maintaining strong suction power for efficient cleaning performance․

3․4 Special Features (e․g․‚ Lift-Away Technology‚ Pet Hair Removal)

The Shark Rotator Professional excels with its innovative features‚ including the Lift-Away Technology‚ allowing easy above-floor cleaning․ It also includes specialized pet hair removal tools‚ effortlessly tackling embedded fur on carpets and upholstery‚ ensuring a thorough and efficient cleaning experience across various surfaces and pet owners’ needs․

Safety Precautions and Electrical Information

Unplug the vacuum when not in use or before servicing․ Avoid damaged cords or plugs․ Follow electrical safety guidelines to prevent hazards and ensure safe operation․

4․1 General Safety Guidelines

Always read the manual before use․ Ensure the vacuum is used only for its intended purpose․ Avoid vacuuming water or hot ashes․ Keep children and pets away during operation․ Regularly inspect the cord and plug for damage․ Never vacuum near open flames or sparks to prevent potential hazards․ Ensure proper ventilation while cleaning․

4․2 Electrical Safety Tips

Always unplug the vacuum before servicing or cleaning․ Avoid using damaged cords or plugs‚ as they can cause electric shock․ Ensure the vacuum is polarized correctly to reduce shock risks․ Never expose the appliance to water or use it in damp environments․ Store the vacuum in a dry‚ cool place when not in use to maintain electrical safety and prevent hazards․

4․3 Proper Storage and Handling

Store your Shark Rotator Professional in a dry‚ cool place away from direct sunlight․ Ensure all attachments are securely stored to avoid damage․ Handle the vacuum with care to prevent drops and scratches․ Regularly check for blockages and ensure the dustbin is empty before storage to maintain performance and longevity of your appliance․

Assembly and Initial Setup

Begin by unboxing and inventorying all parts․ Follow the step-by-step guide to assemble your Shark Rotator Professional․ Ensure all components are securely attached․ Double-check connections for proper alignment and safety before first use to guarantee optimal performance and longevity of your appliance․

5․1 Unboxing and Inventory of Parts

Begin by carefully opening the box and laying out all components․ Check for the main unit‚ wand‚ detachable canister‚ and various attachments․ Refer to the included parts diagram to ensure no items are missing․ This step ensures everything is accounted for before assembly begins․

5․2 Step-by-Step Assembly Instructions

Attach the wand to the main unit by aligning the connectors and snapping it into place․ Next‚ secure the detachable canister to the wand‚ ensuring it clicks firmly․ Check all connections for proper alignment․ Finally‚ plug in the vacuum and test its operation to confirm everything is assembled correctly and functioning as intended․

5․3 Pre-Use Checks and Adjustments

Before first use‚ ensure all parts are securely assembled․ Check for blockages in the wand‚ hose‚ or vacuum inlet․ Verify the electrical connection is safe and undamaged․ Inspect the filter and empty the dustbin if necessary․ Familiarize yourself with the controls and settings․ Always review the manual for specific model adjustments to ensure optimal performance and safety․

Operating the Shark Rotator Professional

Operating the Shark Rotator Professional involves turning it on‚ adjusting settings‚ and utilizing various modes․ Efficiently clean surfaces by adapting to different cleaning needs‚ ensuring safety and optimal performance․

6․1 Turning On and Basic Operation

To begin using your Shark Rotator Professional‚ plug in the device and press the power button located on the handle․ Start with the highest suction setting for initial cleaning․ For basic operation‚ glide the vacuum across surfaces‚ adjusting settings as needed․ Regularly empty the dustbin to maintain performance and ensure optimal results․

6․2 Using Different Modes (Upright‚ Lift-Away‚ etc․)

Switch between modes effortlessly by pressing the release latch․ Use upright mode for carpets and hard floors‚ while Lift-Away mode allows detached pod cleaning of stairs and upholstery․ For above-floor tasks‚ detach the pod and attach desired accessories․ Transition smoothly between modes to tackle various cleaning challenges with precision and efficiency․

6․3 Maneuvering and Advanced Steering Features

The Shark Rotator Professional features advanced swivel steering‚ allowing smooth navigation around furniture and tight spaces․ Its lightweight design enhances maneuverability‚ making it easy to clean various surfaces efficiently․ The ergonomic handle provides comfortable control‚ ensuring precise movement and effortless cleaning experiences․

Maintenance and Troubleshooting

Regularly clean filters and empty the dustbin to maintain performance․ Check for blockages and ensure proper assembly․ For issues‚ reset the vacuum or consult the troubleshooting guide for solutions․

7․1 Regular Maintenance Tasks

Regular maintenance ensures optimal performance․ Empty the dustbin after each use and clean or replace filters as recommended․ Check for blockages in hoses and suction paths․ Remove tangled hair from the brush roll and wipe down surfaces․ Refer to the manual for specific cleaning instructions and schedules to maintain efficiency and longevity․

7․2 Common Issues and Solutions

Common issues include reduced suction‚ clogged filters‚ or the vacuum not turning on․ Check for blockages in hoses and suction paths․ Clean or replace filters as needed․ Ensure the vacuum is properly assembled and plugged in․ For persistent issues‚ refer to the troubleshooting guide in the manual for detailed solutions and repair steps․

7․3 Resetting the Vacuum (if applicable)

To reset your Shark Rotator Professional‚ first ensure all parts are correctly assembled and free from blockages․ Clean or replace filters as needed․ Check for any obstructions in the suction path and empty the dustbin․ If issues persist‚ refer to the manual for specific reset instructions or troubleshooting steps to restore functionality․

Attachments and Accessories

Your Shark Rotator Professional comes with essential attachments like a pet hair brush and crevice tool for versatile cleaning․ Optional accessories enhance functionality‚ ensuring optimal performance across different surfaces and cleaning tasks․ Properly use and maintain these tools to extend their lifespan and keep your vacuum operating at its best․

8․1 Included Attachments and Their Uses

The Shark Rotator Professional comes with a variety of attachments to enhance cleaning efficiency․ These include a pet hair brush for removing embedded fur‚ a crevice tool for tight spaces‚ and an upholstery tool for furniture․ Each attachment is designed for specific tasks‚ ensuring comprehensive cleaning across different surfaces and areas․ Proper use of these tools maximizes your vacuum’s performance and versatility․

8․2 Optional Accessories for Enhanced Functionality

Optional accessories like the car detail kit‚ hardwood floor buffer‚ and extended reach wand enhance cleaning versatility․ A multi-angle brush and additional filters can also be purchased to tackle specific cleaning tasks‚ ensuring your Shark Rotator Professional adapts to all your cleaning needs for optimal performance and convenience․

8․3 Proper Use and Care of Attachments

Use attachments as described in the manual for optimal performance․ Regularly clean and inspect them for blockages․ Empty dustbins after use and store attachments securely․ Avoid using damaged parts and refer to the manual for specific care instructions to maintain functionality and longevity of your Shark Rotator Professional attachments․

Warranty and Customer Support

Your Shark Rotator Professional is backed by a comprehensive warranty and dedicated customer support․ Register your product for extended coverage and access troubleshooting resources‚ ensuring optimal performance and assistance when needed․

9․1 Warranty Period and Coverage

The Shark Rotator Professional is covered by a limited warranty‚ typically spanning 5-7 years‚ depending on the model․ This warranty covers defective parts and labor‚ ensuring your investment is protected against manufacturing defects․ Refer to your manual or Shark’s official website for precise terms and conditions to understand what is included in your coverage․

9․2 Contacting Shark Customer Service

For assistance‚ contact Shark’s customer service via phone‚ email‚ or their official website․ Have your model number ready for efficient support․ Their team is available to address questions‚ warranty claims‚ and technical issues‚ ensuring a smooth experience with your Shark Rotator Professional․

9․3 Online Resources and FAQs

Visit the official Shark website for extensive online resources‚ including FAQs‚ troubleshooting guides‚ and user manuals․ Explore community forums for tips and solutions from other users‚ ensuring you maximize your Shark Rotator Professional’s performance and resolve any issues efficiently․

Final Tips for Optimal Performance

Regularly empty the dustbin‚ clean filters‚ and use the correct mode for surfaces․ Schedule maintenance and store properly to ensure longevity and peak performance of your Shark Rotator Professional․

10․1 Best Practices for Cleaning Different Surfaces

Adjust settings for carpets‚ hard floors‚ and upholstery․ Use the Lift-Away feature for stairs and tight spaces․ Regularly clean filters and empty the dustbin to maintain suction power․ Optimize pet hair removal with specialized tools and ensure proper pre-use checks for enhanced cleaning efficiency across all surfaces․

10․2 Maximizing Suction Power and Efficiency

Empty the dustbin regularly and clean filters to ensure optimal airflow․ Use the correct settings for different surfaces and avoid blockages in hoses․ Proper assembly and maintenance of parts like the motor and suction path also enhance performance‚ ensuring your Shark Rotator Professional delivers consistent and powerful cleaning results every time․

10․3 Extending the Lifespan of Your Shark Rotator Professional

Regularly maintain your Shark Rotator Professional by cleaning filters‚ checking for blockages‚ and replacing worn parts․ Store it in a dry‚ cool place and avoid using damaged cords․ Following these care tips ensures your vacuum remains efficient and durable‚ providing years of reliable service and superior cleaning performance․

color guide blood collection tubes

Blood collection tubes are color-coded to ensure accurate sample collection for specific laboratory tests; Each color represents unique additives or purposes, guiding healthcare professionals in selecting the right tube for various diagnostic procedures. Understanding this system is crucial for maintaining sample integrity and ensuring reliable test results. The color coding simplifies the process, reducing errors and enhancing efficiency in clinical settings. Proper tube selection is essential for patient safety and accurate diagnostic outcomes. This guide provides a detailed overview of the color coding system, its significance, and applications in phlebotomy.

Importance of Tube Colors in Phlebotomy

The color coding of blood collection tubes is critical for ensuring accurate and reliable laboratory test results. Each tube color corresponds to specific additives or no additives, which determine whether blood should clot or remain liquid. Proper tube selection prevents cross-contamination of samples and ensures the correct test is performed. This system minimizes errors, enhances patient safety, and streamlines the diagnostic process. Understanding tube colors is essential for phlebotomists to collect samples correctly, maintaining the integrity of blood specimens for precise analysis and treatment decisions.

Red Blood Collection Tubes

Red blood collection tubes are used for collecting blood samples for various tests, including blood chemistry, serology, and blood bank studies. They contain no additives, allowing blood to clot naturally for serum separation.

Uses and Additives

Red blood collection tubes are primarily used for blood chemistry tests, serology, and blood bank studies. They contain no additives, allowing the blood to clot naturally. This process enables the separation of serum, which is essential for various diagnostic procedures. The absence of additives ensures that the blood components remain in their natural state, providing accurate results for tests such as liver function, kidney function, and infectious disease screenings. Proper handling and clotting times are crucial to maintain sample integrity.

Lavender Blood Collection Tubes

Lavender tubes contain K2 or K3 EDTA, anticoagulants that prevent clotting, making them ideal for hematology tests like CBCs and blood cell analysis.

Role of EDTA in Hematology Testing

EDTA (Ethylene Diamine Tetraacetic Acid) is a critical anticoagulant in lavender tubes, preventing blood clotting by binding calcium ions. This ensures accurate hematology test results by preserving cell integrity. EDTA stabilizes blood cells, preventing shrinkage or swelling, and maintains the viability of cells for analysis. It is essential for complete blood counts (CBCs) and other tests requiring precise cell measurements. Proper mixing of blood with EDTA is vital to avoid clotting and ensure reliable diagnostic outcomes, making it a cornerstone in modern hematology testing.

Light Blue Blood Collection Tubes

Light blue tubes contain sodium citrate, an anticoagulant that prevents clotting for coagulation tests like PT, INR, and fibrinogen. This ensures accurate results for blood clotting assessments.

Sodium Citrate and Coagulation Studies

Sodium citrate is an anticoagulant in light blue tubes, preventing blood clotting for coagulation studies. It chelates calcium ions, essential for clot formation. Common tests include Prothrombin Time (PT), International Normalized Ratio (INR), and D-Dimer. Proper mixing by inverting tubes 8-10 times ensures accurate results. Sodium citrate is ideal for assessing clotting disorders and monitoring anticoagulant therapy. Correct handling ensures reliable outcomes in diagnosing conditions like bleeding disorders or thrombosis. This additive is critical for precise coagulation assessments, making light blue tubes indispensable in clinical settings.

Green Blood Collection Tubes

Green tubes contain sodium heparin, an anticoagulant that prevents clotting for plasma determinations. They are used for tests requiring heparinized plasma or whole blood samples, ensuring accurate results.

Sodium Heparin for Plasma Determinations

Sodium heparin is an anticoagulant in green blood collection tubes, preventing clotting for plasma determinations. It is ideal for tests requiring heparinized plasma or whole blood samples, such as chemistry, immunology, and molecular studies. Sodium heparin inhibits thrombin formation, ensuring accurate results in plasma-based assays. Proper mixing by inverting the tube 8-10 times is essential for even distribution of the anticoagulant. This additive is preferred for tests where clotting must be avoided, making it a critical component in modern laboratory diagnostics for various clinical applications.

Gold (SST) Blood Collection Tubes

Gold tubes contain a clot activator and gel for serum separation, ensuring rapid clotting and clear serum for accurate chemistry and serology tests. Five tube inversions mix additives.

Clot Activator and Gel for Serum Separation

The clot activator in gold tubes accelerates blood clotting, while the gel acts as a barrier, separating serum from blood cells after centrifugation. This ensures clear, contamination-free serum samples for accurate laboratory testing. Proper inversion of the tube five times mixes the clot activator evenly with the blood, promoting efficient clot formation. After centrifugation, the gel moves between the serum and blood cells, preventing hemolysis and maintaining sample integrity. This process is crucial for reliable results in various clinical chemistry tests and serological analyses.

Royal Blue Blood Collection Tubes

Royal blue tubes are used for trace element analysis, containing sodium citrate to prevent clotting and ensure accurate test results in specialized clinical assays.

Trace Element Analysis

Trace element analysis involves measuring concentrations of metals like zinc, copper, and lead in blood. Royal blue tubes, containing sodium citrate, are specifically designed for this purpose. They prevent clotting and ensure accurate test results. Trace elements are essential for diagnosing deficiencies or toxicities, which can impact health conditions like anemia or heavy metal poisoning. Proper collection using these tubes is critical for reliable data, aiding in precise clinical decisions and targeted therapies. Their unique design makes them indispensable in specialized assays.

Tan Blood Collection Tubes

Tan blood collection tubes contain specialized additives for specific tests, such as glucose or lactate determinations. They often include sodium fluoride to inhibit glycolysis, preserving glucose levels for accurate analysis. These tubes are essential for diagnosing metabolic disorders or monitoring glucose levels in clinical settings. Their unique additives ensure reliable results, making them invaluable in targeted diagnostic procedures. Proper use of tan tubes is critical for precise patient care and treatment planning.

Specialized Additives for Specific Tests

Tan blood collection tubes are designed for specialized testing, often containing additives like sodium fluoride to inhibit glycolysis, preserving glucose levels for accurate analysis. These tubes are frequently used for glucose or lactate testing, where maintaining sample integrity is critical. The additives prevent metabolic changes in the blood sample, ensuring reliable results. Proper use of tan tubes is essential for diagnosing conditions like diabetes or metabolic disorders. Their specialized nature makes them indispensable in targeted clinical testing, providing precise data for patient care and treatment decisions.

Yellow Blood Collection Tubes

Yellow blood collection tubes contain Sodium Polyanethol Sulfonate (SPS), an anticoagulant that prevents clotting and preserves blood samples for microbiological cultures and infectious disease testing.

Sodium Polyanethol Sulfonate (SPS) for Blood Cultures

Sodium Polyanethol Sulfonate (SPS) is an anticoagulant used in yellow blood collection tubes to prevent clotting and preserve blood samples for microbiological testing. It inhibits complement, phagocytosis, and lysozyme activity, ensuring accurate detection of pathogens. SPS is ideal for blood cultures, as it supports the growth of bacteria, fungi, and other microorganisms. Proper use of SPS tubes is critical for diagnosing infections and guiding antimicrobial therapy. Always follow the recommended fill volume and handling procedures to maintain sample integrity.

Pink Blood Collection Tubes

Pink tubes contain K2 EDTA, an anticoagulant that prevents clotting and is used for blood typing, cross-matching, and specialized testing. They are essential for ensuring accurate serological results.

K2 EDTA for Blood Typing and Special Tests

K2 EDTA is an anticoagulant in pink blood collection tubes, preventing clotting by binding calcium ions. It is ideal for blood typing, cross-matching, and specialized tests requiring intact blood cells. The additive ensures accurate serological results by preserving cell integrity. K2 EDTA is preferred for its effectiveness in maintaining sample consistency, especially in immunohematology. Proper tube filling and mixing are crucial to ensure the anticoagulant works effectively, avoiding clotting and ensuring reliable test outcomes for critical diagnostic procedures.

Order of Draw in Blood Collection

The standard order of draw ensures sample integrity, starting with blood cultures, followed by light blue, red, gold, green, lavender, and others, preventing cross-contamination and ensuring accurate results.

Standard Protocol for Tube Collection

The standard protocol for tube collection begins with blood cultures, followed by light blue (coagulation), red (serum separator), gold (SST), green (heparin), lavender (EDTA), and others. Tubes must be collected in a specific order to prevent cross-contamination and ensure accurate results. Each tube should be inverted 6-8 times after collection to mix additives with blood. Proper labeling, including patient name and date, is essential. Adhering to this protocol ensures sample integrity, accurate test outcomes, and patient safety. This systematic approach is critical in clinical and laboratory settings.

ardms spi study guide pdf

This comprehensive guide provides detailed insights, practice questions, and expert strategies to help sonographers master ultrasound physics principles and instrumentation, ensuring success on the ARDMS SPI exam.

1.1 Overview of the ARDMS SPI Exam

The ARDMS SPI exam assesses knowledge of ultrasound physics and instrumentation, featuring 110 multiple-choice questions to be completed in 2 hours. It evaluates understanding of physical principles, transducer selection, and Doppler applications, with a passing score of 555. Designed for sonographers and students, the exam is a critical step in certification, ensuring competence in diagnostic ultrasound. It is now available online or in testing centers, offering flexibility for candidates.

1.2 Importance of the ARDMS SPI Study Guide

The ARDMS SPI Study Guide is essential for exam success, offering focused content, practice questions, and expert strategies. It eliminates unnecessary information, ensuring concentration on key concepts and practical applications. With detailed study lessons, video tutorials, and proven techniques, it equips candidates to master ultrasound physics and instrumentation. The guide also provides resources like flashcards and interactive tools, making it an indispensable tool for confident and effective preparation.

Understanding the ARDMS SPI Exam Content

The ARDMS SPI exam focuses on ultrasound physics principles, instrumentation, and clinical applications. It tests knowledge of wave propagation, transducers, Doppler shifts, and image formation, ensuring a strong foundation for sonographers.

2.1 Physics Principles in Ultrasound

Understanding fundamental physics principles is crucial for the ARDMS SPI exam. Key concepts include frequency, wavelength, and propagation speed, which determine ultrasound wave behavior. These principles explain how sound waves interact with tissues, affecting image quality. Mastery of these basics is essential for comprehending advanced topics like Doppler shifts and transducer functionality, ensuring a solid foundation for sonography practice and exam success.

2.2 Instrumentation and Equipment

Mastering ultrasound instrumentation is vital for the ARDMS SPI exam. This section covers the components of ultrasound machines, transducers, and their functionality. Understanding beam patterns, pulse repetition frequency (PRF), and transducer selection is critical. Proper instrumentation ensures accurate image acquisition and diagnostics. Familiarity with equipment setup and operation is essential for sonographers to optimize imaging results and apply physical principles effectively in clinical settings.

2.3 Clinical Applications of Ultrasound Physics

Ultrasound physics principles are pivotal in clinical diagnostics, enabling accurate imaging and patient assessment. Doppler shift applications measure blood flow, while transducer selection optimizes image quality. Understanding wave propagation and tissue interactions ensures safe and effective scanning. Applying these concepts helps sonographers identify abnormalities, guide interventions, and maintain patient safety, adhering to ALARA principles for minimal exposure. This knowledge is essential for precise diagnostics and informed clinical decision-making.

Study Strategies for Success

Effective learning techniques include creating structured schedules, utilizing flashcards, and engaging with practice exams. Prioritize key concepts and employ active learning methods to enhance understanding and retention effectively.

3.1 Creating a Study Schedule

A well-structured study schedule is crucial for exam success. Allocate specific time slots for each topic, balancing physics principles, instrumentation, and clinical applications. Incorporate regular breaks to avoid burnout and enhance focus. Prioritize challenging areas and ensure consistent review of key concepts. A 2-week study plan, as suggested by experts, can help manage time effectively, ensuring thorough preparation and confidence for the ARDMS SPI exam.

3.2 Effective Learning Techniques

Engage in active recall by testing yourself regularly on key concepts. Use spaced repetition to review material over time, enhancing long-term retention. Teach difficult concepts to others to deepen understanding. Leverage visual aids like diagrams to simplify complex physics principles. Incorporate flashcards for quick reviews and utilize interactive tools for hands-on learning. Prioritize understanding over memorization, ensuring a strong foundation in ultrasound physics and instrumentation.

3.3 Utilizing Practice Exams

Practice exams are essential for assessing readiness and identifying weak areas. They simulate real exam conditions, helping you manage time effectively and reduce anxiety. Regularly taking practice tests improves familiarity with question formats and content emphasis. Review incorrect answers to refine understanding and strengthen problem-solving skills. Utilize flashcards and video tutorials alongside practice exams for a well-rounded study approach. Consistent practice builds confidence and ensures thorough preparation for the SPI exam.

Key Concepts to Focus On

Mastering frequency, wavelength, and propagation speed is crucial. Understanding Doppler shift and transducer selection ensures a strong foundation in ultrasound physics and instrumentation for the SPI exam.

4.1 Frequency, Wavelength, and Propagation Speed

Understanding frequency, wavelength, and propagation speed is fundamental. Frequency refers to wave cycles per second (measured in Hz), while wavelength is the distance between cycles. Propagation speed varies with tissue type. In soft tissues, increasing frequency doesn’t change speed, as it depends on tissue stiffness. These concepts are vital for ultrasound imaging and Doppler applications, making them essential for the ARDMS SPI exam preparation.

4.2 Doppler Shift and Its Applications

Doppler shift measures frequency changes due to moving objects, crucial in ultrasound for assessing blood flow. It helps detect velocity and direction, aiding in diagnosing conditions like stenosis. Color Doppler visualizes flow patterns, while spectral Doppler provides waveform analysis. Understanding Doppler principles is essential for interpreting hemodynamic data, making it a key focus area in the ARDMS SPI study guide for sonography professionals.

4.3 Transducer Selection and Beam Patterns

Transducer selection is critical for optimal imaging, depending on frequency and patient size. Beam patterns vary, affecting depth and resolution. The study guide covers these concepts, ensuring sonographers understand how to choose the right transducer and interpret beam patterns for accurate diagnostics.

Recommended Study Materials

The Mometrix ARDMS SPI Study Guide, flashcards, video tutorials, and practice exams are essential resources for comprehensive preparation, offering in-depth insights and practical exercises.

5.1 Mometrix ARDMS SPI Study Guide

The Mometrix ARDMS SPI Study Guide is a leading resource, offering detailed explanations, real exam questions, and proven strategies. It covers physics principles, instrumentation, and clinical applications, ensuring a thorough understanding. Designed for aspiring sonographers, this guide eliminates fluff, focusing on key content to help candidates achieve the required score of 555. Its structured approach and expert insights make it an indispensable tool for exam success.

5.2 Flashcards and Interactive Tools

Flashcards and interactive tools complement traditional study guides by offering dynamic learning experiences. Platforms like Quizlet provide ARDMS SPI flashcards, enabling quick review of key terms and concepts. Interactive tools, such as gamified quizzes and simulations, enhance engagement and retention. These resources are particularly beneficial for visual and kinesthetic learners, reinforcing tricky physics principles and instrumentation details in an accessible format. Regular use can significantly improve exam readiness and confidence.

5.3 Video Tutorials and Online Resources

Video tutorials and online resources provide engaging ways to grasp complex ultrasound physics concepts. Platforms like YouTube offer detailed explanations of topics such as Doppler shift and transducer selection. Websites like My Ultrasound Tutor and Prepry feature interactive lessons and webinars. These tools cater to visual learners, breaking down intricate principles into digestible content. Additionally, forums and discussion groups allow candidates to clarify doubts and share study strategies, enhancing overall preparation for the ARDMS SPI exam.

Test-Taking Strategies

Test-taking strategies are crucial for exam success. Key elements include effective time management, accurate question interpretation, and techniques to reduce anxiety, ensuring optimal performance during the SPI exam.

6.1 Time Management During the Exam

Effective time management is critical during the SPI exam. Allocate 1.5 minutes per question to ensure thorough consideration of each. Skim instructions beforehand to save time. Budget 10 minutes for reviewing answers. Prioritize questions you’re confident in first, then tackle more challenging ones. Practice exams help refine pacing and reduce anxiety, ensuring optimal performance within the 2-hour limit.

6.2 Reducing Test Anxiety

Thorough preparation and consistent practice are key to reducing test anxiety. Familiarize yourself with the exam format through mock tests to build confidence. Employ relaxation techniques like deep breathing and positive affirmations to stay calm. Prioritize rest and nutrition to maintain mental clarity. Arrive early to avoid last-minute stress. Remember, a well-prepared mind is your best tool for success.

6.3 Interpreting Questions and Avoiding Mistakes

Read each question carefully, identifying key terms and concepts. Eliminate obviously incorrect answers first. Focus on understanding Doppler shift, frequency, and propagation speed. Avoid misinterpreting terms by recalling their literal meanings. Manage time wisely, ensuring each question is addressed. Use process of elimination and trust your preparation. Prioritize accuracy over speed to minimize errors and achieve a higher score.

Common Pitfalls to Avoid

Common mistakes include misunderstanding key terms, overlooking critical exam details, and poor time allocation. These errors can significantly impact your performance and confidence during the exam.

7.1 Misunderstanding Key Terms

Misunderstanding key terms like frequency, wavelength, and propagation speed can lead to incorrect answers. Physics concepts are literal, so interpreting terms in everyday language helps. For example, frequency refers to wave cycles per second. Ignoring definitions or assuming knowledge can hinder understanding. Thoroughly reviewing terminology ensures clarity and confidence, preventing avoidable mistakes during the exam. This focus is crucial for mastering ultrasound physics principles effectively.

7.2 Overlooking Important Details

Overlooking critical details, such as frequency and propagation speed relationships, can significantly impact understanding Doppler shift and transducer selection. Neglecting to review fundamental concepts or skipping practice questions may lead to gaps in knowledge. Using flashcards and practice exams helps identify and address these oversights, ensuring thorough preparation and minimizing errors during the exam. Attention to detail is essential for mastering complex ultrasound physics principles and achieving success.

7.3 Poor Time Allocation

Poor time allocation can hinder effective preparation for the ARDMS SPI exam. Failing to create a structured study schedule may result in inadequate coverage of key topics like Doppler shift and transducer physics. Allocate time wisely, focusing on weak areas and utilizing practice exams to simulate real-test conditions. Balancing study sessions ensures comprehensive understanding and minimizes exam-day stress, leading to better performance and higher scores. Proper time management is crucial for success.

Mastering the ARDMS SPI exam requires a strategic approach, focused study, and practice. This guide equips you with essential tools and insights to build confidence and succeed.

8.1 Final Tips for Success

Strategic preparation is key to excelling on the ARDMS SPI exam. Utilize recommended study materials, such as the Mometrix guide and flashcards, to reinforce concepts. Focus on understanding physics principles and instrumentation through video tutorials and practice exams. Aim for a score of 555, as indicated by recent data. Regularly review key terms and avoid common pitfalls like misinterpreting questions. Stay confident, manage time effectively, and minimize test anxiety for optimal performance.

8.2 Staying Confident and Prepared

Confidence and preparation are vital for excelling on the ARDMS SPI exam. Maintain a positive mindset, and regularly review key concepts to reinforce understanding. Utilize the Mometrix ARDMS SPI Study Guide and practice exams to familiarize yourself with the exam format. Focus on understanding physics principles and instrumentation, as these are critical areas. Stay calm during the test, manage your time wisely, and trust in your preparation to achieve a score of 555 or higher.

Frequently Asked Questions

This section addresses common inquiries about the ARDMS SPI exam, such as the passing score, number of questions, time limit, and eligibility to take the exam remotely.

9.1 What is the Passing Score for the SPI Exam?

The passing score for the ARDMS SPI exam is a scaled score of 555. This score indicates that you have demonstrated the necessary knowledge and skills in ultrasound physics and instrumentation. The exam consists of 110 questions, and you must answer them within 2 hours. Achieving a score of 555 ensures you meet the certification standards set by ARDMS. Proper preparation and understanding of key concepts are essential to reach this threshold.

9.2 How Many Questions are on the Exam?

The ARDMS SPI exam consists of 110 multiple-choice questions. You are given 2 hours to complete the exam. This structure allows you to demonstrate your understanding of ultrasound physics and instrumentation. Effective time management is crucial to ensure you answer all questions within the allotted timeframe. Proper preparation and practice will help you navigate the exam confidently and efficiently.

9.3 Can I Take the Exam from Home?

Yes, the ARDMS SPI exam can now be taken from home or at a testing center. This flexibility allows candidates to choose a comfortable environment for their exam. To register and schedule your exam, visit the official ARDMS website. Ensure your device meets the technical requirements for a smooth experience. Taking the exam from home offers convenience while maintaining the integrity of the assessment process.

breville 800esxl manual

The Breville 800ESXL is a high-performance espresso machine designed for home use, offering professional-grade features like a 15-bar pump and dual-wall crema system for perfect espresso extraction.

Overview of the Breville 800ESXL Espresso Machine

The Breville 800ESXL is a high-end espresso machine designed for discerning coffee enthusiasts. Part of the Die Cast series, it features a robust stainless steel construction and advanced brewing technology. Equipped with a 15-bar pump, it ensures optimal espresso extraction, while the dual-wall crema system delivers consistent, velvety crema. The machine also includes a commercial-style swivel steam wand for professional-grade milk frothing and a thermocoil heating system for precise temperature control. Accessories like a stainless steel frothing pitcher and cleaning tools are included for convenience.

Key Features of the Breville 800ESXL

The Breville 800ESXL features a 15-bar pump, dual-wall crema system, commercial swivel steam wand, and advanced temperature control, ensuring precise espresso extraction and professional-grade frothing capabilities.

15-Bar Pump and Dual-Wall Crema System

The Breville 800ESXL’s 15-bar pump ensures optimal pressure for rich espresso extraction. The dual-wall crema system enhances flavor and texture, creating a velvety crema. Together, they deliver barista-quality results at home, making every shot precise and flavorful. This combination is key to achieving professional-grade espresso with ease, ensuring consistency and quality in each brew.

Commercial Swivel Steam Wand and Frothing Capabilities

The Breville 800ESXL features a commercial swivel steam wand designed for precise milk frothing, enabling users to create professional-style lattes and cappuccinos. Its 360-degree rotation offers flexibility, while the frothing capabilities produce silky, smooth milk. Regular purging and cleaning of the wand are essential to maintain optimal performance and prevent clogging. This feature enhances the overall espresso experience, making it ideal for coffee enthusiasts seeking café-quality results at home every time.

Advanced Temperature Control System

The Breville 800ESXL features an advanced temperature control system, utilizing a thermocoil heating element for precise and consistent temperature regulation. This system ensures optimal brewing temperatures between 195°F and 205°F, crucial for extracting the perfect espresso. The machine also includes a pre-infusion feature, gently saturating the coffee grounds before full extraction to enhance flavor and aroma. Automatic temperature reset post-steam use ensures the ideal brewing temperature is maintained, delivering consistent results with every shot.

Understanding the Breville 800ESXL User Manual

The Breville 800ESXL user manual provides comprehensive guidance on machine components, initial setup, brewing processes, and maintenance. It ensures users optimize performance and safety effectively at home.

Components and Accessories Included

The Breville 800ESXL comes with a portafilter, steam wand, frothing pitcher, tamper, and cleaning tools. Accessories include a water filter and descaling solution for maintenance. The user manual provides detailed instructions for each component, ensuring proper setup and operation. Additional items like the 1-cup and 2-cup filters are included for versatility in brewing. The package also contains a warranty booklet and customer support information for assistance. These components and accessories enhance the overall user experience and machine longevity.

Initial Setup and Safety Precautions

Before first use, ensure the Breville 800ESXL is placed on a stable, heat-resistant surface. Turn off and unplug the machine when not in use or during cleaning. Allow the machine to cool before performing maintenance. Always follow the manual’s instructions for descaling and water filter replacement. Handle electrical components with care, avoiding exposure to water. Keep the machine out of children’s reach. Proper setup and adherence to safety guidelines ensure optimal performance and longevity of the espresso machine.

Step-by-Step Brewing Guide

Preheat the machine by turning it on and allowing it to reach optimal temperature. 2. Grind and tamp your coffee beans into the portafilter, ensuring a firm, even surface. 3. Attach the portafilter to the machine and place a demitasse cup under the spout. 4. Press the espresso button to start brewing. 5. Once the shot is complete, froth milk using the steam wand if desired. 6. Combine frothed milk with espresso for cappuccinos or lattes. Follow the manual for precise settings and techniques.

Operating the Breville 800ESXL

The Breville 800ESXL operates with a 15-bar pump and dual-wall crema system, ensuring rich espresso extraction. Use the swivel steam wand for frothing milk, and adjust temperature settings for optimal results.

Preparing for First Use

Before using your Breville 800ESXL for the first time, unpack and wash all accessories. Plug in the machine, power it on, and allow it to initialize. Run water through the group head and steam wand to prime the system. Rinse the portafilter and attach it empty to ensure proper function. Follow the manual’s guidance for initial setup to ensure optimal performance and longevity of your machine.

Espresso Extraction Process

Place a portafilter in the machine’s group head, ensuring it is securely locked. Add finely ground coffee, tamp it firmly, and attach the portafilter. Select your desired brew size using the control panel. Press the extraction button to start brewing. The 15-bar pump ensures optimal pressure for rich, flavorful espresso. The dual-wall crema system enhances the texture and consistency of the crema. Once extraction is complete, pour your espresso into a cup and enjoy. For best results, use freshly roasted beans and the correct grind size.

Steam Wand Operation for Milks and Lattes

Purge the steam wand by releasing steam for a few seconds. Place the steam wand into milk, holding the pitcher at an angle. Turn on the steam and froth until the milk reaches your desired texture. For lattes, froth the milk to a microfoam consistency. Clean the wand immediately after use by wiping it with a damp cloth and purging any remaining milk residue. This ensures optimal performance and hygiene for your next use.

Maintenance and Cleaning

Regularly clean the brew head, steam wand, and drip tray to prevent buildup. Descale every 2-3 months and replace water filters as recommended to maintain optimal performance and longevity.

Daily Cleaning Routine

Daily Cleaning Routine

After each use, wipe the brew head and steam wand with a damp cloth to remove residue. Purge the steam wand by running steam for 2-3 seconds. Clean the portafilter and empty the drip tray daily; Regularly rinse removable parts like the water tank and drip tray. Use a soft brush to clean the group head and gasket. Avoid harsh chemicals; instead, use mild detergents or Breville-approved cleaning solutions. This routine ensures hygiene and prevents mineral buildup, keeping your machine in prime condition.

Descaling and Water Filter Maintenance

Regular descaling is essential to remove mineral buildup in the Breville 800ESXL. Use Breville’s recommended descaling solution or a compatible alternative. Run the solution through the machine as per the manual, then rinse thoroughly with fresh water to eliminate any residue. Replace the water filter every 2-3 months to ensure optimal water quality. After descaling, reset the machine’s maintenance indicator. This process prevents scaling issues and maintains the machine’s performance and longevity, ensuring consistent espresso quality over time;

Replacing Wear and Tear Parts

Over time, parts like seals, gaskets, and shower screens may need replacing due to wear. Refer to the Breville 800ESXL manual for a detailed parts list and diagrams. Regularly inspect components for signs of deterioration. To maintain performance, replace worn parts with Breville-approved accessories. Proper installation ensures optimal functionality and safety. For complex replacements, contact Breville customer support or refer to the troubleshooting guide in the manual. Timely replacement prevents operational issues and extends the machine’s lifespan, ensuring consistent espresso quality and reliability. Always follow the manual’s instructions for replacement procedures.

Troubleshooting Common Issues

Common issues include low pressure, steam wand malfunction, and temperature control problems. The manual provides troubleshooting steps to resolve these issues effectively and maintain optimal performance.

Low Pressure or No Espresso Flow

Low pressure or no espresso flow can occur due to blockages in the machine. Check for clogged portafilters or faulty seals. Ensure the coffee grounds are evenly distributed and not too fine. If issues persist, descale the machine and clean the brew head. Refer to the manual for detailed troubleshooting steps to resolve pressure-related problems and restore proper espresso flow. Regular maintenance and proper usage can prevent such issues from arising.

Steam Wand Malfunction

A malfunctioning steam wand can prevent proper frothing; Check for blockages caused by milk residue or mineral buildup. Clean the wand with a pin or brush and ensure it is purged correctly. If the issue persists, descale the machine and inspect for worn-out seals. Proper maintenance, like regular cleaning and descaling, helps maintain steam wand functionality. Refer to the manual for detailed cleaning and troubleshooting steps to resolve steam-related issues effectively.

Temperature Control Problems

Temperature fluctuations can affect espresso quality. Ensure the machine is preheated correctly and check for blockages in the thermocoil or heating element. Scale buildup may disrupt temperature regulation, so regular descaling is essential. If the issue persists, reset the machine or consult the manual for recalibration instructions. Always use filtered water to prevent mineral deposits. If temperature control problems continue, contact Breville customer support for professional assistance or potential repairs to maintain optimal brewing performance.

Customer Service and Support

Breville offers comprehensive support through their website, phone, and email. Contact their US office at 1(866) BREVILLE or visit their online resources for manuals and FAQs.

Contact Information for Breville Customer Service

For assistance with your Breville 800ESXL, contact their customer service at 1(866) BREVILLE. Mail inquiries can be sent to PO Box 47170, Gardena, CA 90247. Canadian customers can reach out to Anglo Canadian, 2555 Avenue de l’Aviation, Pointe-Claire, Montreal, Quebec H9P 2Z2. Email support is available at customer.service@breville.com. Visit their website for manuals, FAQs, and troubleshooting guides to address any questions or concerns about your espresso machine.

Warranty and Repair Options

The Breville 800ESXL is backed by a 1-year limited product warranty, covering defects in materials and workmanship. For repairs, contact Breville’s customer service or visit their website for authorized service centers. Refer to the user manual for warranty details and troubleshooting guides; Online resources, including FAQs and repair manuals, are available to help diagnose and address issues. Ensure all repairs are performed by authorized technicians to maintain warranty validity and ensure safety.

Online Resources and FAQs

Breville provides comprehensive online resources for the 800ESXL, including downloadable user manuals, troubleshooting guides, and FAQs. Visit their official website to access detailed product information, repair manuals, and customer support. These resources help users optimize performance, address common issues, and understand machine maintenance. Additionally, Breville’s customer service team is available to assist with queries, ensuring a seamless experience for all 800ESXL owners.

The Breville 800ESXL is an excellent choice for coffee enthusiasts, offering advanced features, durability, and ease of use, making it a worthwhile long-term investment for home baristas.

Final Tips for Optimal Performance

To ensure your Breville 800ESXL performs at its best, clean it daily, descale regularly, and use filtered water. Preheat the portafilter, grind beans just before brewing, and adjust grind size for perfect extraction. Experiment with steam wand techniques for silky milk textures. Store coffee beans in an airtight container to preserve flavor. Following these tips will help maintain your machine and deliver exceptional espresso every time.

Breville 800ESXL as a Long-Term Investment

The Breville 800ESXL is a durable and reliable espresso machine built to last, making it a smart long-term investment for coffee enthusiasts. Its robust construction and high-quality components ensure consistent performance over years. Regular maintenance and access to replacement parts further extend its lifespan. With proper care, this machine delivers exceptional value, providing years of delicious espresso and cappuccinos. It’s a worthwhile purchase for those seeking a high-end home espresso experience without frequent upgrades or replacements.

1 2 3 4 5