fishing pole size guide

Choosing the right fishing pole size is crucial for a successful fishing experience. This guide explores key factors‚ from rod length to reel compatibility‚ ensuring optimal performance for any angler.

Factors Influencing Fishing Pole Size

The size of a fishing pole is influenced by target species‚ fishing technique‚ personal preference‚ and fishing environment‚ ensuring optimal performance and comfort for anglers.

Target Species and Fishing Technique

The size of your fishing pole largely depends on the target species and the fishing technique you plan to use. For smaller species like trout or panfish‚ lighter rods with shorter lengths (5-7 feet) are ideal‚ allowing precise casting and control. Larger species‚ such as bass or marlin‚ require longer‚ heavier rods (7-12 feet) to handle powerful fights and larger lures; Techniques like baitcasting‚ spinning‚ or fly fishing also dictate rod size and action. For example‚ spinning rods are versatile for both light and medium-heavy applications‚ while baitcasters are preferred for accuracy and strength in heavy-duty fishing. Matching your gear to the fish and method ensures a more effective and enjoyable experience. Always consider reel size compatibility to maintain balance.

Personal Preference and Fishing Environment

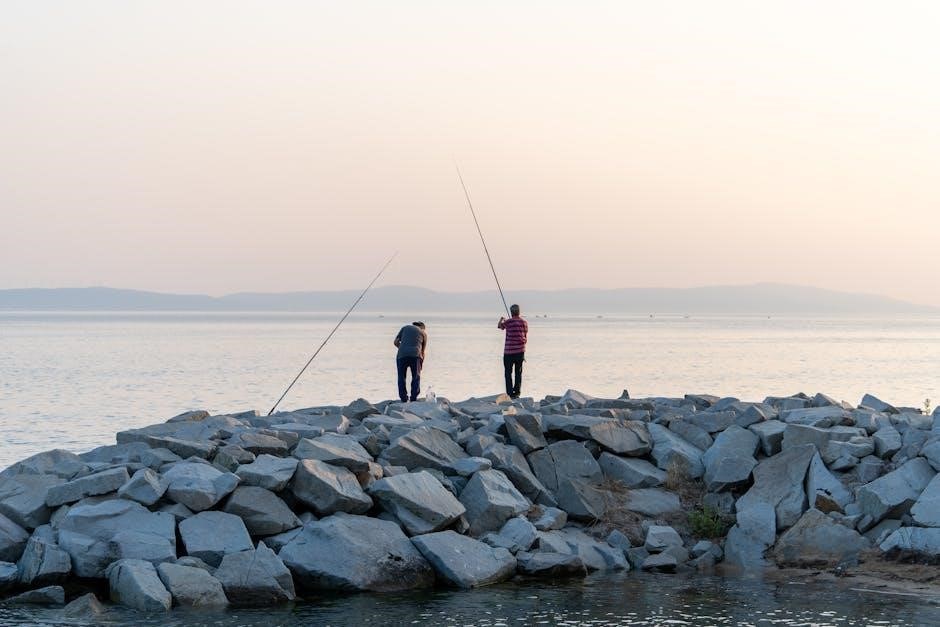
Your personal preference and the fishing environment significantly influence the ideal pole size. Anglers with limited strength or height may prefer shorter‚ lighter rods for ease of handling. Conversely‚ taller individuals or those fishing in open waters might opt for longer rods for better reach and leverage. Fishing in tight spaces‚ like small streams‚ calls for shorter rods (5-6 feet)‚ while open areas‚ such as lakes or surf‚ benefit from longer rods (8-12 feet) for casting distance. Consider the material—graphite for sensitivity or fiberglass for durability—based on your preference. Environmental factors like wind‚ water depth‚ and vegetation also play a role in selecting the right pole size for optimal performance and comfort. Balancing these elements ensures a tailored fishing experience.

Understanding Rod Length and Its Impact

Rod length significantly affects casting distance‚ accuracy‚ and leverage. Longer rods enhance distance and leverage‚ while shorter rods improve control and precision in tight spaces.

How Rod Length Affects Casting Distance and Accuracy

Rod length plays a critical role in determining casting distance and accuracy. Longer rods‚ typically ranging from 7 to 10 feet‚ provide greater leverage and allow for longer casts‚ making them ideal for open-water fishing. Shorter rods‚ usually between 5 to 6 feet‚ offer better control and precision‚ which is beneficial in tight spaces or when targeting smaller species. The length also influences the angler’s ability to manage line and lure placement. For example‚ a longer rod can cast lighter lures farther‚ while a shorter rod excels in accuracy for delicate presentations. Balancing rod length with fishing technique ensures optimal performance and efficiency during casting.

Rod Action and Power Explained

Rod action refers to a rod’s flexibility‚ while power indicates its strength to handle specific line weights. Together‚ they determine the rod’s performance in various fishing scenarios.

Differences Between Rod Action and Power

Rod action describes how much a rod flexes when under pressure‚ ranging from ultralight to heavy. It influences sensitivity and casting accuracy. Power‚ on the other hand‚ refers to the rod’s strength and lifting ability‚ determining the maximum line and lure weight it can handle. While action affects the feel and responsiveness of the rod‚ power is about raw capability. Understanding both is essential for matching the rod to specific fishing techniques and target species. A rod’s action and power must align with the angler’s needs for optimal performance.

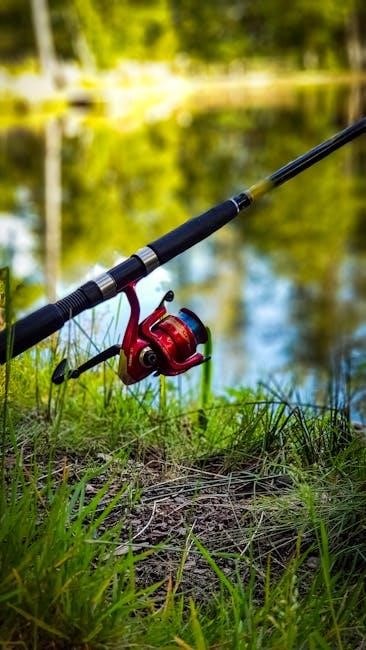
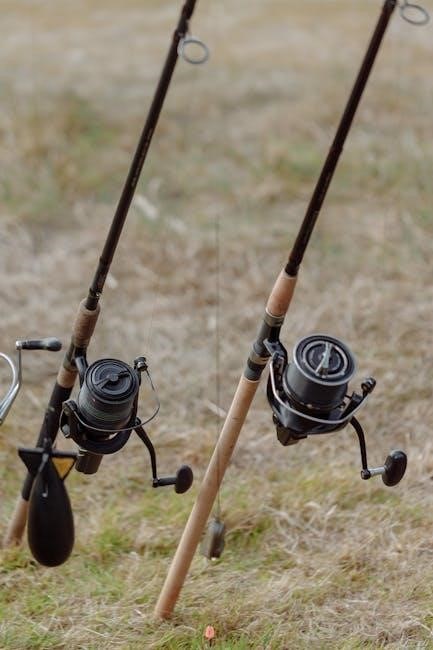
Reel Size and Its Relation to Rod Size

Reel size should complement the rod’s strength and fishing type. A larger rod requires a bigger reel‚ ensuring balanced performance and optimal line management.

Matching Reel Size to Your Fishing Rod

Matching reel size to your fishing rod ensures a balanced setup‚ enhancing performance and comfort. Consider the rod’s length‚ action‚ and power when selecting a reel. For example‚ a medium-light spinning rod pairs well with a reel rated for 8-12 lb test line. Baitcasting reels are ideal for heavy lines and larger species‚ while spinning reels excel with lighter tackle. Ensure the reel’s gear ratio aligns with your fishing style—faster gears for quick retrieves and slower ones for controlled presentations. Check the rod’s specs for recommended line weights to guide your reel choice. A well-matched reel enhances casting accuracy and overall fishing efficiency‚ making it essential for a enjoyable experience.

Line Guides: Size and Placement

Line guides play a crucial role in managing your fishing line. Properly sized and spaced guides improve casting distance‚ reduce line wear‚ and enhance sensitivity‚ ensuring smooth performance.

Importance of Line Guides for Line Management

Line guides are essential for effective fishing‚ as they minimize friction and prevent line tangling. Properly designed guides ensure smooth line flow‚ reducing wear and tear. They also enhance sensitivity‚ allowing anglers to detect even subtle bites. The size and placement of guides directly impact casting accuracy and distance. Larger guides are ideal for heavier lines‚ while smaller ones suit lighter tackle. Strategic placement prevents line overlap and ensures consistent performance. Well-designed line guides elevate the overall fishing experience‚ making them a critical component of a fishing rod’s functionality.

Handle Length and Material

Handle length and material significantly impact comfort and control. Longer handles offer better leverage‚ while shorter ones provide precision. Materials like cork or EVA ensure durability and grip.

Comfort and Durability in Handle Design

Comfort and durability in handle design are essential for long fishing sessions. Handles made from materials like cork or EVA provide a secure grip and resist wear.

Cork handles are prized for their cushioning and natural grip‚ even when wet‚ while EVA handles are more durable and resistant to extreme conditions.

Ergonomic designs‚ such as contoured handles‚ reduce fatigue and improve control‚ ensuring a comfortable fishing experience. The right handle material balances comfort and longevity.

Species-Specific Considerations

Choosing the right rod size depends on the target species’ size and fighting ability. Lighter rods suit smaller fish like trout‚ while heavier rods tackle larger species like tuna.

Choosing the Right Rod Size for Different Fish

When selecting a fishing rod‚ the size and type of fish you’re targeting play a crucial role. Lighter rods with shorter lengths are ideal for small species like trout or panfish‚ allowing precise control and sensitivity. Medium-sized rods are versatile for species like bass or walleye‚ balancing strength and maneuverability. For larger fish‚ such as salmon or tuna‚ longer‚ heavier rods are essential to handle the weight and fighting power. Surf fishing often requires rods over 9 feet to cast long distances. Matching the rod size to the fish ensures better performance and a more enjoyable experience. Always consider the fish’s size and strength when selecting your gear.

claimed by my three alphas pdf

Claimed by My Three Alphas is a captivating fantasy novel by Nadia Sparks, exploring themes of werewolf lore, prophecy, and polyamory. Amery Hunter’s journey intertwines with three powerful alphas, Nikolai, Braxton, and Derik, in a tale of forbidden love and self-discovery. The novel is available in PDF format on various platforms, offering readers a unique blend of romance and supernatural drama.

1.1 Overview of the Novel

Claimed by My Three Alphas is a fantasy romance novel that delves into the intricate world of werewolf lore and polyamory. The story follows Amery Hunter, an ordinary girl who discovers her extraordinary connection to three powerful alpha werewolves—Nikolai, Braxton, and Derik. As she navigates a hidden prophecy and forbidden love, Amery must confront her destiny and the challenges of her newfound reality. The novel explores themes of self-discovery, loyalty, and the complexities of multiple romantic relationships, offering a compelling blend of supernatural drama and emotional depth. Available in PDF format, it captivates readers with its unique take on fantasy and romance.

1.2 Author and Publication Details

Claimed by My Three Alphas is authored by Nadia Sparks, a prominent writer in the fantasy and romance genres. Published by Dreame, the novel has gained significant attention for its unique storytelling and immersive world-building. The book is available in English and can be accessed in PDF and EPUB formats through various online platforms, including Dreame and WebNovel. Sparks’ work is celebrated for its intricate character development and compelling narratives, making this novel a standout in the werewolf fantasy category.

1.3 Genre and Target Audience

Claimed by My Three Alphas falls under the fantasy and romance genres, with a strong focus on werewolf lore and reverse harem dynamics. The novel appeals primarily to young adult readers, particularly women, who enjoy paranormal romance and polyamorous themes. Its blend of action, drama, and supernatural elements makes it a compelling read for fans of fantasy fiction. The story’s intricate relationships and emotional depth resonate with readers seeking immersive and emotionally charged narratives in the werewolf and shifter romance categories.

Core Story of “Claimed by My Three Alphas”

Amery discovers her hidden identity and entwines with three alphas, Nikolai, Braxton, and Derik, in a world of prophecy and forbidden love, shaping her destiny.

2.1 Amery’s Journey and Discovery

Amery, once an outcast, uncovers her true identity when she stumbles into the werewolf realm. There, she meets three powerful alphas—Levi, Asher, and Quincy—who claim her as their mate. Her journey is marked by struggles to adapt to this new world and her roles within it. The discovery of her connection to the prophecy adds depth to her transformation, as she learns to navigate her newfound power and the complexities of her relationships with her alphas. This journey shapes her destiny in unexpected ways, making her a central figure in the werewolf realm’s future.

2.2 The Werewolf Realm and Prophecy

The werewolf realm is a hierarchical world governed by powerful alphas and ancient traditions. A prophecy foretells the arrival of a human who will restore balance and strengthen ties between humans and werewolves. Amery, unknowingly central to this prophecy, must navigate this hidden world. The realm’s dynamics are marked by loyalty, power struggles, and forbidden love, setting the stage for a clash between tradition and destiny. This prophecy drives the story’s conflict and Amery’s pivotal role in shaping the future.

2.3 The Three Alpha Mates: Nikolai, Braxton, and Derik

Nikolai, Braxton, and Derik are powerful alphas bound by duty and prophecy to protect Amery. Nikolai, the pack leader, exudes authority and possessiveness, while Braxton hides secrets behind his enigmatic nature. Derik, the youngest, balances the group with his playful yet fiercely loyal personality. Their dynamic with Amery evolves from initial reluctance to deep emotional bonds, testing their alpha instincts and the boundaries of polyamory. Together, they navigate loyalty, desire, and the challenges of their shared destiny.

Key Characters in the Novel

The story centers around Amery Hunter and her three alpha mates—Nikolai, Braxton, and Derik—each with unique personalities and roles. Supporting characters add depth and intrigue to Amery’s journey.

3.1 Amery Hunter: The Protagonist

Amery Hunter is the protagonist, a young woman initially believing herself to be an outcast with no real friends. Her life takes a dramatic turn when she is thrust into the werewolf realm, revealing her true identity and connection to a prophecy. Amery’s journey explores her resilience as she navigates forbidden love, betrayal, and the complexities of her relationships with her three alpha mates. Her character evolves from self-doubt to strength, making her a compelling and relatable figure in the story.

3.2 The Three Alphas: Their Roles and Personalities

Nikolai, Braxton, and Derik are the three alphas who dominate Amery’s life. Each possesses distinct traits: Nikolai’s calm authority, Braxton’s fiery passion, and Derik’s quiet intensity. Their roles extend beyond protection, as they navigate their complex relationships with Amery. While their bond with her grows, their individual personalities clash, creating tension. The alphas’ dynamic interactions with Amery and each other shape the story’s emotional core, blending possessiveness, loyalty, and love in a intricate dance of power and vulnerability.

3.3 Supporting Characters and Their Impact

Supporting characters like Amery’s childhood friend, who betrays her, add emotional depth to the story. Figures such as the priest and Amery’s mother highlight her personal struggles. Other characters, including Selene Valor and Xara Draven, introduce subplots that enrich the narrative. These individuals challenge Amery, forcing her to grow and confront her destiny. Their roles amplify the novel’s themes of loyalty, betrayal, and identity, making the world feel lived-in and multifaceted. Their interactions with Amery and the alphas drive the plot forward, adding layers to the story’s complexity.

Themes and Dynamics in the Novel

Claimed by My Three Alphas delves into themes of forbidden love, polyamory, and self-discovery. The novel explores complex relationships, loyalty, and power dynamics, blending romance with supernatural elements.

4.1 Reverse Harem and Polyamory Dynamics

Claimed by My Three Alphas explores intricate reverse harem and polyamory dynamics, focusing on Amery’s relationships with Nikolai, Braxton, and Derik. The novel delves into the emotional and societal challenges of loving multiple partners, showcasing how Amery navigates her connections amidst power struggles and supernatural conflicts. The interplay of loyalty, jealousy, and devotion creates a compelling narrative, highlighting the complexities of polyamorous love in a world governed by werewolf hierarchy and ancient prophecies.

4.2 Werewolf Lore and World-Building

Claimed by My Three Alphas immerses readers in a rich werewolf lore, detailing a supernatural realm governed by ancient prophecies and hierarchical structures. The novel explores rituals, such as the blood moon ceremony, and the societal rules binding werewolves. Amery’s journey reveals a world where power, loyalty, and destiny intertwine, offering a fresh perspective on werewolf culture. The intricate world-building enhances the narrative, making the fantastical elements feel vivid and immersive.

4.3 Forbidden Love and Conflict

Claimed by My Three Alphas delves into the complexities of forbidden love, as Amery navigates her relationships with three alphas amidst societal expectations and hierarchical conflicts. The novel explores emotional and societal tensions, highlighting the struggles of balancing love and duty. Betrayal and power struggles further intensify the narrative, creating a gripping dynamic between Amery and her mates. The forbidden nature of their bonds drives both personal growth and external challenges, making the story emotionally resonate with readers.

Popular and Intense Chapters

The Ritual Under the Blood Moon and Amery’s Struggle with Her Mates are emotionally charged, showcasing intense dynamics and pivotal moments in the story. These chapters highlight the novel’s gripping conflicts and character development, making them fan favorites.

5.1 The Ritual Under the Blood Moon

The Ritual Under the Blood Moon is a pivotal chapter in Claimed by My Three Alphas, marking a transformative moment for Amery. The ceremony, steeped in ancient werewolf tradition, binds her to her three alphas—Nikolai, Braxton, and Derik. Tensions rise as Amery struggles with her newfound role, and the ritual’s intensity reveals hidden truths about her identity and destiny; This chapter masterfully blends magic, emotion, and suspense, captivating readers with its dramatic unfolding and profound implications for the story.

5.2 Amery’s Struggle with Her Mates

Amery’s relationship with her three alphas—Nikolai, Braxton, and Derik—becomes increasingly complex as she navigates their dominant personalities and her own evolving emotions. The power dynamics and possessive nature of the alphas create tension, while Amery’s internal conflicts about loyalty, love, and control intensify. This chapter delves into the emotional and physical challenges of polyamory, showcasing Amery’s resilience and the strain on her bonds with each mate. The struggle highlights her growth and the fragile balance of their unconventional relationship.

5.3 The Betrayal and Its Consequences

A shocking betrayal rocks Amery’s world, threatening to destroy her fragile bonds with Nikolai, Braxton, and Derik. The betrayal, orchestrated by someone close to her, exposes deep-seated mistrust and vulnerability. Amery grapples with heartbreak and anger, while the alphas struggle to reconcile their protective instincts with their own feelings of betrayal. This pivotal moment reshapes alliances, intensifies external threats, and forces Amery to confront the true cost of her relationships and the prophecy that binds them all together.

Availability and Access

Claimed by My Three Alphas is widely available in PDF and EPUB formats on platforms like Dreame and WebNovel. Readers can also access free chapters online easily.

6.1 PDF and EPUB Download Options

The novel Claimed by My Three Alphas is available for download in both PDF and EPUB formats. Readers can access these files through platforms like Dreame and WebNovel. To read the files, users may need ebook readers such as ReadEra or Calibre. Additionally, tools like CloudConvert can help convert files between formats for compatibility with devices like Kindle or Kobo. Some chapters are also available for free, allowing readers to preview the story before purchasing the full novel.

6.2 Platforms to Read the Novel

Claimed by My Three Alphas can be accessed on multiple reading platforms. Dreame and WebNovel are popular choices, offering both free and paid chapters. Additionally, platforms like Galatea and Readamo provide the novel in various formats, including PDF and EPUB. Readers can also find the book on online libraries and ebook stores, ensuring easy accessibility across different devices. The availability of free chapters on these platforms attracts new readers, allowing them to experience the story before committing to a purchase.

6.3 Free Chapters and Excerpts

Readers can sample Claimed by My Three Alphas through free chapters and excerpts available on platforms like Dreame and WebNovel. These previews provide a glimpse into Amery’s journey, showcasing the novel’s compelling blend of romance and supernatural themes. Free chapters are designed to engage new readers, offering a sneak peek into the intricate relationships and conflicts that drive the story. This accessibility helps potential readers decide if they want to dive deeper into the world of werewolf lore and polyamory dynamics.

Claimed by My Three Alphas captivates readers with its unique blend of werewolf lore and polyamory dynamics, leaving a lasting impact through Amery’s emotional journey and complex relationships.

7.1 The Novel’s Impact on Readers

Claimed by My Three Alphas has deeply resonated with readers, offering a fresh perspective on polyamory and werewolf lore. Its intricate plot and emotionally charged relationships create a compelling narrative that keeps readers engaged. Many fans praise the novel for its strong female protagonist and the exploration of forbidden love, making it a standout in the fantasy romance genre. The story’s ability to balance drama with supernatural elements has left a lasting impression on its audience.

7.2 Future Directions for the Story

The story of Claimed by My Three Alphas leaves room for potential sequels or spin-offs, exploring unresolved conflicts and unexplored characters. Fans speculate about delving deeper into the werewolf realm’s lore and the prophecy surrounding Amery. Future directions could involve expanding the roles of supporting characters or introducing new challenges for Amery and her alphas. The novel’s cliffhanger ending suggests a continuation of Amery’s journey, possibly uncovering more about her destiny and the evolving dynamics with her mates.

liftmaster professional 1/3 hp manual

Overview of the LiftMaster Professional 1/3 HP Manual

The LiftMaster Professional 1/3 HP Manual provides comprehensive guidance for installation, operation, and maintenance of the garage door opener, emphasizing safety and troubleshooting.

1.1 Key Features of the LiftMaster Professional 1/3 HP Garage Door Opener

The LiftMaster Professional 1/3 HP features a robust motor for reliable performance, a Protector System for enhanced safety, and MyQ compatibility for smartphone control. It includes a P3 Motors system for quiet operation and durability. The opener is designed for efficiency, offering a solid warranty and compatibility with various garage door types, ensuring long-term reliability and ease of use.

1.2 Importance of Reading the Manual Before Installation

Reading the LiftMaster Professional 1/3 HP Manual is crucial for safe and proper installation. It provides detailed instructions, safety precautions, and troubleshooting tips. Understanding the manual ensures optimal performance and prevents potential hazards; It also highlights warranty terms, maintenance requirements, and compatible accessories, helping users maximize their garage door opener’s efficiency and longevity. Proper installation depends on following the manual’s guidelines.

Installation Guidelines

Follow the LiftMaster Professional 1/3 HP Manual for step-by-step installation instructions. Ensure proper alignment, secure hardware, and safety device connections. Test functionality post-installation for optimal performance and safety compliance.

2.1 Pre-Installation Checks and Requirements

Before starting, read the LiftMaster Professional 1/3 HP Manual thoroughly. Ensure the garage door is balanced and properly aligned. Check all hardware for damage and compatibility. Verify the opener’s compatibility with your door type and size. Ensure the ceiling has adequate structural support. Wear protective gear and clear the work area. Ensure all safety devices are functional and correctly aligned before proceeding with installation.

2.2 Step-by-Step Installation Process

Begin by assembling and positioning the rail assembly securely above the garage door. Attach the motor unit to the ceiling bracket, ensuring proper alignment. Connect the chain or belt drive according to the LiftMaster Professional 1/3 HP Manual. Install safety sensors and test their alignment. Wire the opener and connect it to power. Mount the control panel and test all functions, including remote and wall button operations. Ensure smooth door movement and proper stop points. Refer to the manual for detailed diagrams and torque specifications. After installation, conduct a full system test to verify safety and performance.

2.3 Post-Installation Testing and Safety Verification

After installation, test the garage door opener by opening and closing the door to ensure smooth operation. Verify the Protector System is connected and functioning correctly. Check sensor alignment and ensure the door stops and reverses as required. Test remote and wall button functionality. If any issues arise, refer to the manual for troubleshooting or contact a LiftMaster professional for assistance.

Safety Precautions and Warnings

After installation, test the garage door opener by opening and closing the door to ensure smooth operation. Verify the Protector System is connected and functioning correctly. Check sensor alignment and ensure the door stops and reverses as required. Test remote and wall button functionality. If any issues arise, refer to the manual for troubleshooting or contact a LiftMaster professional for assistance.

3.1 General Safety Guidelines for Garage Door Opener Installation

Always hire a trained professional for installation and repairs. Ensure the garage door is balanced and properly aligned before operating. Follow the manual’s instructions carefully and test the door’s functionality after installation. Never attempt repairs without disconnecting power. Keep children away from moving doors and ensure the emergency release is easily accessible. Regularly inspect sensors and wiring for damage.

3.2 Understanding the Protector System and Its Role

The Protector System is a critical safety feature designed to prevent accidents by reversing the door if an obstacle is detected. It uses sensors to monitor the door’s path and ensure safe operation. Proper alignment and connection of these sensors are essential for the system to function effectively. Always test the Protector System after installation to verify its functionality and ensure compliance with safety standards.

Troubleshooting Common Issues

Identify common problems like sensor misalignment, connectivity issues, or power malfunctions. Refer to the manual for diagnostic steps and solutions to restore proper functionality quickly.

4.1 Diagnosing Why the Opener Won’t Work

Diagnosing issues with the LiftMaster Professional 1/3 HP opener involves checking the Protector System, power supply, and sensor alignment. Ensure the door is balanced and unobstructed. Verify remote and wall button functionality. Consult the manual for detailed troubleshooting steps to identify and resolve the root cause efficiently.

  • Check sensor alignment and connectivity.
  • Verify power supply to the motor and controls.
  • Inspect for obstructions or door balance issues.

4.2 Resolving Sensor Alignment and Connectivity Problems

Resolving sensor alignment and connectivity issues ensures smooth operation. Clean sensors, remove obstructions, and verify connections to both the opener and wall button. Use the manual’s alignment guide for accuracy. Correct alignment ensures safety and efficiency. Regular checks prevent recurring problems and maintain reliable functionality over time.

  • Clean sensors to ensure proper detection.
  • Check connections to both the opener and wall button;
  • Use the manual’s alignment guide for precise adjustment.
  • Perform regular inspections to prevent future issues.

Maintenance and Upkeep

Regular maintenance ensures optimal performance and longevity. Clean sensors, lubricate moving parts, and check connections. Periodic inspections prevent wear and tear, ensuring reliable operation over time.

  • Clean sensors to maintain proper detection.
  • Lubricate moving parts for smooth operation.
  • Inspect and tighten connections as needed.

5.1 Regular Maintenance Tasks for Optimal Performance

Regular maintenance ensures your LiftMaster Professional 1/3 HP opener operates smoothly. Clean sensors, lubricate moving parts, and inspect connections. Check the rail for alignment and tighten screws. Test the door balance monthly by manually lifting it halfway. Refer to the manual for specific instructions to maintain efficiency and safety.

5.2 Replacing Wear and Tear Parts

Regularly inspect and replace worn parts like sensors, gears, and springs to maintain performance. Use genuine LiftMaster parts for reliability. Refer to the manual for replacement procedures or contact a professional for complex tasks. Replacing parts promptly ensures smooth operation and prevents further damage, enhancing safety and longevity of your garage door opener.

Technical Specifications and Compatibility

The LiftMaster Professional 1/3 HP features a durable motor, suitable for standard steel or wood garage doors. It is compatible with various smart home systems for seamless integration.

6.1 Understanding the 1/3 HP Motor and Its Capabilities

The LiftMaster Professional 1/3 HP motor delivers reliable performance for standard garage doors, ensuring smooth operation with minimal noise. Designed for daily use, it handles doors up to 8 feet tall and 500 pounds, providing consistent functionality and energy efficiency, making it a practical choice for most residential needs.

6.2 Compatibility with Different Garage Door Types

The LiftMaster Professional 1/3 HP opener is compatible with various garage door types, including sectional, rolling, and one-piece doors. It works efficiently with doors made of steel, wood, and vinyl, ensuring smooth operation across different materials. For one-piece doors, additional installation instructions are recommended to ensure proper functionality and safety.

Accessing Additional Resources

Visit www.liftmaster.com or Manua.ls to download the latest manuals and find authorized dealers for professional assistance, ensuring proper installation and maintenance of your garage door opener.

7.1 Where to Download the Latest Manual

The latest LiftMaster Professional 1/3 HP manual can be downloaded from the official LiftMaster website or trusted platforms like Manua.ls. Simply search for your specific model number, and follow the download instructions to access the most up-to-date version of the manual, ensuring you have the latest features, safety guidelines, and troubleshooting tips.

7.2 Finding Official LiftMaster Dealers for Professional Assistance

Visit the official LiftMaster website to locate authorized dealers near you using their dealer locator tool. These professionals are trained to provide expert installation, maintenance, and repairs, ensuring your garage door opener operates safely and efficiently. Contacting an official dealer guarantees genuine parts and reliable service, adhering to LiftMaster’s quality standards.

Frequently Asked Questions (FAQs)

Why won’t the opener work? Check power supply, sensor alignment, and wiring connections. How to align sensors? Refer to the manual or contact a professional for assistance.

8.1 Common Questions About Installation and Operation

Common questions include troubleshooting issues, such as why the door won’t close or the motor won’t start. Users often inquire about sensor alignment and how to reset the system. Additionally, questions about wiring connections and remote control functionality are frequent. The manual provides detailed steps for resolving these issues and ensuring smooth operation.

8.2 Addressing Concerns About Safety and Maintenance

Concerns often revolve around safety features and regular maintenance. Users ask about Protector System functionality and how to ensure proper alignment. Additionally, questions arise about periodic checks for sensors and springs. The manual advises consulting professionals for complex issues and emphasizes the importance of following safety guidelines to prevent accidents and maintain optimal performance.

Warranty and Support Information

The LiftMaster Professional 1/3 HP includes a comprehensive warranty covering parts and labor. For support, visit www.liftmaster.com or contact their customer service team for assistance and inquiries.

9.1 Understanding the Warranty Coverage

The LiftMaster Professional 1/3 HP warranty covers manufacturing defects in materials and workmanship. It typically includes a limited warranty for parts and labor, with specific terms varying by product. Proper installation by a trained technician is often required for warranty validity. Always review the manual or contact LiftMaster support for detailed warranty conditions and duration.

9.2 How to Contact LiftMaster Customer Support

For assistance, visit the official LiftMaster website or contact their customer support team directly. You can also find resources like the LiftMaster 98022 manual on platforms such as Manua.ls. Their support team provides guidance on troubleshooting, warranty, and installation. Ensure to have your model number ready for efficient service, as seen with models like the LiftMaster LM80 and LM60.

Environmental and Energy Efficiency

The LiftMaster Professional 1/3 HP features energy-efficient designs, reducing power consumption while maintaining performance. Its eco-friendly technology aligns with environmental standards, making it a sustainable choice for garage door automation.

10.1 Energy Consumption and Efficiency Features

The LiftMaster Professional 1/3 HP is designed with energy efficiency in mind, featuring low power consumption while maintaining robust performance. Its advanced motor technology minimizes energy use during operation, and an eco-friendly standby mode further reduces power draw. These features ensure the opener operates sustainably without compromising functionality, making it an environmentally responsible choice for garage door automation.

10.2 Eco-Friendly Aspects of the LiftMaster Professional Series

The LiftMaster Professional Series is engineered with eco-friendly principles, utilizing energy-efficient motors and intelligent power management. These openers are designed to minimize energy consumption while delivering reliable performance. Additionally, the series incorporates environmentally responsible manufacturing practices and recyclable materials, aligning with green technology standards to reduce its carbon footprint and promote sustainability for homeowners.

The LiftMaster Professional 1/3 HP Manual offers a detailed guide to installation, operation, and maintenance, ensuring safe and efficient use of your garage door opener system.

11.1 Final Tips for Maximizing Your Garage Door Opener’s Performance

Regularly inspect and maintain your garage door opener to ensure smooth operation. Check sensor alignment, lubricate moving parts, and replace worn components promptly. Always follow the manual’s guidelines for troubleshooting and maintenance. Proper alignment of the Protector System is crucial for safety and efficiency. By adhering to these tips, you can extend the lifespan and performance of your LiftMaster Professional 1/3 HP opener.

noma air conditioner manual pdf

Welcome to the comprehensive guide on Noma Air Conditioner Manuals. These manuals are essential resources for understanding and maintaining your unit. They provide detailed instructions on installation, operation, and troubleshooting, ensuring optimal performance and longevity. Whether you’re a user or technician, these guides offer valuable insights to maximize efficiency and comfort.

Types of Noma Air Conditioner Manuals

Noma air conditioner manuals are categorized into three main types: user manuals, service manuals, and installation manuals. Each serves a distinct purpose, ensuring comprehensive guidance for users, technicians, and installers. These manuals provide detailed instructions tailored to specific needs, enhancing efficiency and proper unit maintenance.

2.1. User Manuals

User manuals for Noma air conditioners are designed to assist everyday users in understanding and operating their units effectively. These manuals provide clear, step-by-step instructions on how to utilize the air conditioner’s features, such as power on/off, mode selection (cooling, fan, dehumidifying), and temperature adjustments. They also cover basic maintenance tasks like cleaning filters and troubleshooting common issues.

Key sections include explanations of operating modes, fan speed control, and timer functionality. For instance, the manual for model 043-5794-8 highlights how to address issues like unusual odors caused by mold buildup. Additionally, user manuals often include tips for energy-efficient operation, such as using the sleep mode to gradually adjust temperatures for comfort during rest.

These manuals are written in an accessible manner, making them suitable for both new and experienced users. They emphasize preventive care, such as regular filter cleaning, to ensure the unit runs efficiently and lasts longer. By following the guidelines in the user manual, individuals can resolve minor problems independently and optimize their air conditioner’s performance.

Accessing a Noma air conditioner user manual is straightforward, with options to download PDF versions from official sources or appliance manual databases. This ensures users always have the information they need to make the most of their unit. Whether adjusting settings or addressing minor concerns, the user manual serves as an indispensable guide for everyday use.

2.2. Service Manuals

Service manuals for Noma air conditioners are technical documents specifically designed for qualified technicians and professionals; These manuals provide in-depth information necessary for diagnosing, servicing, and repairing the unit. They include detailed schematics, wiring diagrams, and step-by-step repair procedures, ensuring that technicians can address complex issues effectively.

Service manuals cover advanced troubleshooting, such as identifying faulty components, interpreting error codes, and performing system diagnostics. They also provide instructions for disassembling and reassembling the air conditioner, along with specifications for replacement parts. This makes them an essential resource for maintaining the unit’s performance and extending its lifespan.

Additionally, these manuals often include safety precautions and best practices for handling electrical and refrigeration systems. They are written for individuals with specialized knowledge and tools, ensuring that repairs are conducted safely and efficiently. By adhering to the guidelines in the service manual, technicians can restore the air conditioner to optimal working condition and prevent future malfunctions;

Overall, Noma air conditioner service manuals are indispensable for professionals tasked with maintaining and repairing these units. They offer the detailed technical insights needed to ensure the air conditioner operates reliably and efficiently over time.

2.3. Installation Manuals

Installation manuals for Noma air conditioners are detailed guides that walk users through the process of setting up their units correctly. These manuals are crucial for ensuring the air conditioner is installed safely, efficiently, and in accordance with the manufacturer’s specifications. They are designed to help users and professionals alike achieve proper installation, which is essential for optimal performance and longevity.

Key components of Noma installation manuals include step-by-step instructions, diagrams, and safety precautions. They cover essential aspects such as mounting the unit, connecting electrical components, and ensuring proper drainage. The manuals also provide guidance on anchoring the air conditioner securely to prevent damage or accidents.

Additionally, these manuals highlight important considerations for installation, such as selecting the appropriate location for the unit and ensuring adequate ventilation. They may also include troubleshooting tips for common installation issues, such as improper electrical connections or leaks. By following the instructions in the installation manual, users can ensure their Noma air conditioner is set up correctly and operates efficiently from day one.

Proper installation is vital for the air conditioner’s performance and longevity. Noma installation manuals are designed to make the process straightforward, even for those with limited technical expertise. They serve as a comprehensive resource for achieving a safe and effective setup.

Key Features of Noma Air Conditioner Manuals

Noma air conditioner manuals offer comprehensive details on operating modes, temperature control, and advanced features. They provide clear instructions on using cooling, fan, and dehumidify modes, as well as adjusting settings for optimal comfort. Additional features like timers and energy-saving modes are also explained to enhance user experience.

3.1. Operating Modes

Understanding the operating modes of your Noma air conditioner is essential for maximizing its performance and comfort. The manuals detail three primary modes: Cool, Fan, and Dehumidify. The Cool mode activates the air conditioning function to lower the room temperature, while the Fan mode circulates air without cooling, ideal for maintaining airflow. The Dehumidify mode removes excess moisture from the air, improving indoor air quality and comfort.

The manual provides clear instructions on how to select and adjust these modes using the remote control or the unit’s control panel. It also explains how to customize settings, such as fan speed and temperature, to suit your preferences. Additionally, the manual highlights features like timers and sleep modes, which allow you to program the air conditioner to turn on or off at specific times or adjust temperature settings for energy efficiency.

By familiarizing yourself with these operating modes, you can optimize your Noma air conditioner’s performance, ensuring a comfortable and energy-efficient experience. The manual serves as a straightforward guide to help you make the most of your unit’s capabilities.

3.2. Temperature Control

Temperature control is a critical feature of Noma air conditioners, allowing users to maintain a comfortable environment with precision. The manuals provide detailed instructions on how to adjust temperature settings using the remote control or the unit’s control panel. Typically, this involves using up and down arrow buttons to set the desired temperature, which is displayed on the unit’s control panel.

The manual also explains the temperature range available for your specific model, ensuring you can select a setting that efficiently cools the room without overworking the unit; Some models feature an Auto mode, which automatically adjusts the temperature based on the room’s ambient conditions, optimizing energy conservation and comfort.

Additionally, the manual highlights the importance of proper temperature settings for maintaining energy efficiency. It may include guidance on seasonal adjustments, such as setting higher temperatures during cooler months or lower temperatures during peak summer heat. Understanding these features ensures you can customize your cooling experience while minimizing energy consumption.

By following the temperature control guidelines outlined in the manual, users can achieve optimal comfort and energy efficiency. The manual serves as a comprehensive resource to help you master the temperature control functions of your Noma air conditioner.

Troubleshooting Common Issues

Troubleshooting common issues with your Noma air conditioner is made easier with the detailed guidance provided in the manual. The manual outlines step-by-step solutions for addressing frequent problems, ensuring minimal downtime and optimal performance. Whether the unit isn’t turning on, cooling inadequately, or producing unusual noises, the manual offers clear diagnostic steps.

For instance, if the air conditioner fails to power on, the manual suggests checking the power cord, circuit breaker, and remote control batteries. If cooling is weak, it may indicate a need to clean the air filters or check for blockages in the vents. Strange noises could signal loose parts or debris inside the unit, which can often be resolved with a simple inspection and cleaning.

The manual also provides guidance on interpreting error codes, helping users identify the root cause of issues. For more complex problems, such as refrigerant leaks or compressor malfunctions, the manual advises consulting a qualified technician. By following the troubleshooting tips, users can resolve minor issues independently, saving time and repair costs.

Overall, the troubleshooting section of the Noma air conditioner manual empowers users to address common problems confidently, ensuring their unit operates efficiently and effectively throughout the year. Regular reference to this section can prevent minor issues from escalating into major repairs.

Maintenance Guidelines

Regular maintenance is crucial for ensuring the longevity and efficiency of your Noma air conditioner. The manual provides detailed guidelines to help you keep your unit in optimal condition; One of the most important tasks is cleaning the air filters, which should be done every few weeks to prevent dust buildup and ensure proper airflow. Clogged filters can reduce cooling performance and increase energy consumption.

In addition to filter cleaning, the manual recommends inspecting the condenser coils for dirt or debris. Clean coils ensure efficient heat transfer and prevent the unit from overworking. Proper drainage is another key aspect; the manual advises checking the drain pan and hose for blockages to avoid water accumulation, which can lead to mold growth and system damage.

Seasonal maintenance is also emphasized. Before storing the unit during the off-season, the manual suggests cleaning the exterior, covering it to protect against dust and moisture, and ensuring all components are dry. When restarting the unit after storage, a thorough inspection and test run are recommended to ensure everything functions correctly.

By following these maintenance guidelines, you can extend the life of your Noma air conditioner, maintain its efficiency, and prevent costly repairs. Regular upkeep not only enhances performance but also ensures a healthier indoor environment. Make maintenance a priority to enjoy consistent cooling and comfort year after year.

Navigating the Controls

Understanding the controls of your Noma air conditioner is essential for optimizing its performance and customizing your comfort. The unit typically features a user-friendly interface with buttons or a remote control, allowing you to easily adjust settings. The power button is used to turn the unit on and off, while the mode selection button lets you choose between cooling, fan-only, or dehumidify modes.

The temperature control buttons enable precise adjustments, and the fan speed setting allows you to customize airflow. Many models also include a timer function, letting you schedule when the unit turns on or off. Some units offer advanced features like sleep mode, which gradually adjusts the temperature for a comfortable nights rest. The manual provides detailed explanations of each control, ensuring you can use these features effectively.

By familiarizing yourself with the controls, you can tailor the units operation to your preferences, enhancing energy efficiency and comfort. Proper use of these features not only improves performance but also extends the lifespan of your Noma air conditioner. Take the time to explore and understand all the controls to make the most of your unit.

novena mother of perpetual help pdf

The Novena to Mother of Perpetual Help is a traditional devotion honoring Mary’s role as a constant source of comfort and intercession. A PDF guide provides prayers, hymns, and reflections, helping devotees connect with Mary’s loving assistance and seek her guidance in times of need.

1.1 Overview of the Novena

The Novena to Mother of Perpetual Help is a nine-day prayer devotion seeking Mary’s intercession. It includes specific prayers, hymns, and reflections, available in a PDF format for easy access. The novena honors Mary as a constant source of comfort and guidance, encouraging devotees to deepen their faith and trust in her loving assistance.

1.2 Significance of Mother of Perpetual Help

Mother of Perpetual Help is revered as a powerful intercessor, embodying maternal love and protection. Her icon symbolizes divine mercy and hope, offering comfort to the afflicted. Devotees worldwide seek her aid, trusting in her ability to provide solace and guidance. Her enduring popularity reflects her role as a unifying spiritual refuge, inspiring faith and devotion across generations.

1.3 Purpose of the Novena

The Novena seeks to honor Mother Mary’s perpetual intercession, fostering a deeper connection with her divine assistance. It aims to inspire devotion, express gratitude, and implore her help in times of need. Through prayer and reflection, the Novena strengthens faith, provides comfort, and deepens trust in her loving care and divine providence.

Structure of the Novena Prayer Service

The Novena prayer service begins with opening hymns and prayers, followed by the recitation of the Novena prayer proper, and concludes with closing consecration and thanksgiving rituals.

2.1 Opening Prayers and Hymns

The Novena begins with opening prayers and hymns, such as Immaculate Mother, seeking Divine assistance. These prayers express gratitude and invoke Mary’s intercession, setting a devotional tone for the service, as outlined in the PDF guide.

2.2 Daily Reflections and Intentions

Daily reflections and intentions guide devotees to seek Mary’s help for specific needs. The PDF includes prayers and themes for each day, encouraging participants to reflect on Mary’s role in their lives and offer intentions for healing, guidance, and spiritual growth, fostering a deeper connection with her perpetual assistance.

2.3 Closing Prayers and Consecration

Closing prayers and consecration mark the end of each novena session, offering a heartfelt surrender to Mary’s guidance; The PDF guide includes a consecration prayer, allowing devotees to dedicate themselves to her care, expressing trust in her perpetual help and seeking her intercession for spiritual growth and protection throughout their lives.

Historical Background of the Devotion

The Mother of Perpetual Help devotion traces its roots to the 15th-century icon and gained prominence through the Redemptorist Order in the 19th century. The PDF guide highlights this rich history, emphasizing Mary’s enduring role as a symbol of hope and intercession for millions worldwide.

3.1 Origins of the Mother of Perpetual Help Icon

The Mother of Perpetual Help icon originated in the 15th century, crafted in the Byzantine style. It gained prominence after its rediscovery in the 19th century by the Redemptorist Order, who championed its veneration. The PDF guide details this sacred image’s historical journey, linking its origins to its widespread devotion today, inspiring millions through its enduring spiritual significance.

3.2 Spread of the Devotion Worldwide

The devotion to Mother of Perpetual Help spread globally, fueled by the Redemptorist Order’s efforts. The iconic image and novena prayers resonated worldwide, with millions participating in weekly devotions. The PDF guide has further enhanced accessibility, allowing devotees across continents to join in prayers, reflecting the devotion’s universal appeal and enduring spiritual impact.

3.3 Role of the Redemptorist Order

The Redemptorist Order played a pivotal role in popularizing the Mother of Perpetual Help devotion. They disseminated the iconic image and promoted the novena worldwide, ensuring its global reach. The PDF guide reflects their dedication, providing structured prayers and rituals that foster spiritual connection, making the devotion accessible to millions and strengthening its enduring legacy.

Key Prayers and Hymns in the Novena

The novena features the Novena Prayer Proper, hymns like “Immaculate Mother”, and the Litany of Our Mother of Perpetual Help, all included in the PDF guide for devotion and reflection.

4.1 The Novena Prayer Proper

The Novena Prayer Proper is a heartfelt invocation to Mother of Perpetual Help, seeking her intercession and protection. It begins with an address to Mary as the “Most holy and Immaculate Virgin,” acknowledging her as a refuge and hope. The prayer requests her aid in times of need and expresses gratitude for her maternal care, concluding with a pledge to consecrate one’s life to her guidance and the service of her Divine Son. This prayer is a central component of the novena, reflecting deep devotion and trust in Mary’s perpetual assistance.

4.2 Hymns and Songs of Devotion

Hymns like “Immaculate Mother” and “Ave Maria” are integral to the novena, expressing devotion and seeking Mary’s intercession. These songs, sung with faith, deepen participants’ spiritual connection, praising her perpetual help and maternal love. Traditional and contemporary hymns alike enrich the prayer service, fostering a collective appeal for Mary’s guidance and protection in times of need.

4.3 Litany and Consecration Prayers

The Litany of Loreto and consecration prayers are essential components of the novena, invoking Mary’s intercession and seeking her maternal protection. These prayers express devotion, asking for her guidance and blessings. Consecration prayers dedicate participants’ lives to Mary’s care, committing to follow her example and trust in her perpetual help and grace. This sacred ritual deepens spiritual connection and faith.

The Mother of Perpetual Help PDF

The Mother of Perpetual Help PDF is a comprehensive guide containing novena prayers, hymns, and reflections. It offers a convenient digital format for devotees to deepen their devotion anytime, anywhere.

5.1 Availability of the Novena PDF Online

The Mother of Perpetual Help PDF is easily accessible online, offered by various Catholic websites and shrines. It can be downloaded for free, making it convenient for devotees worldwide to pray the novena digitally. This digital version ensures that the devotion remains reachable to all, fostering global participation and spiritual connection.

5.2 Key Contents of the PDF

The Novena PDF includes opening and closing prayers, hymns, daily reflections, and the novena prayer proper. It also features the Litany of Our Mother of Perpetual Help and consecration prayers, guiding devotees through a structured nine-day devotion. The document is designed to enhance spiritual engagement and devotion to Mary’s intercession.

5.3 Benefits of Using the Digital Version

The digital version of the Novena PDF offers convenience, accessibility, and portability. It can be easily shared, accessed on multiple devices, and searched for specific prayers. The digital format also reduces the need for physical copies, making it eco-friendly and ensuring the novena is always within reach for devotees worldwide.

Miracles and Intercessions Associated with the Novena

The Novena to Mother of Perpetual Help is renowned for its miracles and intercessions. Devotees worldwide share testimonies of healing, spiritual growth, and divine assistance, attributing these blessings to Mary’s powerful intercession.

6.1 Testimonies of Devotees

Devotees worldwide express deep gratitude for miracles attributed to Mother of Perpetual Help. Many share testimonies of healing, resolution of personal struggles, and spiritual renewal. These stories highlight Mary’s intercession, reinforcing faith and trust in her maternal care. The Novena’s impact is evident in transformed lives, inspiring others to seek her perpetual assistance and grace;

6.2 The Power of Mary’s Intercession

Mary’s intercession is a powerful bridge between humanity and God. Through the Novena, devotees seek her maternal care, trusting in her ability to amplify their prayers. Her role as a loving advocate reflects her deep compassion, making her a steadfast source of hope and divine grace for those seeking help and spiritual renewal.

6.3 Healing and Spiritual Growth

The Novena fosters profound healing and spiritual growth, offering devotees a transformative experience. Through prayer and reflection, participants seek physical, emotional, and spiritual renewal. The devotion strengthens faith, deepens trust in God, and encourages a closer relationship with Mary, who intercedes for her children, guiding them toward lasting peace and eternal grace.

How to Participate in the Novena

Participate by attending the Perpetual Novena devotions for nine consecutive Wednesdays, praying the Novena at home, or preparing spiritually through reflection and intention-setting.

7.1 Attending the Perpetual Novena Devotions

Attend the Perpetual Novena devotions at a local shrine or church, joining thousands in prayer. Participate in traditional hymns, prayers, and reflections, fostering a sense of community and spiritual connection. The congregation collectively honors Mary’s intercession, offering petitions and gratitude, creating a powerful and unifying experience for all participants.

7.2 Praying the Novena at Home

Praying the Novena at home allows for personal devotion and convenience. Download the Novena Mother of Perpetual Help PDF to access prayers, hymns, and reflections. Set aside dedicated time each day to recite the Novena Prayer Proper, sing hymns, and reflect on intentions. This intimate setting fosters a deeper connection with Mary’s intercession, helping you seek her guidance and grace in your life.

7.3 Preparing for the Novena

Preparing for the Novena involves creating a sacred space for prayer and reflection. Download the Novena Mother of Perpetual Help PDF to guide your daily prayers. Set intentions, light candles, and mentally ready yourself to seek Mary’s intercession. This preparation fosters a deeper spiritual connection and readiness to embrace the grace of the Novena devotion.

The Significance of Wednesday Devotions

Wednesday devotions honor the perpetual intercession of Mother Mary, fostering global unity among devotees. The Novena Mother of Perpetual Help PDF guides this enduring tradition, emphasizing prayer and community worship.

8.1 Tradition Behind Wednesday Prayers

The tradition of Wednesday devotions traces back to the Redemptorist Order’s promotion of Mother Mary’s perpetual help. The Novena Mother of Perpetual Help PDF highlights this practice, reflecting a centuries-old dedication to seeking Mary’s intercession and solace, fostering spiritual growth and communal faith among global devotees through consistent weekly prayer and reflection.

8.2 The Role of the Shrine of Our Mother of Perpetual Help

The Shrine of Our Mother of Perpetual Help serves as a sacred hub for devotees worldwide. The Novena Mother of Perpetual Help PDF outlines its significance, detailing how the shrine facilitates communal prayer, pilgrimages, and spiritual renewal, embodying Mary’s enduring presence as a source of hope and comfort for millions seeking her intercession and blessings.

8.3 Global Participation in the Devotion

The Novena to Mother of Perpetual Help has gained worldwide recognition, with devotees from diverse cultures and regions participating. The Novena Mother of Perpetual Help PDF plays a pivotal role in unifying the global community, offering accessible prayers, hymns, and reflections that transcend linguistic and cultural barriers, fostering a shared spiritual experience and deepening devotion to Mary’s perpetual intercession.

The 75th Anniversary of the Novena at Baclaran Church

The 75th anniversary marks a significant milestone for the Novena at Baclaran Church, celebrating 75 years of devotion since 1948. The Novena Mother of Perpetual Help PDF plays a key role in the preparations and celebrations, uniting pilgrims worldwide in prayer and gratitude.

9.1 Historical Milestone in 2023

2023 marked the 75th anniversary of the Novena at Baclaran Church, celebrating 75 years of devotion since 1948. The Novena Mother of Perpetual Help PDF played a central role in preparations, serving as a digital companion for pilgrims and fostering unity among global devotees honoring this sacred tradition.

9.2 Celebrations and Preparations

The 75th-anniversary celebrations included special masses, processions, and devotional events. The Novena Mother of Perpetual Help PDF was widely used to guide prayers and reflections, fostering global participation. Pilgrims and devotees prepared spiritually, deepening their connection to Mary’s intercession, ensuring the tradition’s enduring legacy and heartfelt observance.

9.3 The Enduring Popularity of the Devotion

The Novena to Mother of Perpetual Help remains deeply cherished due to its universal appeal and comforting intercession. The PDF guide enhances accessibility, allowing global devotion. Its timeless relevance inspires faith and hope, making it a beloved tradition that continues to grow in popularity, especially during challenging times, fostering spiritual renewal and Mary’s loving presence.

The Novena to Mother of Perpetual Help remains a powerful devotion, offering comfort and hope. Its enduring impact, supported by the PDF guide, continues to inspire faithful devotion to Mary’s loving intercession and perpetual assistance.

10.1 The Lasting Impact of the Novena

The Novena to Mother of Perpetual Help has left an indelible mark on the spiritual lives of millions.Its global reach, facilitated by the PDF guide, ensures accessibility to all. Through heartfelt prayers and devotion, it fosters spiritual growth and strengthens faith in Mary’s intercession, inspiring hope and transformation for generations.

10.2 Encouragement to Continue the Devotion

The Novena to Mother of Perpetual Help remains a vibrant spiritual practice, fostering hope and faith. The PDF guide ensures accessibility, encouraging devotees to deepen their relationship with Mary. As a global community, continuing this devotion strengthens spiritual bonds and inspires trust in her perpetual intercession, inviting all to share in its timeless grace and transformative power.

cpn study guide

Welcome to the CPN Study Guide‚ your comprehensive resource for preparing for the Certified Pediatric Nurse exam․ This guide is designed to help you navigate the exam process with confidence and success․

Inside‚ you’ll find detailed content outlines‚ effective study strategies‚ and practice questions to ensure you’re well-prepared․ Whether you’re just starting or finalizing your review‚ this guide is your essential toolkit for achieving your CPN certification․

With a focus on key areas like health promotion and clinical knowledge‚ this guide provides structured support to help you master the material and excel on exam day․ Start your journey to becoming a certified pediatric nurse today!

Overview of the CPN Exam

The Certified Pediatric Nurse (CPN) exam is a 3-hour test consisting of 175 multiple-choice questions․ It assesses your knowledge and skills in pediatric nursing‚ focusing on topics outlined in the content blueprint provided by the exam sponsor․

Understanding the exam structure and content is crucial for effective preparation․ Use this guide to align your study efforts with the exam’s focus areas and ensure a comprehensive review of all essential topics before test day․

2․1 Exam Format

The Certified Pediatric Nurse (CPN) exam is structured to assess your clinical knowledge and decision-making skills․ The exam consists of 175 multiple-choice questions (MCQs) and is timed for 3 hours․ Each question is designed to evaluate your understanding of pediatric nursing concepts‚ including health promotion‚ disease management‚ and family-centered care․

Questions are divided into content categories based on the exam blueprint‚ ensuring a comprehensive assessment of your expertise․ The format includes single-response MCQs‚ where you select the best answer from four options․ Some questions may include patient scenarios to test your ability to apply knowledge in real-world situations․

Understanding the exam format is key to effective preparation․ Familiarize yourself with the timing and question types to optimize your performance․ Use practice exams to simulate the test experience and improve your time management skills․ This will help you approach the actual exam with confidence and readiness․

Key Content Areas

The CPN exam focuses on critical pediatric nursing topics‚ including health promotion‚ disease management‚ and family-centered care․ Mastering these areas ensures a strong foundation for clinical practice and exam success․

3․1 Health Promotion

Health promotion is a core component of pediatric nursing‚ focusing on educating families and communities to improve child health outcomes․ This includes strategies like nutrition guidance‚ vaccination education‚ and safety measures to prevent injuries․

Nurses play a vital role in promoting healthy lifestyles‚ addressing developmental milestones‚ and fostering a supportive environment for children’s growth․ Understanding these principles is essential for effective care and successful exam preparation․

Key topics within this area include age-specific health screenings‚ mental health support‚ and community resources․ By mastering these concepts‚ nurses can empower families to make informed decisions‚ enhancing overall child well-being and developmental outcomes․

Effective Study Strategies

Developing effective study strategies is crucial for success․ Create a structured study plan‚ breaking down topics into manageable sections․ Use active learning techniques like flashcards and practice questions to reinforce knowledge․

Consistency is key—dedicate regular time to studying and reviewing material․ Seek support from clinical educators or study groups to clarify doubts and stay motivated throughout your preparation journey․

4․1 Creating a Study Plan

Creating a structured study plan is essential for effective preparation․ Start by setting clear‚ achievable goals and breaking them into manageable tasks․ Allocate specific time slots for each topic‚ ensuring a balanced approach to cover all content areas․

Begin with a detailed review of the exam content outline‚ identifying your strengths and weaknesses․ Focus on dedicating more time to challenging areas while reinforcing your understanding of key concepts․ Use a weekly schedule to maintain consistency and track your progress․

Incorporate active learning techniques‚ such as flashcards‚ practice questions‚ and summary notes‚ to engage with the material dynamically․ Regularly review and adjust your plan to stay on track and address any gaps in knowledge․ Seeking support from clinical educators or study groups can also enhance your preparation․

Remember‚ consistency and organization are key․ Stick to your plan and stay motivated—you’re one step closer to becoming a Certified Pediatric Nurse!

Practicing with Sample Questions

Practicing with sample questions is crucial for exam success․ Utilize multiple-choice questions to familiarize yourself with the format․ This helps identify knowledge gaps and builds confidence․ Regular practice strengthens your understanding and test-taking skills․

5․1 Types of Questions

The CPN exam features a variety of question types designed to assess your knowledge and clinical reasoning skills․ The most common are multiple-choice questions‚ which present a scenario and several potential answers․ These questions test your ability to apply pediatric nursing concepts to real-world situations․

Some questions may include case studies or scenario-based questions‚ requiring you to analyze patient data and choose the best course of action․ Additionally‚ select-all-that-apply questions may ask you to identify multiple correct answers‚ ensuring a thorough understanding of the topic․

Understanding the question types helps you develop effective strategies for tackling them during the exam․ Focus on identifying key terms in the stem and eliminating incorrect options to maximize your chances of selecting the right answer․ Regular practice with sample questions will enhance your familiarity with these formats‚ boosting your confidence and performance on test day․

Test Day Preparation

Ensure you arrive early‚ stay calm‚ and bring required documents․ Manage your time wisely‚ and read questions carefully․ Stay hydrated and focused to perform at your best during the exam․

6․1 Staying Calm

Staying calm during the CPN exam is crucial for optimal performance․ Begin by practicing relaxation techniques such as deep breathing or mindfulness exercises in the days leading up to the test․ On exam day‚ arrive early to avoid last-minute stress and ensure you have all necessary materials․

  • Take short breaks between questions to refresh your mind․
  • Stay hydrated and energized with a nutritious meal beforehand․
  • Visualize success to maintain confidence and focus․

Remember‚ proper preparation and a positive mindset will help you approach the exam with clarity and composure․ Stay calm‚ trust your knowledge‚ and give your best effort․

Welcome to the CPN Study Guide‚ your ultimate resource for preparing for the Certified Pediatric Nurse (CPN) exam․ This guide is specifically designed to help aspiring pediatric nurses navigate the challenging yet rewarding path to certification․

Within these pages‚ you’ll find a comprehensive overview of the exam format‚ key content areas‚ and effective study strategies to ensure you’re well-prepared․ Whether you’re just beginning your journey or finalizing your review‚ this guide is structured to help you feel confident and ready for success․

The guide covers essential topics such as health promotion‚ pediatric care‚ and clinical knowledge‚ all while providing practical advice for managing exam day stress․ By following the structured approach outlined in this guide‚ you’ll be equipped with the tools and insights needed to excel on the CPN exam and advance your nursing career․

The Certified Pediatric Nurse (CPN) exam is a comprehensive assessment designed to evaluate the knowledge and skills of nurses specializing in pediatric care․ Administered by the Pediatric Nursing Certification Board (PNCB)‚ this exam is a critical step toward becoming a certified pediatric nurse․

The exam consists of 175 multiple-choice questions and is completed within a 3-hour time frame․ Questions are based on the content outline provided by the PNCB‚ covering a wide range of topics relevant to pediatric nursing․ The exam is designed to test both theoretical knowledge and practical application‚ ensuring that candidates are well-prepared to provide high-quality care to pediatric patients․

Understanding the exam structure and content is essential for effective preparation․ The PNCB regularly updates the content outline to reflect current practices and advancements in pediatric nursing‚ making it a valuable resource for study․ By familiarizing yourself with the exam format and focus areas‚ you can approach test day with confidence and achieve your certification goals․

aprilaire thermostat install manual

Welcome to the Aprilaire Thermostat Installation Manual, your comprehensive guide for installing, configuring, and maintaining your thermostat. This manual provides detailed instructions for a seamless setup process.

Overview of the Aprilaire Thermostat Installation Manual

This manual provides a detailed guide for installing, configuring, and maintaining your Aprilaire thermostat. It covers essential steps, from preparation and wiring to final setup and troubleshooting. Designed for both professional installers and homeowners, the manual ensures a smooth installation process, emphasizing safety and compatibility with various HVAC systems.

Importance of Proper Installation

Importance of Proper Installation

Proper installation ensures your Aprilaire thermostat functions optimally, maintaining comfort and efficiency. Incorrect installation can void warranties, cause system malfunctions, or pose safety risks. Follow the manual carefully to comply with safety standards and guarantee reliable performance.

Benefits of Using an Aprilaire Thermostat

An Aprilaire thermostat offers enhanced energy efficiency, smart home compatibility, and precise temperature control. It integrates seamlessly with HVAC systems, improving comfort and reducing energy costs. Advanced features like remote access and scheduling optimize performance, while humidity control capabilities promote better indoor air quality and system longevity.

Preparation for Installation

Before starting, ensure you have all necessary tools and materials. Review the wiring diagram, safety guidelines, and system requirements. Prepare for Wi-Fi setup and registration.

Tools and Materials Needed

Tools and Materials Needed

To install your Aprilaire thermostat, you’ll need a flathead screwdriver, Phillips screwdriver, drill with bits, wire strippers, pliers, and a voltage tester. Materials include wall anchors, screws, mounting hardware, and batteries (if applicable). Label wires for easy reconnection. Ensure all tools are readily available before starting the installation process for efficiency and safety.

Understanding the Thermostat Wiring Diagram

Refer to the wiring diagram in the manual to identify terminals (R, C, W, Y, G) and their functions. Match each wire to its corresponding connector, ensuring proper connections for heating, cooling, and fan operations. Incorrect wiring can damage the system or cause malfunctions. Use the diagram to verify compatibility with your HVAC system and configure settings accurately.

Safety Precautions Before Starting the Installation

Disconnect power to the HVAC system before starting installation to avoid electrical shocks. Ensure wires are not routed near 120VAC lines to prevent interference. Handle wires and terminals carefully to avoid damage or short circuits. Verify proper installation to prevent malfunctions. Refer to the manual for specific safety guidelines tailored to your Aprilaire thermostat model. Use tools correctly and ensure a safe working environment.

Removing the Old Thermostat

Disconnect power to the old thermostat for safety. Gently pull it from the wall, taking care not to damage wires. Label wires for easy reconnection later.

Disconnecting Power to the Old Thermostat

Disconnecting Power to the Old Thermostat

Before starting, ensure the HVAC system is turned off. Switch the thermostat to “off” and verify it is cool. Disconnect power at the circuit breaker or fuse box. Wait a few minutes to confirm the system is fully deactivated. Never proceed without verifying the power is off to avoid electrical hazards or damage.

Removing the Old Thermostat from the Wall

Removing the Old Thermostat from the Wall

Gently pry the old thermostat away from the wall using a screwdriver. Carefully pull it forward while ensuring not to damage the wires or mounting hardware. Once removed, wrap the exposed wires with electrical tape and label them for later connection. Dispose of the old thermostat responsibly, following local regulations.

Labeling the Wires for Easy Reconnection

Labeling the Wires for Easy Reconnection

Start by taking a clear photo of the wired connections. Use color-coded labels or tags to mark each wire according to its function (e.g., R for power, W for heating); Create a legend to map each label. Test for live wires with a voltage tester. Ensure labels are clear and double-checked before reconnecting to the new thermostat for safety and accuracy.

MOUNTING THE NEW THERMOSTAT

Mounting involves attaching the thermostat base to the wall, ensuring proper alignment and level placement. Use screws or adhesive strips for secure installation on any wall type.

Preparing the Wall for Mounting

Ensure the wall is clean, dry, and level. Check for any obstructions or wiring behind the mounting area. Use appropriate anchors for wall types like drywall or plaster. Mark the wall accurately to align with the thermostat base for secure installation.

Mounting the Thermostat to the Wall

Remove the back of the thermostat by pressing the tab at the bottom. Pull the unit away to access the mounting area. Ensure the thermostat fits over the wire opening. Align it with the mark made on the wall and secure using screws. This ensures a flush and stable installation for optimal performance and functionality.

Handling Different Wall Types (Drywall, Plaster, etc.)

Handling Different Wall Types (Drywall, Plaster, etc.)

For drywall, use wall anchors to prevent screws from stripping. For plaster walls, pre-drill holes to avoid cracking. Ensure the thermostat is level and secure. If mounting without a junction box, align the wire opening with the mark on the wall. Use appropriate fasteners for your wall type to ensure a stable and durable installation.

WIRING THE THERMOSTAT

Connect wires to the thermostat terminal, ensuring correct color coding for heating, cooling, and fan functions. Verify compatibility with your HVAC system and test the wiring configuration.

Connecting the Wires to the Thermostat Terminal

Connecting the Wires to the Thermostat Terminal

Match each wire to its corresponding terminal on the Aprilaire thermostat, ensuring proper color coding for heating, cooling, and fan functions. Refer to the wiring diagram in the manual for accurate connections. Carefully insert each wire into its designated terminal, securing it firmly. Double-check all connections to avoid errors. Turn the power back on and test the system to ensure proper functionality.

Configuring the Wiring for HVAC System Compatibility

Configuring the Wiring for HVAC System Compatibility

Refer to the wiring diagram to identify compatibility with your HVAC system. Ensure proper terminal connections for heating, cooling, and fan modes. Use the installer menu to select the correct system type (e.g., gas, electric, or heat pump). Verify compatibility settings to match your HVAC equipment specifications. Double-check all configurations to ensure optimal system performance and avoid operational issues.

Connecting Optional Sensors (Humidity, Outdoor Temperature, etc.)

Connect optional sensors like humidity or outdoor temperature sensors to enhance thermostat functionality. Attach the outdoor temperature sensor to S1 and S2 terminals for accurate readings. Enable remote sensors via the installer setup menu to override or average with the internal temperature sensor. Refer to the wiring diagram for proper connections and settings to optimize system performance and comfort control.

Setting Up Wi-Fi and Registration

Connect your Aprilaire thermostat to a Wi-Fi network for remote control and smart features. Register the device to your Aprilaire account to enable advanced functionality and syncing with other smart devices seamlessly.

Connecting the Thermostat to a Wi-Fi Network

Connecting the Thermostat to a Wi-Fi Network

Select your Wi-Fi network from the thermostat’s menu, enter the password, and wait for confirmation. Ensure stable internet connection for smart features. Refer to the manual for detailed steps and troubleshooting tips to establish a secure and reliable network connection.

Registering the Thermostat to an Aprilaire Account

Registering the Thermostat to an Aprilaire Account

Access the thermostat menu, select “Register Device,” and enter your email to create an Aprilaire account. Follow on-screen instructions to complete registration, ensuring access to advanced features, remote control, and notifications. This step is crucial for smart functionality and warranty activation, as outlined in the manual.

Syncing the Thermostat with Other Smart Devices

Syncing the Thermostat with Other Smart Devices

Open the thermostat menu, navigate to “Smart Home Integration,” and select your preferred smart platform. Use the Aprilaire app to link the thermostat with compatible devices. Ensure all devices are connected to the same Wi-Fi network for seamless integration. This allows voice control and synchronized operation with other smart systems in your home.

Final Setup and Testing

Complete the installation by verifying all connections and settings. Test the thermostat’s functionality, ensuring heating and cooling systems respond correctly. Set preferences and schedules for optimal performance.

Completing the Installation Process

Completing the Installation Process

Finalize the installation by ensuring all wires are securely connected and the thermostat is mounted properly. Double-check the Wi-Fi connection and account registration. Power on the system and verify that all features, including remote sensors, are functioning correctly. Review the setup to ensure everything is operational before testing the thermostat’s performance.

Testing the Thermostat Functionality

Testing the Thermostat Functionality

Once installed, test the thermostat by switching between heating and cooling modes. Adjust the temperature to ensure the system responds correctly. Verify that the display accurately reflects the set temperature and current conditions. Check the Wi-Fi connection and remote access functionality. Ensure all sensors, including optional outdoor or humidity sensors, are providing accurate readings and that the system operates smoothly.

Setting Up Preferences and Schedules

Setting Up Preferences and Schedules

After installation, customize your thermostat by setting preferred temperatures, humidity levels, and schedules. Use the user-friendly interface to create daily or weekly programs that align with your lifestyle. Enable smart features like geofencing or energy-saving modes. Sync the thermostat with your schedule to optimize comfort and energy efficiency. Adjust settings remotely via the app for added convenience.

Troubleshooting Common Issues

Address issues like wiring problems, Wi-Fi connectivity, or sensor malfunctions by checking connections and resetting the thermostat. Refer to the manual or contact support for assistance.

Addressing Wiring or Connection Problems

Addressing Wiring or Connection Problems

Ensure all wires are securely connected to the correct terminals (R, W, Y, G, C). Verify the wiring diagram matches your HVAC system. Check for loose connections or damaged wires. Power down the system before inspecting or repairing wiring. If issues persist, consult the manual or contact Aprilaire support for professional assistance.

Resolving Wi-Fi Connectivity Issues

Resolving Wi-Fi Connectivity Issues

  • Restart your router and thermostat to reset the connection.
  • Ensure the thermostat is connected to the correct Wi-Fi network.
  • Check the signal strength and move the router closer if necessary.
  • Verify the Wi-Fi password is entered correctly.
  • Update the thermostat software to the latest version.
  • Consult the manual or contact Aprilaire support for further assistance.

Fixing Temperature Sensor Malfunctions

Fixing Temperature Sensor Malfunctions

To address temperature sensor issues, first, ensure the sensor is clean and free from obstructions. Check for loose wiring connections and verify that all wires are securely attached. If the sensor is damaged, it may need replacement. Refer to the Aprilaire manual for calibration instructions or contact customer support for assistance. Resetting the thermostat might also resolve the issue. If problems persist, consult a professional HVAC technician for proper diagnosis and repair.

Maintenance and Upkeep

Regularly clean the thermostat display and sensors for optimal performance. Check and replace batteries if applicable. Ensure firmware updates are installed to maintain functionality and efficiency.

Cleaning the Thermostat for Optimal Performance

Cleaning the Thermostat for Optimal Performance

Regularly clean the thermostat’s display and sensors using a soft, dry cloth to prevent dust buildup. Avoid harsh chemicals or liquids, as they may damage the device.

Gently wipe the exterior and internal components to ensure accurate temperature readings and smooth operation. Clean optional sensors, like humidity or outdoor temperature sensors, for enhanced performance.

Updating the Thermostat Software

Updating the Thermostat Software

Ensure the thermostat is connected to Wi-Fi and navigate to the “System” or “Advanced Settings” menu. Select “Software Update” to check for and install the latest version. Avoid interrupting the power during updates. If issues arise, refer to the troubleshooting section or contact Aprilaire support for assistance. Regular updates ensure optimal performance and feature availability.

Replacing Batteries (If Applicable)

Replacing Batteries (If Applicable)

If your Aprilaire thermostat is battery-powered, ensure fresh AA alkaline batteries are installed correctly. Turn off power before replacing batteries to avoid damage. Open the battery compartment, insert batteries as indicated, and close securely. Proper installation ensures accurate temperature control and uninterrupted operation. Refer to the manual for models requiring this step.

Safety and Warranty Information

Your Aprilaire thermostat is warranted for five years from installation, covering defects in materials or workmanship. Proper installation ensures warranty validity and safety compliance. Dispose of old thermostats according to local regulations.

Understanding the Warranty Terms and Conditions

Understanding the Warranty Terms and Conditions

Your Aprilaire thermostat is covered by a limited five-year warranty from the installation date. This warranty protects against defects in materials and workmanship. Proper installation by a qualified technician is required for warranty validity. Damage due to improper installation, misuse, or failure to follow guidelines may void the warranty. Refer to the manual for full terms and conditions.

Compliance with Safety Standards

The Aprilaire thermostat is designed to comply with safety standards, ensuring safe operation within specified limits. Proper installation by a qualified technician and adherence to the manual’s guidelines are crucial for maintaining compliance and overall system performance.

Disposal Information for Old Thermostats

Properly dispose of your old thermostat by contacting local authorities for environmentally responsible disposal options. Some components may be recyclable. Ensure batteries are removed before disposal to prevent potential environmental hazards. Always follow local regulations for electronic waste disposal to promote sustainability and safety.

Thank you for following the Aprilaire thermostat installation manual. Proper installation ensures optimal performance and energy efficiency. Refer to this guide for future maintenance and troubleshooting needs.

Disconnect power, remove the old thermostat, and label wires. Mount the new thermostat, connect wires according to the diagram, and configure settings for HVAC compatibility. Set up Wi-Fi, register the device, and test functionality. Refer to the manual for troubleshooting and maintenance tips to ensure optimal performance and longevity of your Aprilaire thermostat.

Final Tips for Optimizing Thermostat Performance

Regularly update the thermostat software for improved functionality. Clean the screen and sensors to ensure accuracy. Use remote sensors for precise temperature readings. Adjust schedules to match your lifestyle for energy efficiency. Ensure the thermostat is properly registered and synced with other smart devices for seamless operation. Replace batteries timely if applicable to maintain performance.

Contact Information for Support and Assistance

For any questions or issues, contact Research Products Corporation at (800) 334-6011. Visit their website for additional resources or refer to your Aprilaire thermostat model’s specific manual for detailed support options. Ensure to register your product for warranty benefits and updates. Please consult the manual for further assistance or troubleshooting guidance.

two step equations worksheet pdf

Definition and Importance

Two-step equations are algebraic expressions requiring two operations to solve, enhancing problem-solving skills and foundational math understanding․ They build on basic operations, crucial for algebraic skills and real-world problem-solving․

Two-step equations are fundamental algebraic problems requiring two operations to isolate the variable, such as reversing addition and multiplication․ They are essential for developing problem-solving skills and logical thinking, crucial in various academic disciplines and real-life situations․ Mastery of these equations is vital for progressing in mathematics, as they form the basis for more complex algebraic expressions and word problems․ Regular practice with worksheets helps students build a strong mathematical

Overview of Skills Required

Solving two-step equations demands a strong grasp of inverse operations, order of operations, and the ability to apply them sequentially․ Students must understand how to isolate variables by reversing addition, subtraction, multiplication, or division․ Proficiency in identifying and applying the correct operations is crucial․ Additionally, problem-solving strategies and attention to detail are essential to avoid errors․ These skills are foundational for advancing in algebra and tackling more complex mathematical concepts effectively․

How to Solve Two-Step Equations

To solve two-step equations, first eliminate constants by performing inverse operations․ Then isolate the variable by reversing the operation applied to it․ Always check your solution by substituting it back into the original equation to ensure both sides are equal․ This methodical approach ensures accuracy and understanding of the underlying mathematical principles;

Step-by-Step Solving Process

Start by identifying the equation and the goal: solving for the variable․ First, eliminate constants by performing inverse operations․ For example, in (3x + 5 = 11), subtract 5 from both sides․ Next, isolate the variable by reversing the operation applied to it, such as dividing by 3․ Always check your solution by substituting it back into the original equation․ This ensures accuracy and builds confidence․ Worksheets often include model problems to guide learners through this methodical approach, helping them master two-step equations effectively․

Common Operations Involved

Two-step equations typically involve basic arithmetic operations: addition, subtraction, multiplication, and division․ These can be applied to integers, fractions, or decimals․ Common scenarios include simplifying expressions, combining like terms, or reversing operations to isolate the variable․ For example, equations like (3x + 5 = 11) require subtraction and division․ Worksheets often include problems that mix these operations, such as (7 ⎻ 2x = 3) or ( rac{4x}{2} + 6 = 10)․ These exercises help build fluency in applying operations in sequence to solve for unknowns․

Benefits of Using Worksheets

Worksheets provide structured practice, ensuring mastery of two-step equations through clear solutions and varied problems․ They engage students with interactive exercises, making learning effective and enjoyable while building confidence․

Free Printable Resources

Free printable two-step equations worksheets are widely available online, offering a variety of problems for all skill levels․ Websites like Super Teacher Worksheets, Cuemath, and Kuta Software provide PDFs with exercises covering addition, subtraction, multiplication, and division․ These resources cater to 6th, 7th, and 8th-grade students, with options for integers, decimals, and fractions․ Many worksheets include answer keys, making them ideal for self-study or classroom use․ They offer structured practice, ensuring effective learning and mastery of two-step equations․

Structured Practice for Effective Learning

Structured practice with two-step equations worksheets ensures steady progress and mastery․ Worksheets are designed with increasing difficulty, guiding students from basic to complex problems․ Clear instructions and examples help students understand the process, while answer keys allow for self-assessment․ Regular practice builds confidence, fluency, and problem-solving skills, making these resources invaluable for learners at all levels․ The organized format helps students track their improvement and identify areas needing extra attention, fostering a systematic approach to learning algebra․

Types of Two-Step Equations Worksheets

Worksheets are categorized by difficulty, operations, and problem types, including basic, intermediate, and advanced levels․ They cover addition, subtraction, multiplication, and division, with integers, fractions, and decimals․

Worksheets by Difficulty Level

Worksheets are categorized into basic, intermediate, and advanced levels․ Basic worksheets focus on simple operations without exponents or parentheses, suitable for 6th–8th graders․ Intermediate worksheets introduce operations like negative coefficients and word problems․ Advanced sheets involve complex operations and variables on both sides of the equation․ Each level builds on the previous, ensuring progressive learning and mastery of two-step equations, with clear solutions provided for effective practice and understanding․

Worksheets by Operation (Addition, Subtraction, Multiplication, Division)

Worksheets are tailored to focus on specific operations, allowing targeted practice․ Addition and subtraction worksheets involve solving equations with constants on one or both sides․ Multiplication and division worksheets introduce coefficients and inverse operations․ Many resources combine these operations, offering a variety of problems with integers, fractions, and decimals․ Each PDF includes clear solutions, making them ideal for structured practice and mastery of two-step equations across different arithmetic operations;

Creating Custom Worksheets

Custom worksheets allow teachers and students to tailor practice to specific needs․ Tools like Kuta Software and Cuemath offer generators for creating two-step equations with varying operations and difficulty levels, ensuring focused and effective learning experiences․

Tools for Generating Worksheets

Tools like Kuta Software, Infinite Pre-Algebra, and WorksheetWorks․com offer customizable worksheet generators for two-step equations․ These platforms allow users to create problems involving addition, subtraction, multiplication, and division, catering to different difficulty levels․ Teachers can tailor worksheets to focus on specific operations or include mixed operations for varied practice․ Many tools provide answer keys, ensuring easy grading and feedback․ These resources are ideal for creating structured, engaging practice materials for students learning two-step equations․

Designing Effective Practice Problems

Effective two-step equation practice problems should vary operations, incorporating integers, fractions, and decimals․ Start with basic addition/subtraction, then introduce multiplication/division․ Include word problems and geometric shapes for real-world relevance․ Ensure problems progress logically, from simple to complex․ Use clear formatting and provide answer keys for verification․ Mixed-operation worksheets challenge students to apply inverse operations correctly․ Regular practice with structured problems enhances understanding and retention, preparing students for advanced algebraic concepts and practical applications․

Common Mistakes to Avoid

Errors in Order of Operations

Students often forget to apply operations in the correct order, leading to incorrect solutions․ Always perform multiplication/division before addition/subtraction unless parentheses dictate otherwise․

One of the most common mistakes when solving two-step equations is ignoring the order of operations․ Students often perform addition or subtraction before multiplication or division, leading to incorrect solutions․ For example, in an equation like (3x + 5 = 11), some may mistakenly subtract 5 first instead of dividing․ This oversight can result in incorrect variable values․ It is crucial to follow the proper sequence: multiplication/division before addition/subtraction, unless parentheses indicate otherwise․ Neglecting this rule can significantly hinder problem-solving accuracy and understanding of algebraic concepts․ Always double-check each step to ensure operations are applied correctly․

Incorrect Application of Inverse Operations

Misapplying inverse operations is a frequent error in solving two-step equations․ For instance, when isolating a variable, students may incorrectly use multiplication instead of division or addition instead of subtraction․ This mistake often stems from confusion about which operation will reverse the original equation․ For example, in solving (3x + 5 = 11), some might subtract 5 instead of dividing, leading to an incorrect value for (x)․ Always ensure the correct inverse operation is applied to maintain equation balance and accuracy․

Real-World Applications

Two-step equations are essential in everyday situations, such as calculating distances, budgeting expenses, and adjusting recipes․ They also appear in geometric problems involving shapes and word problems․

Everyday Situations Involving Two-Step Equations

Two-step equations are often used in budgeting, such as calculating the cost of items after discounts; For example, determining the original price of an item on sale or adjusting recipe quantities․ They also apply to splitting bills equally among friends or calculating travel expenses, making them practical tools for everyday problem-solving and financial planning․

Word Problems and Geometric Shapes

Word problems often involve two-step equations, such as calculating total costs after discounts or determining ingredients for recipes․ Geometric shapes also use these equations to find missing dimensions, like the perimeter or area of a shape․ These practical applications make two-step equations essential for solving real-world problems and visualizing mathematical concepts, enhancing both problem-solving skills and spatial understanding․

Interactive Learning Resources

Engage with interactive platforms offering dynamic two-step equation practice․ Educational games and digital tools provide fun, immersive learning experiences, making mastering equations enjoyable and highly effective for all students․

Online Tools for Practicing Two-Step Equations

Utilize online platforms like Cuemath, Kuta Software, and WorksheetWorks for interactive two-step equation practice․ These tools offer customizable worksheets, real-time feedback, and progress tracking․ They provide a variety of problems, including word problems and geometric applications, to cater to different learning needs․ Interactive games and activities make learning engaging, while detailed solutions help students understand their mistakes․ These resources are ideal for students seeking structured yet flexible practice to master two-step equations effectively․

Games and Activities for Engaging Practice

Engage students with interactive games and activities that make learning two-step equations fun․ Online platforms offer simulations, multiplayer challenges, and real-world applications․ Tools like digital algebra tiles and number lines provide hands-on practice․ Incorporate word problems and geometric shapes for practical relevance․ Games with rewards or badges motivate students to practice consistently․ Escape rooms and puzzle games add excitement, ensuring active participation and deeper understanding of two-step equations through enjoyable, interactive experiences․

Two-step equations are fundamental algebraic problems requiring two operations to solve for the variable․ Worksheets with problems involving integers, fractions, and decimals are excellent practice tools, available as free PDFs․ Mastering these equations enhances algebraic skills and problem-solving abilities․ Regular practice with varied resources, including online tools and games, ensures understanding and engagement․ Real-world applications in everyday situations, like budgeting or mixing ingredients, highlight their relevance․ Avoiding common mistakes, such as order of operations errors, is crucial for accuracy․ Consistent practice and reviewing errors lead to mastery, making two-step equations a vital skill in algebra․

Final Tips for Mastering Two-Step Equations

Regular practice with varied worksheets ensures mastery of two-step equations․ Break problems into smaller steps and use real-world examples for better understanding․ Always check your work by substituting solutions back into the original equation․ Seek help when stuck to avoid confusion․ Consistent practice builds confidence and reduces errors, helping you become proficient in solving two-step equations efficiently․

Additional Resources

Explore recommended websites like Super Teacher Worksheets and Cuemath for diverse two-step equation PDFs․ Additionally, books and guides offer in-depth practice for mastering these equations effectively․

Recommended Websites for Worksheets

For high-quality two-step equation worksheets, visit Super Teacher Worksheets and Cuemath․ These sites offer free, printable resources with answer keys, catering to various skill levels․ WorksheetWorks provides customizable sheets, while Kuta Software allows teachers to create personalized worksheets․ These platforms ensure structured and engaging practice, making them ideal for both students and educators seeking reliable math resources․

Books and Guides for Further Practice

Supplement your practice with books like McGraw-Hill’s Algebra and Pearson’s Pre-Algebra, which include dedicated sections on two-step equations․ Online guides from Khan Academy and Mathway offer step-by-step solutions and interactive tools․ These resources provide in-depth explanations and varied problem sets, making them ideal for students seeking additional practice beyond worksheets․ They cater to different learning styles, ensuring a comprehensive understanding of two-step equations through structured lessons and real-world applications․

sod paladin leveling guide

Welcome to the ultimate Season of Discovery Paladin leveling guide! Master the art of leveling your Paladin efficiently, whether you prefer Retribution, Protection, or Holy. This comprehensive guide covers optimal builds, essential runes, and effective strategies to streamline your journey from 1 to 60. Discover expert tips, ability prioritization, and gear optimization to ensure a smooth and rewarding experience in WoW’s Season of Discovery.

Overview of the Guide

This guide provides a comprehensive approach to leveling your Paladin in WoW’s Season of Discovery. It covers all three specializations—Retribution, Protection, and Holy—offering tailored advice for each. Learn how to optimize talents, runes, and gear for efficient progression. Discover effective leveling strategies, whether solo or in a group, and master ability rotations to maximize damage, healing, or survivability. Suitable for both new and experienced players, this guide ensures a smooth journey from level 1 to 60, helping you unlock your Paladin’s full potential in SoD.

Paladin Specializations in Season of Discovery

Retribution, Protection, and Holy are the three distinct Paladin specializations in Season of Discovery, each offering unique playstyles for damage, tanking, or healing, tailored to your preferred role.

Retribution Paladin: DPS Specialization

Retribution Paladins excel at dealing damage, making them ideal for players seeking a fast-paced, offensive playstyle. Their burst damage capabilities and strong single-target abilities allow for swift enemy elimination. Key abilities like Judgement and Hammer of Wrath form the core of their damage rotation, while Consecration provides area-of-effect utility. Talents and runes enhancing critical strikes and attack power are crucial for maximizing damage output. This specialization shines in both solo leveling and group content, offering high mobility and consistent DPS, making it a versatile choice for aggressive players.

Protection Paladin: Tank Specialization

Protection Paladins are built for survivability and threat generation, making them exceptional tanks for group content; While slower in solo leveling, they excel in dungeons and raids, providing robust defense and crowd control. Key abilities like Seal of Righteousness and Holy Light help maintain aggro and sustain health. Runes such as Divine Shield and Guarded by Light enhance survivability, ensuring long uptime in combat. Focus on talents that improve armor and threat generation, making Protection Paladins a reliable choice for safeguarding allies and managing enemy aggression effectively.

Holy Paladin: Healing Specialization

Holy Paladins are the primary healers, excelling at keeping allies alive through powerful healing spells and support abilities. Specializing in Holy Light and Flash of Light, they provide consistent and efficient healing. Talents like Improved Flash of Light and Divine Grace enhance healing output and mana efficiency. Runes such as Improved Lay on Hands further bolster their capabilities, making them invaluable in group content. While less suited for solo leveling, Holy Paladins shine in parties, ensuring survival and success in challenging encounters through their robust healing and support toolkit.

Talents and Runes for Efficient Leveling

Talents and runes are key to optimizing your Paladin’s performance. They enhance damage, healing, or survivability, ensuring efficient progression. Proper selection maximizes your leveling experience in SoD.

Optimal Talent Builds for Each Specialization

For Retribution, focus on talents like Improved Judgement and Consecration to maximize damage output. Protection Paladins should prioritize survivability talents such as Improved Righteous Fury and Divine Shield. Holy Paladins benefit from healing-focused talents like Improved Flash of Light and Divine Grace. Each specialization requires a tailored approach to ensure optimal leveling efficiency and effectiveness in their respective roles. Proper talent allocation is crucial for maximizing your Paladin’s potential in Season of Discovery.

Essential Runes for Damage, Healing, and Survivability

Retribution Paladins benefit from runes like Improved Hammer of Wrath and Purifying Power to enhance damage output. Protection Paladins should prioritize Divine Protection and Improved Shield of the Righteous for increased survivability. Holy Paladins gain from Improved Flash of Light and Divine Grace to boost healing efficiency. These runes are crucial for optimizing your Paladin’s performance in Season of Discovery, ensuring maximum effectiveness in their respective roles. Proper rune selection significantly impacts your leveling speed and overall gameplay experience.

Gear and Equipment Optimization

Optimize your Paladin’s gear with Best in Slot items, strategic enchanting, and potent consumables. Focus on stats like attack power for Retribution, armor for Protection, and intellect for Holy to enhance your effectiveness in Season of Discovery.

Best in Slot Gear for Each Level Range

Acquiring Best in Slot (BiS) gear is crucial for optimal Paladin performance in Season of Discovery. Early levels (1-20) focus on weapons with high DPS and armor pieces with stamina. Mid-levels (20-40) introduce dungeon drops, emphasizing stat prioritization based on your specialization. Retribution Paladins should seek attack power and critical strike gear, while Protection Paladins focus on armor and block value. Holy Paladins prioritize intellect and mana regeneration. At higher levels (40-60), raid-tier gear becomes accessible, offering powerful set bonuses and enhanced stats for peak performance.

Enchanting and Consumables to Boost Performance

Enchanting your gear and utilizing consumables can significantly enhance your Paladin’s performance in Season of Discovery. For weapons, prioritize enchants like Crusader for Retribution or Shield Block for Protection. Gear enchants such as Minor Speed for boots or Major Mana for chests can provide substantial bonuses. Consumables like Super Mana Potions and Spiced Mammoth Treats are essential for maintaining mana and boosting stats. Additionally, Scrolls of Protection and Food Buffs can prevent unnecessary damage and downtime, ensuring smooth leveling progress.

Ability Prioritization and Rotation

Mastering ability prioritization and rotation is crucial for efficient Paladin leveling. Focus on core abilities like Seal of Righteousness, Judgement, and Hammer of Wrath for consistent damage output.

Core Abilities for Each Paladin Specialization

For Retribution Paladins, core abilities include Judgement, Hammer of Wrath, and Consecration, which deliver high damage and control. Protection Paladins rely on Shield of the Righteous, Hammer of the Righteous, and Seal of Righteousness for defense and threat generation. Holy Paladins focus on Flash of Light, Holy Light, and Lay on Hands for healing and mana efficiency. These abilities form the foundation of each specialization, ensuring effectiveness in their respective roles.

Effective Rotation Techniques for Smooth Leveling

Mastering your rotation is crucial for efficient leveling. Start with an active aura like Devotion or Righteous Fury. Maintain a Blessing to enhance damage or mana. For Retribution, cycle Judgement and Hammer of Wrath, using Consecration for AoE. Protection Paladins focus on Shield of the Righteous and Hammer of the Righteous for threat. Holy Paladins prioritize Flash of Light and Holy Light, weaving in Lay on Hands for emergencies. Adjust rotations to match your role, ensuring smooth, impactful gameplay.

Group vs. Solo Leveling Strategies

Group leveling accelerates XP gain and offers better loot, ideal for Retribution and Holy Paladins. Solo play provides flexibility but is slower, especially for Protection Paladins.

Pros and Cons of Group Play

Group play in WoW SoD offers faster XP gain, better loot distribution, and enhanced survivability, especially for Retribution and Holy Paladins. It allows for coordinated strategies, making dungeons and tough quests easier. However, it requires time to find and maintain a group, and may involve waiting for others or repeating content. Additionally, group play can sometimes lead to reduced personal control over progression, potentially slowing individual leveling if the group’s pace doesn’t align with yours. Balance is key for optimal results.

Effective Solo Leveling Techniques

Solo leveling as a Paladin in WoW SoD offers flexibility and control over your progression. Focus on quest optimization, completing high XP quests in optimal zones. Use abilities like Seal of Righteousness, Judgement, and Consecration for efficient mob clearing. Retribution Paladins excel at single-target damage, while Protection Paladins can tank multiple enemies with ease. Prioritize gear with stats relevant to your spec and maintain active Blessings and Auras for enhanced performance. Solo play allows for a methodical approach, ensuring steady progression without group dependencies.

Advanced Tips and Tricks

Master Season of Discovery with expert techniques! Optimize quest routes for maximum XP, utilize runes for enhanced power, and leverage addons for streamlined progression. Manage cooldowns and ability usage wisely to maintain efficiency and effectiveness during your leveling journey.

Utilizing Quest Routes and Addons

Optimize your leveling journey by mastering efficient quest routes and leveraging powerful addons. Tools like Questie and TomTom help streamline navigation, ensuring minimal downtime between quests. Prioritize dungeon runs at key levels, such as 20, for rapid XP gains. Use addons to track quest completions and plan routes effectively. Pair this with strategic cooldown management to maintain momentum. By combining optimized routes with addon-enhanced efficiency, you’ll accelerate your progression and maximize your Paladin’s potential in Season of Discovery.

Maximizing Experience Gain and Loot Efficiency

To maximize XP gain, focus on completing high-reward quests and minimizing travel time. Utilize rested experience bonuses and prioritize dungeon runs at key levels, such as 20, for accelerated leveling. Loot efficiency can be enhanced by equipping optimal gear from quest rewards or the auction house. Strategic use of cooldowns and ability rotations ensures smoother progression. By combining these strategies, you can optimize your Paladin’s leveling journey, ensuring swift and efficient progression through Season of Discovery.

black and decker handy steamer manual

Welcome to the Black and Decker Handy Steamer manual! This guide provides essential information for using and maintaining your steamer, ensuring optimal performance and safety. Discover how to steam vegetables, cook rice, and more efficiently with this versatile appliance.

Key Features and Components of the Black and Decker Handy Steamer

The Black and Decker Handy Steamer features a user-friendly control panel, a steaming basket, and a non-stick rice bowl. Its compact design includes a water reservoir and automatic shut-off for safe, efficient cooking.

2.1. Main Components of the Handy Steamer

The Black and Decker Handy Steamer consists of several key components designed for efficient cooking. The main unit includes a steaming basket for holding vegetables or seafood, while the rice bowl is ideal for cooking rice or grains. A water reservoir is integrated into the base, allowing users to add the required amount of water for steaming. The control panel features simple buttons for setting timers and monitoring cooking progress. Additionally, the steamer includes a transparent lid for observing the cooking process without releasing steam. These components work together to provide a convenient and versatile cooking experience, suitable for preparing healthy meals with minimal effort.

2.2. Design and Build Quality

The Black and Decker Handy Steamer is designed with both functionality and user convenience in mind. Its compact and lightweight construction makes it easy to store and transport, fitting seamlessly into any kitchen. The steamer features a durable, high-quality build with a non-stick inner pot that prevents food from sticking, ensuring easy cleanup. The transparent lid allows users to monitor the cooking process without releasing steam, while the ergonomic handle provides a secure grip for safe handling. The control panel is simple and intuitive, with clear buttons for setting timers and monitoring progress. The overall design emphasizes practicality, making it an ideal addition to modern kitchens. With its robust construction and thoughtful design elements, the Handy Steamer is built to deliver reliable performance for years of use.

2.3. Accessories Included

The Black and Decker Handy Steamer comes with a set of essential accessories to enhance your cooking experience. Included is a steaming basket, perfect for holding vegetables, seafood, or other foods while they steam. A rice bowl is also provided, allowing you to cook rice simultaneously while steaming other ingredients. Additionally, a measuring cup is included to help you accurately measure water levels, ensuring the right amount of steam is generated. These accessories are designed to work seamlessly with the steamer, making meal preparation efficient and convenient. The non-stick coating on the rice bowl prevents food from sticking, while the steaming basket is easy to clean and dishwasher-safe. These thoughtfully included components ensure that you have everything you need to start cooking right away, making the Handy Steamer a comprehensive and user-friendly kitchen appliance.

How to Use the Black and Decker Handy Steamer

Using the Black and Decker Handy Steamer is straightforward. Simply add water to the base, place food in the steaming basket, and set the timer. The user-friendly control panel allows easy adjustment of steaming time and temperature, ensuring perfectly cooked meals every time.

3.1. Step-by-Step Instructions for First-Time Use

To ensure a smooth first-time experience with your Black and Decker Handy Steamer, follow these steps:

  1. Wash the steaming basket, rice bowl, and lid with warm soapy water before initial use.
  2. Place the steamer base on a flat, heat-resistant surface and plug it in.
  3. Fill the water reservoir with fresh, cold water to the “Max” line. Avoid overfilling.
  4. Add rice, vegetables, or other food to the rice bowl or steaming basket as desired.
  5. Position the steaming basket into the base, ensuring it aligns with the locator marks.
  6. Use the control panel to set the cooking time and select the steaming function.
  7. Turn on the steamer and let it operate until the cycle completes.
  8. Once done, unplug the unit and carefully remove the lid using oven mitts to avoid steam burns.
  9. Serve your food hot and enjoy the perfectly cooked results!

Always refer to the manual for specific guidelines tailored to your model, such as the Black and Decker Handy Steamer HS90 or HS800, for optimal performance and safety.

3.2. Cooking Rice and Steaming Vegetables

Cooking rice and steaming vegetables with the Black and Decker Handy Steamer is straightforward and efficient. For rice, add the desired amount to the rice bowl, mix in seasonings, and fill the bowl with water to the recommended level. Place the bowl in the steamer base and set the timer using the control panel. The steamer will automatically cook the rice to perfection.

For steaming vegetables, place them in the steaming basket. Fill the water reservoir to the “Max” line, ensuring proper steam generation. Position the basket in the base, close the lid, and select the steaming function. The appliance will shut off automatically once the cycle is complete. This method preserves nutrients and ensures even cooking. The Handy Steamer’s non-stick surface also prevents food from sticking, making cleanup easy. Whether cooking rice or steaming vegetables, this appliance offers a healthy and convenient way to prepare meals. Always refer to your specific model’s manual, like the HS90 or HS800, for detailed guidelines.

Maintenance and Care

Regularly clean the steamer with a soft cloth and mild detergent to prevent residue buildup. Avoid using abrasive cleaners to protect the non-stick surface. Store the appliance in a cool, dry place when not in use.

4.1. Cleaning the Handy Steamer

Cleaning the Black and Decker Handy Steamer is essential for maintaining its performance and hygiene. Always unplug the steamer before cleaning to ensure safety. Wipe the exterior with a damp cloth, avoiding harsh chemicals or abrasive cleaners. For the steamer bowl and rice bowl, wash them with mild soap and warm water after each use. Do not submerge the base unit in water, as it contains electrical components. Instead, clean it with a soft, damp cloth, focusing on areas around the controls and water reservoir. Regularly descale the water reservoir to prevent mineral buildup, especially if you live in an area with hard water. Allow all parts to dry thoroughly before storing to prevent moisture buildup. By following these steps, you can keep your Handy Steamer in excellent condition and ensure years of reliable service.

4.2. Storing the Appliance

Proper storage of the Black and Decker Handy Steamer is crucial for maintaining its functionality and longevity. Always unplug the appliance and allow it to cool completely before storing. Ensure all parts, including the steaming bowl and rice bowl, are clean and dry to prevent moisture buildup. Store the components separately or assembled, depending on your preference, but avoid stacking heavy objects on top of the steamer. Use a dry, cool place away from direct sunlight to store the appliance, as heat and light can damage the materials. Do not store the steamer in plastic bags or tight covers, as this can trap moisture and lead to mold. For extended storage, consider cleaning the steamer thoroughly beforehand and placing a silica gel packet inside to absorb any residual moisture. Always refer to the manual for specific storage recommendations to maintain the product’s warranty and performance.

Troubleshooting Common Issues

If you encounter issues with your Black and Decker Handy Steamer, troubleshooting can often resolve the problem. Common issues include the steamer not turning on, water not heating, or steam not being produced. First, ensure the appliance is properly plugged in and the outlet is working. Check if the water level is below the minimum fill line, as this can prevent heating. Descale the steamer regularly to remove mineral buildup, which can block steam production. If the steamer is not functioning, reset it by unplugging and replugging it after 30 minutes. For persistent issues, clean the steam vent and filter to ensure proper airflow. Always refer to the manual for specific troubleshooting steps. If problems persist, contact Black and Decker customer support for assistance. Regular maintenance and proper usage can help minimize issues and extend the appliance’s lifespan.

1 2 3 4 5