v tech phone manual

Welcome to the VTech Phone Manual‚ your comprehensive guide to installing‚ operating‚ and maintaining your new VTech telephone. This manual covers safety‚ features‚ and troubleshooting to ensure optimal performance. Review it thoroughly to get the most out of your device.

Important Safety Instructions
Always follow basic safety precautions to reduce risks of fire‚ electric shock‚ or injury. Charge the battery as instructed and use only approved VTech accessories.
2.1 General Safety Precautions
Always follow basic safety guidelines to minimize risks. Charge the battery for at least 16 hours before first use and only with the provided VTech battery. Avoid exposing the device to extreme temperatures‚ moisture‚ or physical stress. Keep the phone out of reach of children and pets to prevent accidental damage or ingestion of small parts. Ensure proper ventilation during charging to prevent overheating. Regularly inspect cords and accessories for damage.
2.2 Specific Warnings and Cautions
Never use damaged batteries or non-VTech-approved accessories‚ as they may cause malfunctions or safety hazards. Avoid exposing the device to liquids‚ as this could result in permanent damage. Do not charge the battery near open flames or sparks. Ensure the phone is not subjected to extreme temperatures or physical stress. Always follow the manufacturer’s guidelines for charging and usage to prevent overheating or electrical issues. Keep the device away from water and moisture to maintain proper functionality.
2.3 Handling and Storage Guidelines
Handle your VTech phone with care to ensure longevity. Avoid dropping or applying excessive force‚ as this may damage internal components. Store the device in a cool‚ dry place‚ away from direct sunlight and moisture. Clean the phone regularly with a soft cloth to prevent dust buildup. Do not submerge the device in water or expose it to extreme temperatures. When storing for extended periods‚ ensure the battery is fully charged and avoid leaving it in a discharged state.
Product Features and Technical Specifications
VTech phones offer advanced features like Bluetooth connectivity‚ HD audio‚ and call blocking. They are designed with DECT 6.0 technology for superior sound quality and range.
3.1 Key Features of VTech Phones
VTech phones boast Bluetooth connectivity‚ allowing seamless pairing with mobile devices. They also feature HD audio for crystal-clear calls‚ call blocking to filter unwanted numbers‚ and eco mode for energy efficiency. Additional features include caller ID‚ voicemail‚ and speed dial‚ enhancing user convenience. These phones are built with DECT 6.0 technology‚ ensuring interference-free communication and extended range. VTech phones are designed to meet diverse communication needs effectively.
3.2 Technical Specifications and Compatibility
VTech phones utilize DECT 6.0 technology for reliable‚ interference-free communication. They operate on a 1.9GHz frequency and support up to 12 handsets per base station; The phones are compatible with VoIP systems and offer HD audio for superior sound quality. Battery life typically lasts up to 10 hours talk time and 200 hours standby. These phones are also compatible with wireless headsets and support call waiting‚ forwarding‚ and blocking features‚ ensuring seamless integration with modern communication needs.
Installation and Setup
Start by charging the battery for at least 16 hours. Connect the base unit to power using the provided adapter and link handsets to the base station. Follow the manual’s guidelines for syncing and registration to ensure proper functionality.
4.1 Step-by-Step Installation Guide
Unpack all components‚ including the base unit‚ handset‚ and power adapter. 2. Charge the battery for at least 16 hours before first use. 3. Connect the base unit to a power source using the provided adapter. 4. Place the handset in the base unit to sync. 5. Follow the manual’s pairing instructions to register additional handsets. 6. Position the base unit in a central location for optimal coverage. 7. Turn on the phone and test functionality.
4.2 Registering Handsets and Base Units
To register a handset to the base unit‚ ensure the base is powered on. Press and hold the registration button on the base until the registration light blinks. Then‚ press the menu button on the handset and select register handset. Wait for the confirmation tone. Repeat for additional handsets‚ ensuring each is registered separately. This process ensures proper communication between the handset and base unit;

Parts and Accessories
Your VTech phone system includes essential components like the handset‚ base unit‚ battery‚ and charger. Additional accessories‚ such as extra handsets or headsets‚ can enhance functionality and convenience.
5.1 Identifying Components of the VTech Phone
Your VTech phone system consists of key components‚ including the handset‚ base unit‚ battery‚ and charger. The handset features a keypad‚ display‚ and speaker for calls. The base unit houses the main system electronics and connects to the telephone line. Additional accessories like headsets or extra handsets may be available. Familiarize yourself with these parts to ensure proper setup and functionality. Always handle components with care to maintain performance and longevity.
5.2 Recommended Accessories
To enhance your VTech phone experience‚ consider these recommended accessories: extra handsets for multi-room coverage‚ rechargeable batteries for extended use‚ and wall mounts for convenient placement. A headset or speakerphone can improve call clarity and hands-free convenience. Additionally‚ protective cases and screen protectors help maintain your phone’s condition. Ensure all accessories are compatible with your VTech model for optimal performance. Visit the VTech website or authorized dealers for genuine products.

Battery Charging and Maintenance
Always use the provided VTech battery or equivalent. Charge the battery for at least 16 hours initially. Avoid overcharging to maintain battery longevity and performance.
6.1 Initial Charging Requirements
Before using your VTech phone‚ charge the battery for at least 16 hours to ensure proper initialization. Use only the provided VTech battery or its equivalent for optimal performance. Avoid using damaged chargers or batteries‚ as this may cause malfunctions. Keep the phone away from extreme temperatures during charging. Once charged‚ unplug the charger to prevent overcharging‚ which can reduce battery lifespan. Regularly check the battery level to maintain reliable operation.
6.2 Best Practices for Battery Longevity
To maximize battery life‚ charge your VTech phone regularly and avoid deep discharges. Store the handset in a cool‚ dry place when not in use. Prevent overcharging by unplugging the charger once the battery is full. Clean battery contacts periodically to ensure proper charging. Replace the battery if it no longer holds a charge. Follow these tips to maintain optimal performance and extend the lifespan of your VTech phone’s battery.

Basic Operations
Welcome to the basic operations section of your VTech phone manual. Here‚ you’ll learn how to make calls‚ adjust volume‚ and use essential features for everyday communication.
7.1 Making and Receiving Calls
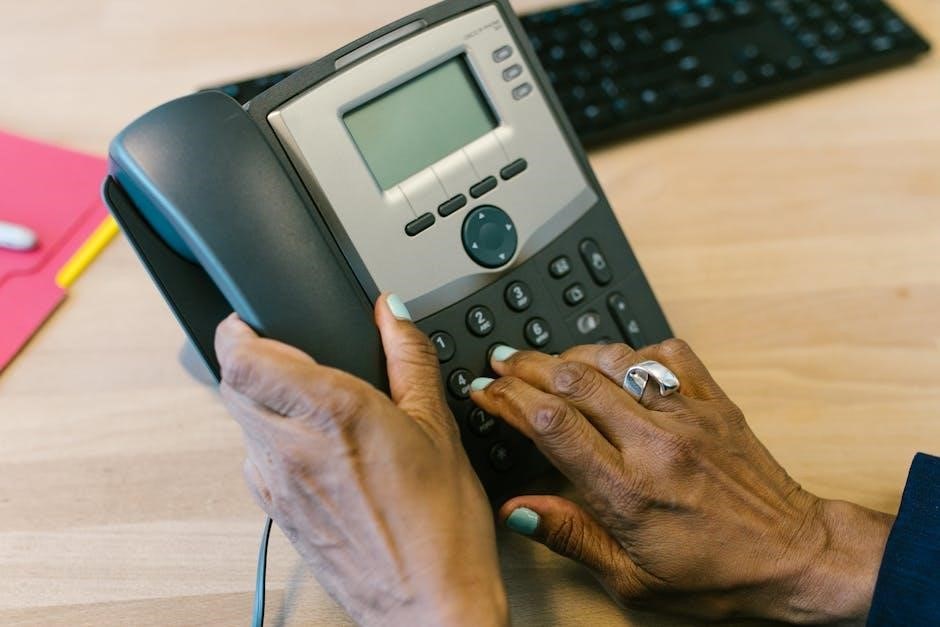
To make a call‚ dial the desired number using the keypad and press Call. Ensure the phone is fully charged and within range of the base unit. To receive calls‚ simply press Call when the phone rings. Use the Hold feature to pause a call and the Mute button to silence the microphone. Adjust the volume using the side buttons for optimal clarity. Always use the provided VTech battery for reliable performance and long battery life.
7.2 Volume Control and Sound Settings
Adjust the volume during calls using the side buttons. Press Mute to silence the microphone. Access sound settings via the menu to choose from profiles like Normal‚ Loud‚ or Soft. Customize the Equalizer for enhanced audio. Save settings for future calls. Ensure the phone is charged for optimal sound. Refer to the manual for additional details on sound customization and maintenance.
Advanced Features
Explore advanced functionalities like call screening‚ do-not-disturb mode‚ and speed dial. Customize ringtones and notifications for enhanced personalization. These features enhance your communication experience.
8.1 Call Waiting‚ Forwarding‚ and Blocking
Utilize advanced call management features to enhance your communication experience. Enable call waiting to handle multiple calls simultaneously. Set up call forwarding to redirect incoming calls to another number. Use call blocking to prevent unwanted calls. Customize settings to prioritize or restrict specific numbers. These features ensure you stay connected while maintaining control over your calls‚ offering flexibility and convenience for managing incoming communications effectively.
8.2 Bluetooth Connectivity and Pairing
Enable Bluetooth connectivity to pair your VTech phone with compatible devices‚ such as cell phones or headsets. Activate Bluetooth on both devices and follow the pairing instructions. Once connected‚ enjoy hands-free calls and audio streaming. Ensure devices are within range for a stable connection. Refer to the manual for specific pairing codes or settings. This feature enhances convenience and expands your phone’s functionality‚ allowing seamless integration with other devices for improved usability and flexibility.

Troubleshooting Common Issues
This section helps resolve common issues‚ ensuring optimal performance of your VTech phone. Follow the troubleshooting guides to address problems and restore functionality efficiently.
9.1 Resolving Connection Problems
Common connection issues with your VTech phone can often be resolved by checking the base unit’s power‚ ensuring the handset is properly charged‚ and verifying the connection settings. If the phone fails to connect‚ restart both the base and handset. For Bluetooth-related problems‚ ensure pairing is done correctly and interference from other devices is minimized. Refer to the troubleshooting section for detailed steps to restore connectivity and resolve issues efficiently.
9.2 Addressing Audio and Display Issues
If experiencing poor audio quality‚ ensure the volume is adjusted correctly and the speaker is not blocked. For display issues‚ check brightness settings and clean the screen. If problems persist‚ restart the device or reset to factory settings. Ensure firmware is updated‚ as outdated software can cause malfunctions. Consult the manual for specific troubleshooting steps tailored to your VTech phone model to resolve audio and display problems effectively.

Maintenance and Repair Tips
Regularly clean your VTech phone to prevent dust buildup. Check for firmware updates and use original accessories. For repairs‚ attempt DIY fixes only if confident; otherwise‚ contact VTech support.
10.1 Cleaning and Upkeep
Regularly clean your VTech phone with a soft‚ dry cloth to remove dust and dirt. Avoid using harsh chemicals or abrasive materials that may damage the finish. For stubborn marks‚ lightly dampen the cloth with water‚ but ensure no moisture enters the device. Clean the keypad and screen gently to maintain functionality. Check for firmware updates to keep your phone up-to-date and functioning optimally. Proper upkeep ensures longevity and performance.
10.2 DIY Repairs and When to Seek Help
For minor issues‚ such as low battery life‚ try resetting the handset or replacing the battery with a genuine VTech equivalent. If connectivity problems persist‚ restart the base unit and ensure proper registration. For physical damage or complex malfunctions‚ contact VTech customer support. Avoid opening the device yourself‚ as this may void the warranty. Seek professional assistance for advanced repairs to ensure safety and maintain functionality.
By following this manual‚ you’ve successfully set up and optimized your VTech phone for peak performance. From basic operations to advanced features‚ you’re now equipped to make the most of your device. Regular maintenance and adherence to safety guidelines will ensure longevity. Explore all features confidently‚ knowing troubleshooting tips are at your fingertips. Enjoy seamless communication with your VTech phone‚ designed for reliability and ease of use.

Additional Resources
For further assistance‚ visit www.vtechphones.com for online support‚ FAQs‚ and detailed guides. Contact VTech Customer Service for personalized help with your device.
12.1 Online Support and FAQs
Visit www.vtechphones.com for extensive online support and FAQs. This resource offers detailed troubleshooting guides‚ feature explanations‚ and solutions to common issues. Access user manuals‚ compatibility checks‚ and software updates. The FAQ section addresses installation‚ operation‚ and maintenance queries‚ ensuring you can resolve problems quickly. Utilize these resources to maximize your VTech phone’s performance and stay informed about the latest features and updates.
12.2 Contacting VTech Customer Service
For personalized assistance‚ contact VTech Customer Service directly. Visit the official VTech website to find contact details‚ including phone numbers and email support. Their team is available to address technical queries‚ warranty issues‚ and product-related concerns. Ensure to have your product model and serial number ready for efficient support. VTech’s dedicated customer service aims to provide timely and effective solutions to enhance your user experience.