bikram yoga 26 poses pdf

Bikram Yoga, developed by Bikram Choudhury, is a structured practice of 26 poses performed in a heated environment to promote physical and mental well-being.
1.1 What is Bikram Yoga?
Bikram Yoga is a specific style of yoga involving 26 poses and breathing exercises performed in a heated environment. It is a 90-minute practice designed to systematically work every muscle, tendon, and ligament, promoting oxygenated blood flow, detoxification, and overall physical and mental well-being through precise postures and breathing techniques.
1.2 History and Development of Bikram Yoga
Bikram Yoga was developed by Bikram Choudhury in the 1970s in California. It is a patented practice consisting of 26 specific poses performed in a heated environment. Choudhury, an Indian yogi, created this method to systematically work every part of the body, promoting health and wellness through precise postures and heat therapy.
1.3 Key Principles of Bikram Yoga
Bikram Yoga follows a fixed sequence of 26 poses in a heated room, promoting detoxification through sweat and improving circulation. Proper alignment, breathing techniques, and duration are emphasized, with each pose designed to work the entire body systematically. Heat enhances flexibility and mental focus, fostering a holistic practice for physical and mental well-being.

The 26 Bikram Yoga Poses Overview
The 26 Bikram Yoga poses include standing, seated, balancing, backbends, forward bends, and breathing exercises, performed in a heated room to enhance physical and mental well-being.
2.1 Standing Poses
The standing poses in Bikram Yoga, such as Standing Deep Breathing and Eagle Pose, aim to build strength, balance, and focus. They are foundational, improving circulation and mental clarity while preparing the body for more complex postures. Each pose is held to maximize benefits and promote proper alignment.
- Enhance balance and stability.
- Strengthen legs and core muscles.
- Improve posture and concentration.
2.2 Seated Poses
The seated poses in Bikram Yoga, such as Janushirasana and Paschimottanasana, focus on stretching the spine, hamstrings, and hips. These postures improve flexibility, circulation, and mental focus while strengthening the core and promoting detoxification through deep stretching. Proper alignment is crucial for maximum benefits and injury prevention.
- Enhance spinal flexibility and posture.
- Strengthen abdominal muscles and hips.
- Reduce stress and improve circulation.
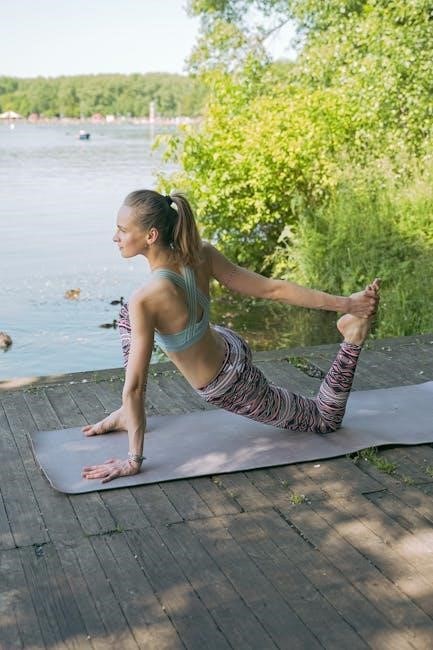
2.3 Balancing Poses
Balancing poses in Bikram Yoga, such as Tree Pose (Tadasana) and Toe Stand (Padangusthasana), challenge equilibrium and focus. These postures strengthen the legs, improve concentration, and enhance overall stability, fostering mental clarity and physical poise. Regular practice helps build confidence and resilience.
- Improve focus and concentration.
- Strengthen legs and ankles.
- Enhance balance and stability.
- Boost confidence and mental clarity.
- Reduce stress and anxiety.
2.4 Backbends and Forward Bends
Backbends and Forward Bends in Bikram Yoga, such as Cobra Pose (Bhujangasana) and Standing Head-to-Knee (Dandayamana Janushirasana), enhance spinal flexibility and strength. These postures improve circulation, posture, and balance, while also stretching the shoulders, chest, and hamstrings, promoting overall flexibility and mental focus.
- Strengthen and flex the spine.
- Improve posture and circulation.
- Stretch hamstrings and shoulders.
- Enhance balance and mental focus.
- Reduce tension and stress.
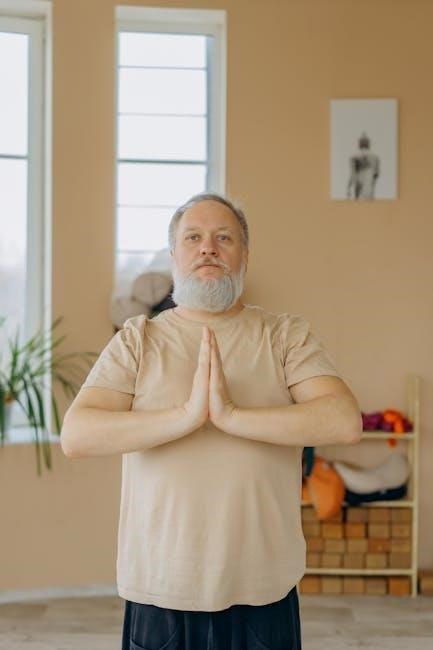
2.5 Breathing Exercises
Breathing exercises in Bikram Yoga, like Standing Deep Breathing (Pranayama) and Kapalabhati, focus on controlled breath to enhance oxygen flow and mental clarity. These practices help detoxify, energize, and prepare the body for the physical postures, promoting a calm and centered state of mind during the session.
- Enhance oxygen flow and energy.
- Detoxify and prepare the body.
- Improve mental focus and calmness.
- Strengthen respiratory health.
- Promote relaxation and balance.
Benefits of the 26 Bikram Yoga Poses
The 26 Bikram Yoga poses offer comprehensive benefits, improving circulation, boosting strength, and enhancing flexibility. They promote detoxification, weight management, and mental clarity, while reducing stress and improving overall well-being.
3.1 Physical Benefits
The 26 Bikram Yoga poses enhance cardiovascular health, improve circulation, and strengthen muscles. They boost flexibility, improve posture, and support joint health, while the heat aids in detoxification through sweating, promoting overall physical well-being and resilience.
3.2 Mental and Emotional Benefits
Bikram Yoga fosters mental clarity, reduces stress, and enhances self-discipline. The challenging poses and meditation-like focus build confidence and emotional resilience, while the practice itself creates a sense of calm and inner peace, improving overall mental well-being and emotional stability.
3.3 Detoxification and Weight Loss
Bikram Yoga’s intense heat promotes sweating, aiding in detoxification by flushing out toxins. The dynamic poses and cardiovascular benefits support weight loss, while improving metabolism and burning calories, helping practitioners achieve a healthier, toned physique through consistent practice.
How to Perform Each of the 26 Poses
Each pose in Bikram Yoga is executed with precise alignment, breathing techniques, and timing. Proper form ensures maximum benefits while minimizing injury risks, guided by expert instructions.
4.1 Proper Alignment and Form
Proper alignment is critical in Bikram Yoga to prevent injuries and maximize benefits. Each pose requires precise positioning, engaging the correct muscles, and maintaining balance. Using the 26 Poses PDF Guide, practitioners can reference detailed diagrams and instructions to ensure accurate form and alignment, enhancing the effectiveness of their practice while staying safe.
4.2 Breathing Techniques
Breathing techniques in Bikram Yoga, such as Pranayama and Kapalabhati, are essential for oxygen flow and focus. The 26 Poses PDF Guide provides detailed instructions on synchronizing breath with movement, helping practitioners maintain rhythm and endurance throughout the 90-minute session, enhancing both physical and mental clarity.
4.3 Duration and Timing
The 26 Bikram Yoga poses are practiced in a 90-minute class, with each pose held for 30-60 seconds. The PDF guide outlines specific timing for each asana, ensuring a balanced flow and maximizing the therapeutic benefits of the sequence in the heated environment.
Modifications and Variations
The PDF guide offers detailed modifications for each of the 26 poses, catering to all levels, and provides tips for variations to enhance practice safely and effectively.
5.1 Modifications for Beginners
The Bikram Yoga 26 Poses PDF provides detailed modifications for beginners, ensuring safe and effective practice. It offers step-by-step adjustments for poses like Standing Deep Breathing and Cobra Pose, helping newcomers build strength and flexibility gradually. The guide emphasizes proper alignment and breathing to prevent injuries and enhance benefits.
5.2 Advanced Variations
The Bikram Yoga 26 Poses PDF offers advanced variations for experienced practitioners, enhancing depth and intensity. It includes detailed tips for refining poses like Cobra, Triangle, and Tree, ensuring practitioners can deepen stretches and improve balance while maintaining proper alignment and form.
5.3 Injury Prevention Tips
The Bikram Yoga 26 Poses PDF emphasizes injury prevention through proper alignment, gradual progression, and mindful breathing. It advises listening to your body, staying hydrated, and using props when needed. Regular practice and warm-up routines are also highlighted to ensure a safe and effective yoga experience for all levels.
The Role of the Heated Environment
The heated environment in Bikram Yoga promotes detoxification, enhances flexibility, and prevents injuries by maintaining oxygenated blood flow during the 90-minute practice.
6.1 Benefits of Heat in Bikram Yoga
The intense heat in Bikram Yoga enhances detoxification through sweating, improves circulation, relaxes muscles, and prepares the body for deep stretching. It also boosts endurance and mental focus, simulating the climate of yoga’s origins in India for optimal physiological and mental benefits.
6.2 Preparing for a Hot Yoga Session
To prepare for a Bikram Yoga session, hydrate thoroughly, wear lightweight, breathable clothing, and arrive early. Avoid heavy meals beforehand and bring a towel and water bottle. Familiarize yourself with the studio’s environment and set intentions to fully engage with the practice for maximum benefits.
6.3 Safety Guidelines
Listen to your body and rest when needed. Stay hydrated and avoid pushing beyond comfort. Ensure proper alignment and follow instructor cues; Be mindful of the heat and avoid dizziness. Consult a healthcare professional before starting, especially if you have medical conditions. Safety is paramount in a heated practice.

Structuring a 90-Minute Bikram Yoga Class
A 90-minute Bikram Yoga class includes 26 poses, breathing exercises, and a structured sequence in a heated environment, designed to detoxify and improve circulation for holistic well-being.
7.1 Class Sequence and Flow
A 90-minute Bikram Yoga class begins with Standing Deep Breathing to warm up, followed by a structured sequence of the 26 poses, designed to progressively warm up the body and target all systems. The flow ensures each pose is held for a specific duration, promoting detoxification and circulation in a heated environment, concluding with a cool-down period.
7.2 Warm-Up and Cool-Down Techniques
Bikram Yoga classes begin with Standing Deep Breathing to warm up the body and prepare for the sequence. The cool-down involves relaxation and breathing exercises, allowing the heart rate to slow and promoting rejuvenation after the intense practice in the heated environment.
7.3 Instructor Feedback and Adjustments
Instructors provide alignment corrections, modifications, and safety guidance to optimize each student’s practice. They adapt feedback to suit all levels, ensuring poses are performed safely and effectively in the heated environment. This personalized approach enhances the therapeutic benefits of the 26 poses, promoting overall well-being.
Sanskrit Names and Their Significance
The Sanskrit names of the 26 Bikram Yoga poses reflect their cultural and historical roots, connecting modern practice to traditional yoga philosophy and enhancing understanding of each pose’s purpose.
8.1 Understanding the Sanskrit Terminology
The Sanskrit names of the 26 Bikram Yoga poses provide insight into their origins and purposes, linking each posture to ancient yoga traditions and enhancing practitioners’ connection to the practice’s cultural heritage.
8.2 Cultural and Historical Context
Bikram Yoga’s 26 poses trace their roots to traditional Hatha Yoga, with influences from ancient Indian practices. Popularized by Bikram Choudhury in the 1970s, this method blends timeless postures with modern techniques, preserving cultural heritage while adapting to contemporary wellness practices worldwide.
8.3 Pronunciation Guide
The Sanskrit names of Bikram Yoga poses hold cultural significance. A pronunciation guide helps practitioners articulate names like Pranayama (pra-nay-yama) and Janushirasana (jah-nu-sheer-a-sana) correctly. This enhances connection to the practice’s roots and ensures clarity in class. The guide often includes phonetic breakdowns and common challenges for accurate articulation.
Bikram Yoga 26 Poses PDF Guide
The Bikram Yoga 26 Poses PDF Guide offers detailed instructions, visuals, and alignment cues for each pose. It serves as a comprehensive resource for practitioners, providing modifications and tips for safe practice. The guide is designed to enhance understanding and mastery of the sequence, making it accessible for all levels.
9.1 Features of the PDF Guide
The PDF guide includes detailed instructions, alignment cues, and Sanskrit names for each of the 26 poses. It features high-quality images, modifications, and tips for safe practice. The guide also offers a pronunciation guide and explains the benefits of each pose, making it a comprehensive resource for all levels of practitioners.
9.2 How to Use the Guide Effectively
Start by skimming the table of contents to understand the structure. Focus on one pose at a time, using alignment cues and images for reference. Practice along with the guide during class, and review modifications for your skill level. Reference the pronunciation guide for Sanskrit names and apply tips for safe practice.
9.3 Downloading and Accessing the PDF
The Bikram Yoga 26 Poses PDF guide is easily downloadable from official sources. Access it on your smartphone, tablet, or computer for convenient practice. Print it for offline use or reference during classes to enhance your learning experience.
Common Mistakes to Avoid
Practitioners often overlook proper alignment, push too hard, or ignore breathing techniques. These errors can lead to injuries and reduce the effectiveness of Bikram Yoga practice.
10.1 Overexertion and Injury Risks
Overexertion in Bikram Yoga can lead to muscle strains, joint injuries, and dehydration. Ignoring body signals and pushing beyond safe limits often results in harm, especially in the heated environment. Proper pacing and mindfulness are crucial to prevent such risks during practice.
10.2 Improper Breathing Practices
Improper breathing in Bikram Yoga can disrupt focus and balance, leading to dizziness or lightheadedness. Forgetting to synchronize breath with movements or holding breath during poses can cause discomfort and reduce the effectiveness of the practice, emphasizing the need for mindful breathing techniques.
10.3 Ignoring Alignment Cues
Ignoring alignment cues in Bikram Yoga can lead to improper form, increasing injury risk and reducing pose effectiveness. Without attention to detail, practitioners may strain muscles or joints, making it essential to follow instructor guidance for safe and beneficial practice.
Bikram Yoga offers a transformative experience through its structured 26-pose sequence, fostering physical, mental, and emotional growth. The practice, performed in heat, promotes detoxification and overall well-being, supported by detailed guides like the Bikram Yoga 26 Poses PDF for optimal practice.
11.1 Final Thoughts on Bikram Yoga
Bikram Yoga is a empowering practice that challenges the body and mind through its 26-pose sequence in a heated environment, promoting detoxification, strength, and mental clarity. The structured approach ensures a comprehensive workout, supported by resources like the Bikram Yoga 26 Poses PDF, making it accessible for all levels of practitioners.
11.2 Encouragement for Practitioners
Embrace the transformative power of Bikram Yoga! Each 26-pose sequence is a step toward strength, flexibility, and mental clarity. Stay committed, listen to your body, and celebrate progress. The heated environment and structured practice are tools to empower your journey—keep pushing forward and enjoy the profound benefits that await.
11.3 Resources for Further Learning
Deepen your practice with the Bikram Yoga 26 Poses PDF guide, offering detailed instructions and visuals. Explore books, DVDs, and online courses for insights. Visit official Bikram Yoga websites and join communities for tips, workshops, and instructor guidance to enhance your understanding and mastery of the practice.