black and decker handy steamer manual

Welcome to the Black and Decker Handy Steamer manual! This guide provides essential information for using and maintaining your steamer, ensuring optimal performance and safety. Discover how to steam vegetables, cook rice, and more efficiently with this versatile appliance.

Key Features and Components of the Black and Decker Handy Steamer

The Black and Decker Handy Steamer features a user-friendly control panel, a steaming basket, and a non-stick rice bowl. Its compact design includes a water reservoir and automatic shut-off for safe, efficient cooking.

2.1. Main Components of the Handy Steamer

The Black and Decker Handy Steamer consists of several key components designed for efficient cooking. The main unit includes a steaming basket for holding vegetables or seafood, while the rice bowl is ideal for cooking rice or grains. A water reservoir is integrated into the base, allowing users to add the required amount of water for steaming. The control panel features simple buttons for setting timers and monitoring cooking progress. Additionally, the steamer includes a transparent lid for observing the cooking process without releasing steam. These components work together to provide a convenient and versatile cooking experience, suitable for preparing healthy meals with minimal effort.

2.2. Design and Build Quality

The Black and Decker Handy Steamer is designed with both functionality and user convenience in mind. Its compact and lightweight construction makes it easy to store and transport, fitting seamlessly into any kitchen. The steamer features a durable, high-quality build with a non-stick inner pot that prevents food from sticking, ensuring easy cleanup. The transparent lid allows users to monitor the cooking process without releasing steam, while the ergonomic handle provides a secure grip for safe handling. The control panel is simple and intuitive, with clear buttons for setting timers and monitoring progress. The overall design emphasizes practicality, making it an ideal addition to modern kitchens. With its robust construction and thoughtful design elements, the Handy Steamer is built to deliver reliable performance for years of use.

2.3. Accessories Included

The Black and Decker Handy Steamer comes with a set of essential accessories to enhance your cooking experience. Included is a steaming basket, perfect for holding vegetables, seafood, or other foods while they steam. A rice bowl is also provided, allowing you to cook rice simultaneously while steaming other ingredients. Additionally, a measuring cup is included to help you accurately measure water levels, ensuring the right amount of steam is generated. These accessories are designed to work seamlessly with the steamer, making meal preparation efficient and convenient. The non-stick coating on the rice bowl prevents food from sticking, while the steaming basket is easy to clean and dishwasher-safe. These thoughtfully included components ensure that you have everything you need to start cooking right away, making the Handy Steamer a comprehensive and user-friendly kitchen appliance.

How to Use the Black and Decker Handy Steamer

Using the Black and Decker Handy Steamer is straightforward. Simply add water to the base, place food in the steaming basket, and set the timer. The user-friendly control panel allows easy adjustment of steaming time and temperature, ensuring perfectly cooked meals every time.

3.1. Step-by-Step Instructions for First-Time Use

To ensure a smooth first-time experience with your Black and Decker Handy Steamer, follow these steps:

  1. Wash the steaming basket, rice bowl, and lid with warm soapy water before initial use.
  2. Place the steamer base on a flat, heat-resistant surface and plug it in.
  3. Fill the water reservoir with fresh, cold water to the “Max” line. Avoid overfilling.
  4. Add rice, vegetables, or other food to the rice bowl or steaming basket as desired.
  5. Position the steaming basket into the base, ensuring it aligns with the locator marks.
  6. Use the control panel to set the cooking time and select the steaming function.
  7. Turn on the steamer and let it operate until the cycle completes.
  8. Once done, unplug the unit and carefully remove the lid using oven mitts to avoid steam burns.
  9. Serve your food hot and enjoy the perfectly cooked results!

Always refer to the manual for specific guidelines tailored to your model, such as the Black and Decker Handy Steamer HS90 or HS800, for optimal performance and safety.

3.2. Cooking Rice and Steaming Vegetables

Cooking rice and steaming vegetables with the Black and Decker Handy Steamer is straightforward and efficient. For rice, add the desired amount to the rice bowl, mix in seasonings, and fill the bowl with water to the recommended level. Place the bowl in the steamer base and set the timer using the control panel. The steamer will automatically cook the rice to perfection.

For steaming vegetables, place them in the steaming basket. Fill the water reservoir to the “Max” line, ensuring proper steam generation. Position the basket in the base, close the lid, and select the steaming function. The appliance will shut off automatically once the cycle is complete. This method preserves nutrients and ensures even cooking. The Handy Steamer’s non-stick surface also prevents food from sticking, making cleanup easy. Whether cooking rice or steaming vegetables, this appliance offers a healthy and convenient way to prepare meals. Always refer to your specific model’s manual, like the HS90 or HS800, for detailed guidelines.

Maintenance and Care

Regularly clean the steamer with a soft cloth and mild detergent to prevent residue buildup. Avoid using abrasive cleaners to protect the non-stick surface. Store the appliance in a cool, dry place when not in use.

4.1. Cleaning the Handy Steamer

Cleaning the Black and Decker Handy Steamer is essential for maintaining its performance and hygiene. Always unplug the steamer before cleaning to ensure safety. Wipe the exterior with a damp cloth, avoiding harsh chemicals or abrasive cleaners. For the steamer bowl and rice bowl, wash them with mild soap and warm water after each use. Do not submerge the base unit in water, as it contains electrical components. Instead, clean it with a soft, damp cloth, focusing on areas around the controls and water reservoir. Regularly descale the water reservoir to prevent mineral buildup, especially if you live in an area with hard water. Allow all parts to dry thoroughly before storing to prevent moisture buildup. By following these steps, you can keep your Handy Steamer in excellent condition and ensure years of reliable service.

4.2. Storing the Appliance

Proper storage of the Black and Decker Handy Steamer is crucial for maintaining its functionality and longevity. Always unplug the appliance and allow it to cool completely before storing. Ensure all parts, including the steaming bowl and rice bowl, are clean and dry to prevent moisture buildup. Store the components separately or assembled, depending on your preference, but avoid stacking heavy objects on top of the steamer. Use a dry, cool place away from direct sunlight to store the appliance, as heat and light can damage the materials. Do not store the steamer in plastic bags or tight covers, as this can trap moisture and lead to mold. For extended storage, consider cleaning the steamer thoroughly beforehand and placing a silica gel packet inside to absorb any residual moisture. Always refer to the manual for specific storage recommendations to maintain the product’s warranty and performance.

Troubleshooting Common Issues

If you encounter issues with your Black and Decker Handy Steamer, troubleshooting can often resolve the problem. Common issues include the steamer not turning on, water not heating, or steam not being produced. First, ensure the appliance is properly plugged in and the outlet is working. Check if the water level is below the minimum fill line, as this can prevent heating. Descale the steamer regularly to remove mineral buildup, which can block steam production. If the steamer is not functioning, reset it by unplugging and replugging it after 30 minutes. For persistent issues, clean the steam vent and filter to ensure proper airflow. Always refer to the manual for specific troubleshooting steps. If problems persist, contact Black and Decker customer support for assistance. Regular maintenance and proper usage can help minimize issues and extend the appliance’s lifespan.

ritetemp manual

Ritetemp thermostats are designed for 24V systems, offering compatibility with gas, oil, electric, and millivolt heating/cooling systems. They provide programmable scheduling, temporary overrides, and energy-efficient operation, ensuring optimal temperature control and reliability.

1.1 Overview of Ritetemp Models (e.g., 8022, 8010, 6036)

Ritetemp offers a range of programmable thermostats, including the 8022, 8010, and 6036 models. The 8022 is suitable for 24V systems, including gas, oil, and electric heating/cooling, while the 6036 is designed for millivolt systems. The 8010 provides programmable scheduling and temporary overrides. Each model ensures compatibility with various heating and cooling systems, offering reliable temperature control and energy efficiency.

1.2 Compatibility with Heating and Cooling Systems

Ritetemp thermostats are compatible with 24V and millivolt systems, supporting gas, oil, and electric heating/cooling systems, as well as single-stage heat pumps. They are not compatible with 120V systems or multi-stage heat pumps, ensuring safe and efficient operation within their specified ranges.

Installation Guidelines
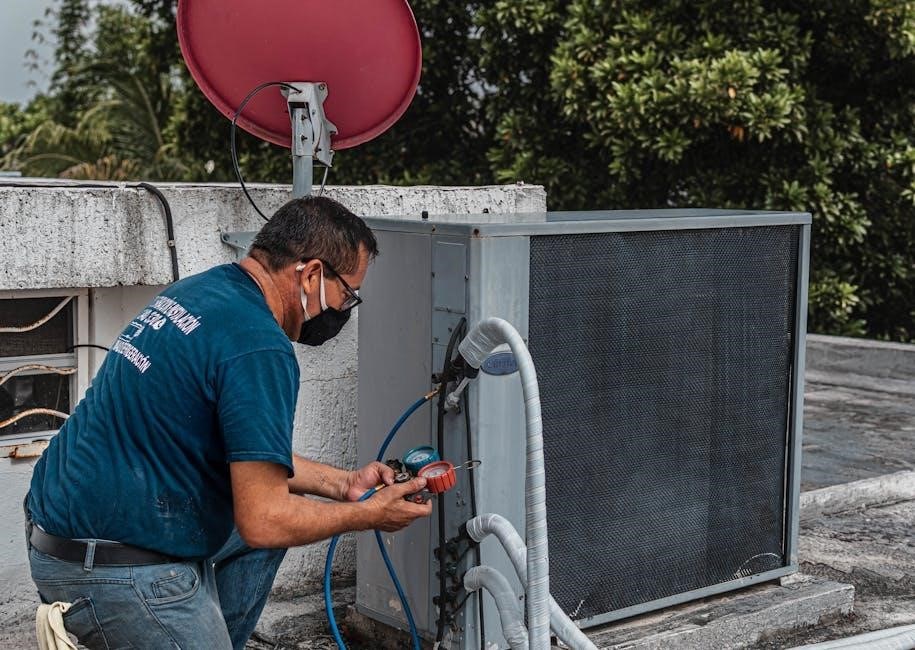
Installation involves connecting power wires to RH/RC, G, W, and Y terminals. Ensure compatibility with 24V systems and follow step-by-step instructions for safe setup.

2.1 Step-by-Step Installation Process

To install a Ritetemp thermostat, first turn off power to the HVAC system. Remove the old thermostat and install the new backplate. Connect wires to the correct terminals (RH/RC, G, W, Y). Mount the thermostat and restore power. Finally, test the system to ensure proper operation. Always follow safety guidelines and refer to the manual for specific wiring instructions.

2.2 System Compatibility (24V Systems, Millivolt Systems, etc.)

Ritetemp thermostats are compatible with 24V and millivolt systems, including gas, oil, electric, and single-stage heat pumps. They support conventional 24V HVAC systems and millivolt heating systems but are not compatible with 120V systems or multistage heat pumps. Ensure your system matches these requirements before installation to guarantee proper functionality and safety.

Operating the Ritetemp Thermostat

Operate your Ritetemp thermostat by setting the HEAT/COOL mode, adjusting temperature via arrows, and using HOLD for consistent settings. Temporary overrides and easy navigation ensure smooth control.

3.1 Setting the Clock and Day of the Week

To set the clock and day of the week on your Ritetemp thermostat, press the SET CLOCK button once to activate the clock setting mode. Use the up and down arrows to adjust the time in a 12-hour format. Press SET CLOCK again to save. For the day, press the button a second time and use the arrows to select the correct day, ensuring accuracy. The display will confirm when settings are saved.

3.2 Switching Between HEAT and COOL Modes

To switch between HEAT and COOL modes on your Ritetemp thermostat, locate the MODE switch. Move it to the desired position (HEAT or COOL). The thermostat will display the current mode and adjust its operation to maintain the set temperature. Ensure the FAN switch is set to AUTO for optimal performance. The system will activate accordingly based on the selected mode.

3.3 Temporary Temperature Override

To temporarily override the set temperature on your Ritetemp thermostat, press the UP or DOWN arrow buttons while in HEAT or COOL mode. The OVERRIDE icon will flash, indicating the change. Hold the buttons for faster adjustments. This feature allows quick temperature adjustments without altering the programmed schedule. The override remains active until the next scheduled setting or manual cancellation.

Programming Features

Ritetemp thermostats offer advanced programming for scheduling temperature settings, optimizing energy use, and ensuring comfort. Features include daily and weekly schedules, override functions, and compatibility with various models like 8022 and 8030C.

4.1 Scheduling Temperature Settings

Ritetemp thermostats allow users to program temperature settings for different times of the day and week. Models like the 8022 and 8030C support scheduling, enabling energy savings by adjusting temperatures during off-peak hours. The thermostat can be set to follow a daily or weekly schedule, with options to override settings temporarily for flexibility. This feature ensures consistent comfort while optimizing energy efficiency.

4.2 Understanding Override Functions

Ritetemp thermostats feature override functions that allow temporary adjustments to temperature settings. By pressing the UP or DOWN arrows, users can change the control temperature by 1 degree per step. The OVERRIDE icon appears, indicating a temporary deviation from the programmed schedule. This function is ideal for short-term comfort adjustments without altering the overall programming, ensuring flexibility while maintaining energy efficiency. The override remains active until the next scheduled setting resumes.

Advanced Features

Ritetemp thermostats offer advanced features like HOLD function, filter timer, and battery monitoring. They also support touch-based override commands and are compatible with millivolt systems.

5.1 HOLD Function for Temperature Maintenance

The HOLD function allows users to maintain a specific temperature indefinitely until canceled. It can be activated at the manual override screen by touching the HOLD icon. The thermostat will display the hold temperature and continue to maintain it. This feature is useful for consistent comfort without repeated adjustments. The HOLD function is canceled if the MODE switch is moved or by pressing HOLD again, ensuring flexible control over temperature settings.

5.2 Filter Timer and Battery Monitoring

The Ritetemp thermostat includes a filter timer to remind users when to replace their system’s air filter, ensuring optimal performance. Additionally, it monitors battery levels, providing alerts when replacement is needed. These features help maintain system efficiency and prevent unexpected interruptions, ensuring consistent heating and cooling performance while extending the lifespan of the thermostat and HVAC system components.

Troubleshooting Common Issues

Common issues include display malfunctions or temperature inaccuracies. Check wiring connections, ensure proper system compatibility, and restart the thermostat if problems persist for quick resolution.

6.1 Resolving Display Issues

Display issues on Ritetemp thermostats may include a blank screen or incorrect temperature readings. Ensure the thermostat is properly powered and restart it if necessary. Check for loose wiring connections and verify that the system is compatible with the thermostat. Clean the screen gently to remove any debris. If issues persist, consult the manual for specific error codes like E1 or E2, which may indicate sensor problems.

6.2 Addressing Temperature Inaccuracy

Temperature inaccuracy can occur due to incorrect programming or sensor malfunctions. Check the programmed settings to ensure they match your system’s requirements. Verify that the thermostat’s temperature sensor is clean and not obstructed. If issues persist, restart the thermostat or consult the manual for calibration instructions. Ensure proper wiring connections, especially for 24V systems, to maintain accurate temperature readings and system performance.

Safety Precautions

Ritetemp thermostats are not compatible with 120V systems. Avoid connecting to such systems to prevent damage or hazards. Handle electrical components carefully to ensure safe operation.

7.1 Avoiding Incompatible Systems (e.g., 120V Systems)

Ritetemp thermostats are incompatible with 120V systems, as they are designed for 24V, millivolt, or gas heating systems. Using them with 120V systems can cause damage or safety hazards. Always ensure compatibility with your heating or cooling system to avoid risks. Check system specifications before installation to prevent potential electrical issues or malfunctions.

7.2 Proper Handling of Electrical Components

Always disconnect power before handling electrical components. Avoid short circuits by ensuring wires are securely connected to correct terminals. Never touch live wires or components with wet hands. Inspect wires for damage before installation. Use appropriate tools to prevent damage to terminals. Ensure all connections are tight and properly secured. Refer to the manual for specific instructions to avoid electrical hazards.

Downloading the Ritetemp Manual

Visit the official Ritetemp website or platforms like ManualsLib and ManualsOnline. Search for your specific model (e.g., 8022, 8030C, 8050C) and download the PDF manual easily.

8.1 Finding the Correct Manual for Your Model

To locate the correct Ritetemp manual, visit websites like ManualsLib, ManualsOnline, or the official Ritetemp site. Enter your specific model number (e.g., 8022, 8030C, 8050C) in the search bar. Ensure the manual matches your thermostat model for accurate instructions. Download the PDF version for easy access and reference. Always verify the model number to avoid confusion and ensure compatibility.

8.2 Accessing PDF Manuals Online

Visit reputable websites like ManualsLib or ManualsOnline to access Ritetemp thermostat manuals. Search for your specific model (e.g., 8022, 8030C) and download the PDF version. Ensure the manual matches your thermostat model for accurate instructions. Save the PDF for easy reference and compatibility across devices. Always verify the model number to download the correct manual.

Customer Support and Resources

Ritetemp offers dedicated customer support and online resources, including troubleshooting guides and FAQs, to assist users with their thermostat needs. For further assistance, visit their official website or contact their support team directly.

9.1 Contacting Ritetemp Customer Service

Ritetemp customer service can be reached through their official website or by phone for assistance. They provide support for product inquiries, troubleshooting, and repair needs. Additionally, their website offers downloadable manuals, FAQs, and guides to help users resolve common issues independently. For more complex concerns, their support team is available to provide detailed guidance and solutions.

9.2 Online Resources and FAQs

Ritetemp offers comprehensive online resources, including downloadable PDF manuals for models like 8022, 8010, and 6036. Their official website provides detailed FAQs, troubleshooting guides, and user manuals to help resolve common issues independently. These resources cover installation, operation, and maintenance, ensuring users can maximize their thermostat’s functionality and address concerns efficiently without needing direct customer support intervention.

Ritetemp thermostats offer reliable temperature control with programmable scheduling and energy-efficient operation, ensuring comfort and convenience for users across various heating and cooling systems.

10.1 Summary of Key Features

Ritetemp thermostats offer programmable scheduling, temporary temperature overrides, and compatibility with 24V and millivolt systems. Features include energy-efficient operation, filter timers, and battery monitoring. Models like the 8022 and 8010 provide easy-to-use interfaces, ensuring precise temperature control. Their design supports various heating and cooling systems, making them versatile for different home setups while maintaining reliability and user convenience.

10.2 Final Tips for Optimal Use

Regularly check and replace filters as indicated by the filter timer. Use programmable scheduling to align temperature settings with your daily routine. Ensure compatibility with your heating/cooling system during installation. Utilize the HOLD function for consistent temperatures when away. Monitor battery levels to avoid unexpected shutdowns. These practices will enhance energy efficiency, system performance, and overall user experience with your Ritetemp thermostat.

bible in a year reading plan pdf ascension press

Ascension Press offers a free Bible in a Year PDF plan, guiding readers through the entire Catholic Bible in 365 days with daily readings from the Old and New Testaments, Psalms, and Proverbs, inspired by Jeff Cavins’ Great Adventure Bible Timeline and complemented by Fr. Mike Schmitzs podcast commentary.

Overview of the Plan

The Bible in a Year plan by Ascension Press is a structured, 365-day reading schedule designed to guide readers through the entire Catholic Bible. Inspired by Jeff Cavins’ Great Adventure Bible Timeline, it integrates daily readings from the Old and New Testaments, Psalms, and Proverbs. Each day features 2-3 passages, organized chronologically to deepen understanding of salvation history. The plan is complemented by Fr. Mike Schmitz’s podcast commentary, offering reflection and prayer guidance, and is available as a free downloadable PDF.

Why Use a Bible Reading Plan?

A structured Bible reading plan like Ascension Press’s Bible in a Year provides a clear path to reading the entire Catholic Bible consistently. It ensures daily engagement with Scripture, fostering spiritual growth and a deeper connection to God’s Word. By following a chronological approach, readers gain a clearer understanding of salvation history, while the inclusion of Psalms and Proverbs offers spiritual reflection and wisdom. The complementary podcast adds commentary, making the plan both educational and inspiring, helping readers stay motivated and deepen their faith journey.

The Structure of the Reading Plan

The plan divides the Bible into 365 daily readings, incorporating the Old and New Testaments, Psalms, and Proverbs, following a chronological structure inspired by the 12-period Great Adventure Bible Timeline.

Daily Readings and Breakdown

The Bible in a Year plan provides daily readings with a balanced mix of Old Testament, New Testament, Psalms, and Proverbs. Each day includes 2-3 passages, totaling 15-20 minutes of reading. The structure follows a chronological order, aligning with the 12 periods of Jeff Cavins’ Great Adventure Bible Timeline. This approach ensures readers encounter key events and themes in sequence, fostering a deeper understanding of salvation history while maintaining a manageable pace for completion within one year.

Integration of Old and New Testaments

The Bible in a Year plan seamlessly integrates Old and New Testament readings, revealing their connection and continuity. Each day, passages from both testaments are paired to show how they relate, deepening the understanding of God’s plan. This approach highlights the unity of Scripture, helping readers see how Old Testament events and prophecies are fulfilled in the New Testament, creating a cohesive narrative of salvation history that enriches spiritual growth and biblical understanding.

Inclusion of Psalms and Proverbs

The Bible in a Year plan thoughtfully incorporates readings from Psalms and Proverbs, ensuring a balanced approach to spiritual growth. These selections provide comfort, wisdom, and practical guidance, enriching daily reflection. Psalms offer poetic expressions of faith and prayer, while Proverbs imparts timeless wisdom for living virtuously. Their inclusion complements the narrative readings, fostering a deeper connection with God’s Word and its application in everyday life, making the plan holistic and spiritually nourishing.

Inspiration Behind the Plan

The Bible in a Year plan draws inspiration from Jeff Cavins’ Great Adventure Bible Timeline, offering a chronological journey through Scripture to deepen understanding of salvation history and God’s plan.

The Great Adventure Bible Timeline

The Great Adventure Bible Timeline, developed by Jeff Cavins, divides Scripture into 12 periods, revealing the sweeping narrative of salvation history. This framework guides the Bible in a Year plan, integrating daily readings from the Old and New Testaments, Psalms, and Proverbs. By following this chronological structure, readers gain a deeper understanding of God’s plan and the interconnectedness of biblical events, fostering a transformative journey through the entire Catholic Bible in one year.

Jeff Cavins’ Contribution

Jeff Cavins, renowned Catholic Bible teacher, revolutionized Scripture study with The Great Adventure Bible Timeline. His approach divides the Bible into 12 narrative periods, making salvation history accessible. Cavins’ insights are central to Ascension’s Bible in a Year plan, providing a chronological framework for daily readings. His work has inspired millions to engage deeply with God’s Word, offering clarity and connection to the biblical narrative through his transformative teaching methods and resources.

How to Use the Reading Plan

Download the free Bible in a Year PDF, featuring daily readings from the Old Testament, New Testament, Psalms, and Proverbs, perfectly aligning with Fr. Mike Schmitz’s podcast for commentary and reflection.

Downloading the PDF

Ascension Press offers a free downloadable Bible in a Year PDF, providing a structured daily reading plan. Each day includes passages from the Old Testament, New Testament, Psalms, and Proverbs, ensuring a balanced approach. The plan is inspired by Jeff Cavins’ Great Adventure Bible Timeline and aligns with Fr. Mike Schmitz’s podcast. Simply visit the Ascension Press website to download the PDF and start your journey through the entire Catholic Bible in one year.

Following Along with the Podcast

Fr. Mike Schmitz’s Bible in a Year podcast perfectly complements the PDF reading plan. Each episode aligns with the daily readings, offering insightful commentary, reflection, and prayer guidance. Listeners can deepen their understanding of Scripture as Fr. Mike walks through the Bible chronologically, inspired by Jeff Cavins’ Great Adventure Bible Timeline. The podcast is available on major platforms, making it easy to follow along with the Ascension Press PDF plan seamlessly.

Benefits of the Bible in a Year Plan

The plan fosters spiritual growth through consistent daily readings, providing a deeper understanding of salvation history and a balanced approach to Scripture with integrated Old and New Testament passages.

Spiritual Growth Through Daily Reading

Daily engagement with Scripture through the Bible in a Year plan nurtures spiritual growth by fostering a deeper connection with God. Consistent reading helps build a habit of prayerful reflection, allowing readers to encounter God’s Word in a structured yet meaningful way. The chronological structure and balanced readings from both Testaments, along with insights from Fr. Mike Schmitz, enrich understanding and application of biblical truths in daily life, promoting lasting spiritual transformation and a stronger faith journey.

Deeper Understanding of Salvation History

The Bible in a Year plan enhances understanding of salvation history by guiding readers through Scripture chronologically. Inspired by Jeff Cavins’ Great Adventure Timeline, it divides the Bible into 12 periods, revealing God’s plan of redemption. Daily readings integrate Old and New Testament passages, showing how they connect and fulfill prophecies. This structured approach helps readers grasp the overarching narrative, deepening their appreciation of God’s covenant with humanity and the unity of Scripture.

Alignment with the Podcast

The Bible in a Year PDF aligns perfectly with Fr. Mike Schmitz’s podcast, offering daily readings and commentary that mirror the episodes, enhancing the spiritual journey with deeper insights.

Fr. Mike Schmitz’s Commentary

Fr. Mike Schmitz’s commentary in the Bible in a Year podcast offers insightful reflections and prayers, guiding listeners through the daily readings. His explanations deepen understanding, connecting each passage to salvation history, making Scripture accessible and engaging. The PDF plan aligns with his commentary, enhancing the spiritual journey through structured daily readings and thoughtful insights.

Reflection and Prayer Guidance

The Bible in a Year plan includes daily reflection and prayer guidance, helping readers apply Scripture to their lives. Fr. Mike Schmitz’s podcast offers meditative insights, fostering a deeper connection with God. The structured approach encourages consistent prayer and reflection, making the Bible more accessible and personal, while the PDF plan provides a clear roadmap for daily spiritual growth and contemplation.

Availability and Accessibility

The Bible in a Year PDF is freely available for download from Ascension Press, ensuring accessibility for all. It is compatible with various digital devices, making it easy to use anywhere.

Free PDF Download

Ascension Press provides a complimentary Bible in a Year PDF, accessible to everyone. This downloadable resource aligns perfectly with Fr. Mike Schmitz’s podcast, offering a structured daily reading schedule. The PDF is designed to guide readers through the entire Catholic Bible in 365 days, with selections from the Old Testament, New Testament, Psalms, and Proverbs. Its availability ensures that anyone can embark on this spiritual journey without cost, making it universally accessible for deeper biblical engagement and understanding.

Compatibility with Digital Devices

The Bible in a Year PDF from Ascension Press is fully compatible with various digital devices, ensuring easy access on e-readers, tablets, and smartphones; Its clear formatting adapts seamlessly to different screen sizes, providing a readable experience across all platforms. Whether on iOS or Android, the PDF remains accessible, allowing users to engage with the daily readings anytime, anywhere, and integrate it effortlessly into their daily routines for a consistent spiritual practice.

Unique Approach to Bible Reading

The plan offers a chronological structure, integrating Old and New Testaments, Psalms, and Proverbs, providing a balanced and varied approach to understanding Scripture daily.

Chronological Structure

The Bible in a Year reading plan is structured chronologically, dividing the Bible into 12 periods for clarity. This approach helps readers understand the progression of events and themes throughout Scripture. Each day’s reading includes passages from the Old Testament, New Testament, Psalms, and Proverbs, ensuring a balanced and varied study. This method emphasizes the continuity of God’s plan, making the Bible more accessible and engaging for daily reading and reflection.

Balanced and Varied Readings

Each day’s reading in the plan includes selections from the Old Testament, New Testament, Psalms, and Proverbs, ensuring a diverse and comprehensive study. This balanced approach avoids repetition and keeps the reader engaged by blending narrative, wisdom, and poetic texts. The variety of passages provides a richer understanding of Scripture, while the structured format makes it easy to stay on track throughout the year.

Popularity and Impact

The Bible in a Year podcast surged to #1 on Apple Podcasts, engaging millions and inspiring a global community to deepen their faith through daily readings and reflections.

Reach and Audience

The Bible in a Year podcast has reached millions globally, becoming the #1 podcast on Apple Podcasts. Nearly half a million participants completed the plan in its first year, with the free PDF downloaded by a vast audience. Its appeal spans diverse demographics, creating a worldwide community united in reading and reflection, making it one of the most accessible and engaging Catholic Bible resources available today.

Testimonials and Success Stories

Participants praise the Bible in a Year plan for its transformative impact, with many sharing how it deepened their faith and understanding of Scripture. Over 500,000 people completed the plan in its first year, creating a vibrant global community. Listeners highlight Fr. Mike Schmitz’s engaging commentary and the structured approach as key to their success. The plan has inspired countless testimonials of spiritual growth and renewed connection to God’s Word.

The Bible in a Year plan offers a structured journey through Scripture, complemented by insightful commentary, making it perfect for deepening faith and understanding God’s Word.

Final Thoughts on the Plan

The Bible in a Year plan offers a balanced and chronological approach to reading Scripture, making the entire Catholic Bible accessible in 365 days. By integrating Old and New Testament readings, Psalms, and Proverbs, it provides a unified understanding of God’s story. The free PDF from Ascension Press, along with Fr. Mike Schmitz’s podcast commentary, enhances the journey, fostering spiritual growth and deeper biblical understanding for all participants.

Encouragement to Start the Journey

Embark on a transformative spiritual journey with the Bible in a Year plan, designed to deepen your faith and understanding of Scripture. This structured approach makes reading the entire Catholic Bible achievable and engaging. With the free PDF guide and Fr. Mike Schmitz’s podcast, you’ll find inspiration and guidance each day. Take the first step and immerse yourself in God’s Word, discovering the rich tapestry of salvation history and its relevance to your life.

it band syndrome stretches pdf

IT Band Syndrome is a common condition causing knee pain in runners and cyclists. It occurs due to inflammation of the iliotibial band, often from overuse or improper training. Managing ITBS requires a combination of targeted stretches, strengthening exercises, and proper recovery techniques to alleviate symptoms and prevent recurrence.

What is IT Band Syndrome?

IT Band Syndrome, or ITBS, is an overuse injury causing pain on the outside of the knee. It occurs when the iliotibial band, a ligament-like structure, becomes inflamed or irritated. This condition is common in runners, cyclists, and hikers due to repetitive knee bending. Symptoms include lateral knee pain, swelling, and tightness, often worsening during activity. Rest typically alleviates pain, but it may return with continued stress.

Common Causes and Risk Factors

IT Band Syndrome is often caused by repetitive friction between the iliotibial band and the lateral femoral condyle. Risk factors include overuse in activities like running or cycling, weak hip muscles, poor training techniques, and inadequate recovery. Tight or imbalanced muscles, such as the tensor fasciae latae, can also contribute. Addressing these factors is key to prevention and effective management.

Understanding the IT Band and Its Function

The iliotibial (IT) band is a ligament running down the thigh, connecting the hip to the knee. It stabilizes the knee during movement, aiding in activities like running and cycling.

Anatomy of the IT Band

The IT band is a thick, fibrous ligament extending from the ilium to the patella and tibia. Composed of connective tissue, it provides lateral thigh stability. It originates from the Tensor Fasciae Latae muscle and gluteus maximus, playing a crucial role in knee movement and hip abduction. Its structure is integral to movement efficiency and joint protection.

The Role of the IT Band in Movement

The IT band plays a vital role in movement by stabilizing the knee and aiding in hip abduction. It helps track the patella during knee flexion and extension, essential for activities like running and cycling. Its function is crucial for maintaining proper gait mechanics and preventing excessive lateral movement of the knee joint during physical activities.

Best Stretches for IT Band Syndrome

Effective IT band stretches include side-lying, standing, and crossed-leg stretches. These exercises target the iliotibial band and connected muscles, reducing tension and alleviating pain. Regular stretching helps improve flexibility and prevent recurrence of symptoms.

Side Lying IT Band Stretch

The side-lying IT band stretch targets the iliotibial band and tensor fasciae latae. Lie on your side with the affected leg on top. Cross the affected leg over the other, keeping the foot flexed. Gently lean away from the stretch, holding for 20-30 seconds. This stretch relieves tension and improves flexibility, helping to alleviate IT band syndrome symptoms effectively.

Standing IT Band Stretch

The standing IT band stretch is an effective way to relieve tension. Cross the affected leg behind the other, bending the knee slightly. Lean gently away from the stretch until you feel a pull on the outer thigh. Hold for 20-30 seconds, then repeat 2-3 times. This stretch improves flexibility and reduces discomfort associated with IT band syndrome.

IT Band Stretch with Crossed Legs

This stretch targets the IT band effectively. Cross your legs, placing the affected leg behind the other. Slowly lean to the side of the unaffected leg until a gentle stretch is felt on the outer thigh. Hold for 20-30 seconds, then switch legs. Repeat 2-3 times for optimal relief and improved flexibility in the IT band.

Strengthening Exercises for IT Band Syndrome

Strengthening exercises target weak hip muscles, often a root cause of ITBS. Focus on clamshells, side-lying leg lifts, and step-ups to build strength and stability.

Hip Strengthening Exercises

Hip strengthening exercises are crucial for IT Band Syndrome recovery. Focus on clamshell exercises, side-lying leg lifts, and step-ups to improve hip abductor strength. These exercises target weak hip muscles often linked to ITBS. Perform 2-3 sets of 15-20 repetitions, ensuring proper form to maximize effectiveness. Stronger hips help reduce strain on the IT band, preventing future inflammation.

Tensor Fasciae Latae (TFL) Strengthening

Strengthening the Tensor Fasciae Latae (TFL) muscle is essential for IT Band Syndrome recovery. The TFL plays a key role in hip stabilization and movement. Exercises like side-lying leg lifts and clamshell exercises target the TFL, improving its strength and reducing IT band tension. Perform these exercises 2-3 times weekly, focusing on controlled movements to enhance muscle function and promote healing. Consistency is vital for long-term relief.

Foam Rolling Techniques for IT Band Relief

Foam rolling is effective for relieving IT band tension. Use a foam roller to gently roll the IT band and surrounding muscles, promoting circulation and reducing inflammation. Consistency in foam rolling can enhance recovery and complement stretching routines.

Proper Foam Rolling Methods

Proper foam rolling involves using controlled, slow movements to target the IT band and surrounding muscles. Start by positioning the foam roller on the outer thigh, applying moderate pressure. Roll from the hip down to the knee, focusing on tender areas. Avoid rolling too quickly or applying excessive force, which can cause discomfort or injury. Repeat the process 2-3 times, ensuring consistent coverage for optimal relief. This method helps reduce muscle tension and improves circulation, aiding in recovery and reducing IT band syndrome symptoms effectively.

Frequency and Duration of Foam Rolling

For optimal IT band relief, foam rolling should be performed 2-3 times weekly, or daily if symptoms persist. Each session should last 1-2 minutes per leg, focusing on slow, controlled movements. Start with lighter pressure and gradually increase as needed. Consistency is key to reducing inflammation and improving mobility. Adjust frequency based on symptom severity and recovery progress.

Creating a Comprehensive IT Band Syndrome Stretching PDF Guide

A well-structured guide provides clear instructions and visuals for effective IT band stretches, helping users understand their condition and manage symptoms through practical exercises and recovery tips.

Key Components of an Effective Guide

An effective guide includes detailed step-by-step instructions, high-quality images, and clear diagrams to illustrate each stretch. It should also provide information on proper posture, breathing techniques, and the duration of each exercise. Including tips on modifying stretches for different fitness levels ensures accessibility for all users. Additionally, incorporating a routine schedule helps maintain consistency.

Visual Aids and Instructions

Clear images and diagrams are essential for demonstrating proper stretch techniques. Step-by-step instructions ensure users understand each movement. Videos or GIFs can enhance learning, while arrows and labels on images highlight key focus areas. Including modifications for different fitness levels makes the guide inclusive and practical for a wide audience. Detailed descriptions prevent misunderstandings;

Preventive Measures and Long-Term Management

Preventing IT Band Syndrome involves consistent stretching, strengthening, and proper warm-up routines. Gradually increasing activity intensity and improving running mechanics can reduce strain. Regular foam rolling and addressing muscle imbalances also play a crucial role in long-term management and maintaining knee health.

Modifying Activities to Prevent ITBS

Modifying activities is essential to prevent ITBS. Reducing running frequency and intensity can minimize stress on the IT band. Incorporating low-impact exercises like cycling or swimming helps maintain fitness without aggravating symptoms. Ensuring proper footwear and gradually increasing workout intensity are key preventive measures. Additionally, avoiding repetitive knee-bending movements and incorporating strength training can significantly reduce the risk of recurrence.

Importance of Consistent Stretching and Strengthening

Consistent stretching and strengthening are crucial for managing ITBS. Regular stretching reduces inflammation and improves flexibility, while strengthening the hips and TFL muscles enhances stability. Over time, these practices prevent recurrence and promote long-term recovery. Without consistent effort, symptoms may persist, especially in active individuals. A balanced routine ensures sustained relief and supports overall lower body function.

Recovery and Rehabilitation Strategies

Recovery and rehabilitation strategies for ITBS focus on rest, ice therapy, and targeted exercises. Professional guidance ensures proper healing and prevents future injuries effectively.

Rest and Ice Therapy

Rest and ice therapy are crucial for managing ITBS symptoms. Ice reduces inflammation and eases pain when applied for 15-20 minutes several times daily. Allowing the IT band to rest prevents further irritation. Combining these methods with gentle stretching accelerates recovery and helps restore normal movement without causing additional strain.

Physical Therapy and Professional Guidance

Physical therapy plays a vital role in treating ITBS by addressing muscle imbalances and improving flexibility. A professional therapist can create a personalized plan, focusing on stretching and strengthening exercises tailored to your needs. They also guide proper techniques to avoid overuse injuries, ensuring a holistic approach to recovery and long-term prevention.

Evidence-Based Stretching and Treatment Options

Evidence-based treatments for ITBS include targeted stretches and strengthening exercises. The American Association of Hip and Knee Surgeons recommends a home exercise program focusing on these methods.

Scientific Research on ITBS Treatments

Research indicates that ITBS is often linked to hip weakness and tightness. Studies suggest that combining stretching with strengthening exercises, particularly for the hip muscles, can effectively reduce symptoms. Foam rolling and physical therapy are also supported as complementary treatments. Consistency in these practices is key to long-term recovery and prevention of recurrence.

Expert Recommendations for Stretching

Experts recommend consistent stretching routines to alleviate ITBS symptoms. Side-lying stretches and standing stretches are highly effective. Incorporating foam rolling can enhance flexibility and reduce tension in the IT band. Combining stretching with strengthening exercises, particularly for the hip muscles, is advised for optimal recovery and prevention of recurrence.

Effective management of ITBS requires consistent stretching and strengthening exercises. Dedication to these practices, along with proper recovery techniques, ensures long-term relief and prevents recurrence of symptoms.

Effective ITBS management involves a combination of targeted stretching, strengthening exercises, and proper recovery techniques. Consistency in practicing IT band stretches, like side-lying and standing stretches, is crucial. Strengthening the hip muscles and tensor fasciae latae (TFL) helps alleviate symptoms. Incorporating foam rolling and rest prevents further inflammation. Long-term management requires modifying activities and maintaining a routine to ensure lasting relief and prevent recurrence.

Encouragement for Consistent Practice

Consistency is key to managing ITBS effectively. By dedicating just a few minutes daily to stretching and strengthening exercises, you can significantly reduce symptoms and prevent recurrence. Developing a routine and staying committed will lead to faster recovery and improved mobility. Remember, small efforts today can result in long-term relief and a healthier, pain-free lifestyle.

Additional Resources and References

Explore detailed PDF guides and expert-recommended resources for ITBS management. Websites like dartmouth-hitchcock.org offer comprehensive exercise plans and recovery tips. Utilize these tools to enhance your treatment plan effectively.

Recommended Reading and Websites

For in-depth guidance, visit www.dartmouth-hitchcock.org and www.aahks.org. These sites offer evidence-based exercises and recovery tips. Download the ITBS PDF guide from AAHKS, which includes detailed stretches and strengthening routines. Explore these resources to enhance your understanding and treatment plan for IT Band Syndrome effectively.

PDF Guides and Printable Worksheets

Download comprehensive IT Band Syndrome PDF guides from trusted sources like AAHKS or physical therapy websites. These guides include detailed stretches, strengthening exercises, and foam rolling techniques. Printable worksheets help track progress and maintain consistency. Look for guides with visual aids like photos and diagrams to ensure proper form. Many resources are free and easily accessible online for immediate use.

german grammar pdf

A comprehensive guide to mastering German grammar‚ these PDF resources offer structured lessons‚ interactive exercises‚ and clear explanations‚ making learning efficient and accessible for all levels.

Overview of German Grammar Fundamentals

German grammar fundamentals form the backbone of mastering the language. Key concepts include the four cases (Nominative‚ Genitive‚ Dative‚ Accusative)‚ gender of nouns‚ and word order rules. Verbs are conjugated based on tense‚ person‚ and number‚ with separable verbs adding complexity. PDF guides provide clear explanations and exercises to practice these essentials. These resources often include printable cheat sheets and practical examples to simplify learning. By focusing on these core elements‚ learners can build a strong foundation for understanding and using German effectively. Comprehensive PDFs also cover sentence structure‚ articles‚ and basic tenses‚ making them invaluable for beginners and intermediate learners alike.

Importance of Using PDF Resources for Learning

PDF resources are invaluable for learning German grammar due to their accessibility and flexibility. They offer structured lessons‚ interactive exercises‚ and clear explanations‚ making them ideal for self-study. Printable cheat sheets and practical examples simplify complex grammar rules‚ while downloadable textbooks provide offline access‚ perfect for learners who prefer traditional study methods. PDFs often include progress tracking and reviews‚ ensuring a comprehensive understanding. Additionally‚ they cater to various learning styles‚ offering visual‚ auditory‚ and kinesthetic approaches. Their portability allows learners to practice anytime‚ anywhere‚ making PDFs an essential tool for mastering German grammar efficiently and effectively. They are widely available‚ often free‚ and tailored to different proficiency levels‚ ensuring every learner can benefit.

Foundational Aspects of German Grammar

Mastering gender‚ word order‚ and verb conjugation forms the core of German grammar. PDF resources simplify these concepts‚ offering clear explanations and exercises for effective learning.

The Four Cases in German (Nominative‚ Genitive‚ Dative‚ Accusative)

The German language relies heavily on four grammatical cases: Nominative‚ Genitive‚ Dative‚ and Accusative. Each case determines the role of a noun or pronoun in a sentence. The Nominative case is used for the subject of the sentence‚ while the Accusative marks the direct object. The Dative indicates the indirect object‚ and the Genitive shows possession or relationship. Understanding these cases is crucial‚ as they influence the endings of articles‚ adjectives‚ and some nouns. PDF resources provide detailed explanations‚ including practical examples and exercises to help learners master the cases effectively. These resources often include charts and drills to simplify the learning process‚ ensuring a solid grasp of this fundamental aspect of German grammar.

Understanding Gender and Word Order

German grammar requires a strong grasp of gender and word order. Nouns are categorized into three genders: masculine‚ feminine‚ and neuter‚ each influencing article and adjective endings. While some genders align with logical expectations‚ others are arbitrary‚ making memorization essential. Word order in German is relatively flexible but follows specific rules. In main clauses‚ the verb typically occupies the second position‚ while in subordinate clauses‚ it moves to the end. PDF resources provide detailed explanations and exercises to help learners master these concepts. They often include charts and drills to simplify the learning process‚ ensuring a solid grasp of this fundamental aspect of German grammar.

Essential Verb Conjugations and Separable Verbs

Mastering German verb conjugations is crucial for effective communication. Regular and irregular verbs change based on tense‚ mood‚ person‚ and number‚ with the present tense serving as the foundation for learners. Separable verbs‚ such as aufstehen (to get up)‚ consist of a root verb and a detachable prefix that can change meaning. These verbs often require the prefix to be placed at the end of the sentence in the present tense. Common prefixes include auf‚ mit‚ and aus. Learning these verbs early is vital‚ as they are frequently used in everyday language. PDF guides provide detailed charts and exercises to help learners practice conjugations and understand the nuances of separable verbs‚ making them an indispensable resource for mastering German grammar.

Advanced German Grammar Topics

Dive into complex tenses‚ adjectives‚ adverbs‚ passive voice‚ and the subjunctive mood. These advanced concepts‚ explained in detail in PDF guides‚ enhance your German language mastery.

Mastering Tenses (Present‚ Past‚ and Future)

Understanding German tenses is crucial for clear communication. The present tense is used for current actions‚ while the past tense (imperfect and perfect) describes completed events. The future tense expresses upcoming actions. PDF guides provide detailed conjugation charts and exercises to practice these tenses effectively. For example‚ regular verbs in the present tense follow predictable patterns‚ but irregular verbs require memorization. The perfect tense often involves using helfen or sein as auxiliary verbs. Mastery of these tenses enhances sentence structure and storytelling ability in German. Common mistakes include incorrect conjugation and misuse of auxiliary verbs. Practice exercises in PDF resources help learners overcome these challenges and improve accuracy. Regular practice is essential for fluency.

Using Adjectives and Adverbs Effectively

Adjectives and adverbs are essential for adding detail and nuance to German sentences. Adjectives describe nouns‚ while adverbs modify verbs‚ adjectives‚ or other adverbs. In German‚ adjectives must agree with the noun they describe in gender‚ number‚ and case. For example‚ der gute Mann (the good man) vs. die gute Frau (the good woman). Adverbs often end in “-weise” or “-halber” and provide information about manner‚ time‚ or place. Common adverbs include schnell (quickly) and gut (well). PDF guides offer exercises to practice correct usage‚ such as distinguishing between similar adverbs like schnell and schlecht. Mastering these elements enhances clarity and precision in German communication.

Passive Voice and Subjunctive Mood

The passive voice in German is formed using the verb werden and the past participle of the main verb‚ e.g.‚ Der Ball wird gekickt (The ball is kicked). It emphasizes the action rather than the doer. The subjunctive mood expresses hypothetical or reported statements‚ like Er wäre gern da gewesen (He would have liked to be there). PDF guides detail these concepts with exercises‚ such as identifying passive constructions and forming subjunctive sentences. Practice is key to mastering these advanced grammar elements‚ as they require precise context and structure for accurate use in both speaking and writing.

Resources and Tools

Discover downloadable German grammar PDFs and eBooks‚ such as Hammer’s German Grammar‚ offering comprehensive lessons and exercises. Online platforms like MyGermanAcademy provide additional practice tools for all levels.

Recommended German Grammar PDFs and eBooks

For effective learning‚ consider Hammer’s German Grammar And Usage‚ Fifth Edition‚ a comprehensive guide covering all grammar rules. German Grammar in Context‚ 3rd Edition offers practical examples from real-life texts. Additionally‚ Modern German Grammar: A Practical Guide is ideal for learners seeking clear explanations. These resources are available as downloadable PDFs‚ ensuring accessibility. They cater to various proficiency levels‚ from beginners to advanced learners. Essential German Grammar provides concise lessons‚ while Practice Makes Perfect: German Grammar offers exercises for reinforcement. These eBooks and PDFs are invaluable tools for mastering German grammar efficiently‚ whether for self-study or classroom use.

Online Platforms for Practicing German Grammar

Several online platforms offer interactive tools and exercises for mastering German grammar. Duolingo‚ Babbel‚ and Busuu provide engaging lessons with quizzes and progress tracking. Deutsche Welle offers free courses with structured grammar lessons. Additionally‚ Quizlet is excellent for flashcards and tests. These platforms cater to all skill levels‚ from beginners to advanced learners. They often include features like interactive exercises‚ video tutorials‚ and community support‚ making learning German grammar both effective and enjoyable. Utilizing these resources alongside PDF guides ensures a well-rounded approach to mastering German grammar‚ with both theoretical knowledge and practical application;

Mastering German grammar requires consistent practice and dedication. Utilize PDF guides‚ online platforms‚ and interactive tools to reinforce learning. Regular review and practical application ensure steady progress.

Best Practices for Learning German Grammar

Consistent practice is key to mastering German grammar. Start by creating a grammar cheat sheet for quick reference‚ focusing on essential rules like gender‚ cases‚ and verb conjugations. Set realistic goals‚ such as dedicating 15-30 minutes daily to grammar exercises. Use PDF resources to reinforce learning‚ as they often include structured lessons and interactive exercises. Practice regularly by completing worksheets‚ quizzes‚ and writing short sentences. Immerse yourself in the language by reading German texts‚ watching films‚ and speaking with native speakers. Regular review of grammar concepts ensures long-term retention. Stay motivated by celebrating small achievements and gradually increasing difficulty. With persistence and the right tools‚ you’ll confidently grasp German grammar.

jurisprudence exam questions and answers pdf ontario

The Jurisprudence Exam in Ontario is a mandatory requirement for healthcare professionals, focusing on legal and ethical frameworks. It ensures compliance with legislation like the Regulated Health Professions Act and the Nursing Act, promoting professional standards and accountability in practice.

1.1 Overview of the Exam

The Jurisprudence Exam in Ontario is a mandatory assessment for healthcare professionals, evaluating their knowledge of legal, ethical, and professional standards. It features multiple-choice questions and focuses on understanding key legislation such as the Regulated Health Professions Act and the Nursing Act. The exam ensures professionals are informed about their legal responsibilities and ethical practices in patient care.

1.2 Importance of the Jurisprudence Exam for Healthcare Professionals

The Jurisprudence Exam ensures healthcare professionals understand legal and ethical responsibilities, fostering safe and ethical care. It promotes accountability, adherence to legislation like the Regulated Health Professions Act, and upholds professional standards. Passing the exam demonstrates commitment to patient safety and public trust, making it a critical component of professional practice in Ontario.

Structure and Format of the Jurisprudence Exam

The exam consists of multiple-choice questions assessing knowledge of legal and ethical standards. It is designed to evaluate understanding of professional responsibilities and regulatory frameworks effectively.

2.1 Types of Questions and Exam Duration

The Jurisprudence Exam features multiple-choice questions designed to test knowledge of legal and ethical standards. Candidates typically have 10 minutes and 30 seconds to complete the exam, ensuring a focused assessment of their understanding of professional responsibilities and regulatory frameworks. The structure emphasizes clarity and precision, aligning with the professional standards outlined in Ontario’s healthcare regulations.

2.2 Passing Requirements and Scoring System

The Jurisprudence Exam requires a passing score of 70-75% to ensure competency in legal and ethical standards. Each question is scored as correct or incorrect, with no partial marks. The exam evaluates understanding of professional responsibilities and regulatory compliance, ensuring healthcare professionals meet the legal requirements to practice in Ontario. The scoring system is straightforward, emphasizing clear and accurate knowledge of jurisprudence principles.

Key Legislation Governing the Jurisprudence Exam

The exam is governed by the Regulated Health Professions Act (RHPA), Nursing Act, 1991, and Ontario Drug Benefit Act, ensuring legal and ethical standards are met in healthcare practice.

3.1 Regulated Health Professions Act, 1991 (RHPA)

The Regulated Health Professions Act, 1991 (RHPA) governs healthcare professionals in Ontario, ensuring self-regulation and adherence to professional standards. It outlines scopes of practice, professional misconduct, and disciplinary measures, promoting accountability and public trust. The RHPA is foundational for the Jurisprudence Exam, emphasizing legal and ethical responsibilities in healthcare delivery. Its provisions ensure that healthcare professionals operate within defined frameworks, balancing autonomy with public protection.

3.2 Nursing Act, 1991

The Nursing Act, 1991, regulates the nursing profession in Ontario, outlining professional standards, competencies, and ethical practices. It works alongside the RHPA to ensure nurses meet legal requirements and maintain public trust. The Act defines the scope of nursing practice, addressing professional misconduct and disciplinary actions. It is a critical component of the Jurisprudence Exam, focusing on nurses’ legal and ethical responsibilities in patient care.

3.3 Ontario Drug Benefit Act

The Ontario Drug Benefit Act governs drug benefits for eligible Ontario residents, ensuring access to necessary medications. It outlines legal responsibilities for healthcare professionals, particularly pharmacists, regarding drug coverage and patient eligibility. The Act is crucial for understanding legal implications in prescribing and dispensing medications, with exam questions often focusing on interpreting its provisions and applying them in clinical scenarios.

Ethical and Professional Issues in Jurisprudence

The Jurisprudence Exam emphasizes ethical and professional standards, ensuring healthcare professionals understand legal frameworks and accountability in their practice.

4.1 Ethical Decision-Making Frameworks

Ethical decision-making frameworks are central to the Jurisprudence Exam, guiding professionals in resolving legal and moral dilemmas. The College of Nurses of Ontario (CNO) emphasizes principles like patient autonomy, beneficence, and justice. These frameworks help professionals navigate complex situations, ensuring actions align with legislation and professional standards, such as those outlined in the Nursing Act, 1991 and the Regulated Health Professions Act.

4.2 Professional Conduct and Accountability

Professional conduct and accountability are critical components of the Jurisprudence Exam, ensuring healthcare professionals adhere to ethical and legal standards. The College of Nurses of Ontario (CNO) regulates nursing practice, emphasizing transparency and responsibility. Accountability involves being answerable for actions and decisions, aligning with legislation like the Nursing Act, 1991 and the Regulated Health Professions Act, which outline professional expectations and consequences for misconduct.

Practice Questions and Study Resources

Essential resources include PDF guides and practice exams covering legal frameworks like the Ontario Drug Benefit Act. These tools aid in understanding professional ethics and accountability standards.

5.1 Sample Jurisprudence Exam Questions and Answers

Sample questions cover legal and ethical scenarios, such as professional conduct under the Regulated Health Professions Act. Answers explain key principles, like mandatory reporting requirements. For example, a question might ask about a nurse’s duty to report unsafe practices, with answers referencing the Nursing Act, 1991. These resources help candidates understand exam formats and legal expectations.

5.2 Recommended Study Materials and Guides

Recommended study materials include official guides from the College of Nurses of Ontario (CNO) and the Ontario College of Pharmacists. These resources provide comprehensive overviews of relevant legislation, such as the Regulated Health Professions Act and the Nursing Act, 1991. Additional resources like practice exams and PDF guides offer realistic question formats and detailed explanations to aid in exam preparation.

Jurisprudence Exam Preparation Tips

Effective preparation involves understanding legal frameworks like the Regulated Health Professions Act and practicing with CNO Jurisprudence Exam sample questions. Focus on ethical decision-making and adhering to professional standards to ensure readiness.

6.1 Effective Study Strategies

Effective study strategies for the Jurisprudence Exam involve active learning techniques, such as practicing with sample questions from the Ontario College of Nurses and reviewing legislation like the Nursing Act, 1991. Focus on understanding ethical frameworks, professional conduct, and legal terminology. Utilize recommended study guides and online resources to reinforce knowledge and ensure comprehensive preparation for the exam.

6.2 Time Management During the Exam

Effective time management is crucial for success in the Jurisprudence Exam. Allocate time evenly across all questions, spending no more than 1-2 minutes per question. Prioritize understanding legal terminology and ethical frameworks, as seen in resources like the Ontario College of Nurses guides. Skip difficult questions initially and return to them after completing easier ones, ensuring all answers are reviewed if time allows.

Common Challenges and Mistakes to Avoid

Common challenges include misunderstanding legal terminology and poor time management. Mistakes like rushing through questions or ignoring ethical frameworks can lead to errors. Stay calm and systematic.

7.1 Misunderstanding Legal Terminology

Misunderstanding legal terminology is a common challenge, often leading to incorrect answers. Terms like “professional misconduct” and “informed consent” can be complex and vary in meaning. Thorough preparation and studying official resources help clarify these terms, ensuring accurate responses during the exam. It’s crucial to familiarize oneself with legislative language to avoid errors and achieve success in the jurisprudence exam.

7.2 Time Management Errors

Time management errors are frequent during the jurisprudence exam, often leading to incomplete answers or rushed decisions. Candidates may spend too long on complex questions or fail to allocate sufficient time for later sections. Effective time management strategies, such as prioritizing questions and practicing under timed conditions, are essential to ensure all questions are addressed adequately within the exam timeframe.

Recent Updates and Changes in the Exam

Recent updates include legislative changes impacting exam content, such as revisions to the Regulated Health Professions Act and new question formats focusing on ethical decision-making scenarios.

8.1 Legislative Updates Impacting the Exam

Recent legislative updates, such as revisions to the Regulated Health Professions Act and the Nursing Act, have introduced changes to exam content. These updates reflect evolving legal standards and professional practices, ensuring the exam aligns with current regulatory requirements. Healthcare professionals must stay informed about these changes to accurately address questions related to legal and ethical frameworks in their practice.

8.2 New Question Formats and Content Additions

The exam now includes new question formats, such as true/false and scenario-based questions, to assess deeper understanding. Additional content focuses on emerging legal topics, including recent updates to the Ontario Drug Benefit Act and professional accountability. These changes ensure the exam reflects current practices and challenges in healthcare jurisprudence, preparing professionals for real-world ethical and legal dilemmas.

Exam Requirements and Eligibility

The Jurisprudence Exam is mandatory for healthcare professionals in Ontario. Eligibility requires registration with the regulatory college and payment of fees. It ensures legal and ethical compliance in practice.

9.1 Who Needs to Take the Jurisprudence Exam

The Jurisprudence Exam is required for regulated healthcare professionals in Ontario, including nurses, pharmacists, and dentists. It is a prerequisite for licensure, ensuring professionals understand legal and ethical standards. The exam is mandated by regulatory colleges to uphold public safety and professional accountability in healthcare practice.

9.2 Registration Process and Fees

Registration for the Jurisprudence Exam is completed through the respective regulatory college’s website. Applicants must create an account, submit required documents, and pay the exam fee, typically ranging between $75 to $150. Payment methods include credit card or cheque. Fees are non-refundable, and applicants are encouraged to review the registration guide for detailed instructions and updates.

Role of the Jurisprudence Exam in Professional Development

The Jurisprudence Exam ensures healthcare professionals understand legal and ethical responsibilities, enhancing their ability to practice competently and uphold public trust in the healthcare system.

10.1 Enhancing Legal Knowledge

The Jurisprudence Exam enhances legal knowledge by familiarizing healthcare professionals with key legislation such as the Regulated Health Professions Act and Nursing Act. It ensures understanding of professional responsibilities, ethical practices, and legal frameworks. Regular updates keep professionals informed about legislative changes, enabling them to apply legal concepts in real-world scenarios effectively.

10.2 Promoting Professional Competence

The Jurisprudence Exam promotes professional competence by ensuring healthcare professionals understand their legal and ethical responsibilities. It reinforces adherence to professional standards, enhancing decision-making skills and accountability. By testing knowledge of legislation like the Regulated Health Professions Act and Nursing Act, the exam ensures practitioners are well-equipped to navigate complex legal and ethical scenarios in their daily practice.

The Jurisprudence Exam ensures Ontario healthcare professionals understand legal and ethical standards and frameworks, fostering accountability and competence in practice, aligning with the Regulated Health Professions Act and Nursing Act.

11.1 Final Tips for Success

Thoroughly review legal frameworks like the Regulated Health Professions Act and Nursing Act. Practice with sample questions and seek feedback. Focus on ethical decision-making and professional accountability. Manage time effectively during the exam, ensuring all questions are attempted. Utilize CNO study guides and resources to strengthen knowledge. Avoid common mistakes, such as misunderstanding legal terminology. Stay updated on legislative changes to maintain exam readiness and confidence.

the possibility of evil pdf

Shirley Jackson’s classic tale explores the darker side of human nature through Miss Adela Strangeworth, a seemingly innocent woman with a secret. The story, available as a PDF, delves into themes of judgment, self-righteousness, and hidden evil, offering a chilling commentary on small-town life and moral complexities.

1.1 Overview of the Short Story

The Possibility of Evil, a short story by Shirley Jackson, revolves around Miss Adela Strangeworth, an elderly woman living in a quaint, close-knit town. She appears as a pillar of morality but harbors a dark secret: she writes anonymous, manipulative letters to her neighbors. The story explores themes of deception, judgment, and the duality of human nature, revealing how evil can masquerade as virtue. The tale is available as a PDF for readers to delve into its chilling narrative.

1.2 Shirley Jackson’s Writing Style

Shirley Jackson’s writing in The Possibility of Evil is masterful, blending psychological suspense with subtle irony. Her use of understatement and ordinary settings creates a chilling contrast to the darker themes. The narrative voice is detached yet insightful, allowing readers to glimpse the characters’ inner lives. Jackson’s dialogue is crisp and revealing, while her foreshadowing builds tension. This style effectively explores the complexities of human nature, making the story both haunting and thought-provoking.

1.3 Themes and Symbolism

In The Possibility of Evil, Jackson explores themes of moral judgment, self-righteousness, and the duality of human nature. Roses symbolize the juxtaposition of beauty and evil, while the small-town setting highlights communal naivety. The letters Miss Strangeworth writes serve as tools of hidden malice, symbolizing unchecked evil in plain sight. These elements weave together to create a narrative that warns against the dangers of unchecked moral authority and the facade of innocence.

The Nature of Evil in the Story

Evil in the story is subtle, embodied by Miss Strangeworth, who hides her malice behind a polite facade. The small-town setting highlights how evil can thrive unnoticed, disguised as normalcy.

2.1 The Concept of Evil in Ordinary People

The story illustrates how evil can reside in ordinary individuals, masked by a facade of normalcy. Miss Strangeworth, a seemingly harmless elderly woman, embodies this concept through her malicious letters, revealing that evil often hides in plain sight, making it more insidious. Jackson’s portrayal challenges the notion that evil is always overt, instead showing how it can thrive unnoticed in everyday people and their actions.

2.2 Miss Strangeworth as a Symbol of Insidious Evil

Miss Strangeworth represents insidious evil, using her polite demeanor and respected status to conceal her manipulative nature. Her actions, such as writing harmful letters, demonstrate how evil can operate subtly, causing destruction without direct confrontation. Jackson uses her character to highlight the danger of unchecked self-righteousness and the ease with which evil can infiltrate seemingly idyllic communities, making Miss Strangeworth a powerful symbol of hidden malice.

2.3 TheTown’s Unawareness of Evil

2.3 The Town’s Unawareness of Evil

The townspeople remain oblivious to Miss Strangeworth’s sinister deeds, viewing her as a harmless, elderly woman. Their trust in her respectable facade blinds them to her manipulative actions, allowing her evil to thrive unnoticed. This unawareness underscores Jackson’s critique of societal complacency and the ease with which evil can hide in plain sight, even in seemingly idyllic communities.

Character Analysis

Miss Adela Strangeworth is portrayed as a lonely, eccentric old woman with a mysterious connection to her roses, whose seemingly harmless facade conceals her manipulative nature.

3.1 Miss Adela Strangeworth: A Complex Character

Miss Strangeworth is a multifaceted character, presenting herself as a kind, elderly woman while harboring a darker side. Her actions, such as writing malicious letters, reveal a manipulative nature hidden beneath her polite demeanor. The story highlights her loneliness and eccentricity, which drive her to seek control through subtle, insidious means, making her both fascinating and unsettling to readers.

3.2 Motivations Behind Miss Strangeworth’s Actions

Miss Strangeworth’s actions are driven by a sense of moral superiority and a need to exert control over others. She believes it is her duty to expose the town’s hidden flaws, justified by her self-appointed role as a moral guardian. Her loneliness and isolation further fuel her desire to influence others’ lives, blurring the line between good intentions and malicious interference.

3.3 The Impact of Miss Strangeworth’s Letters

Miss Strangeworth’s letters spread fear, distress, and mistrust among the townspeople. By revealing hidden secrets and stirring up rumors, they disrupt the town’s harmony and create moral dilemmas. Her actions demonstrate how seemingly harmless behavior can lead to significant emotional turmoil, highlighting the destructive power of unchecked self-righteousness and the insidious nature of evil hidden behind polite facades.

Themes Explored in the Story

The story explores themes of self-righteousness, judgment, and moral dilemmas, highlighting how evil can masquerade as good in ordinary individuals.

4.1 The Dangers of Self-Righteousness

Miss Strangeworth’s self-righteousness leads her to judge others harshly, believing she is morally superior. Her actions, however, reveal her own moral flaws, showcasing how self-righteousness can blind individuals to their own hypocrisy and lead them to commit harm under the guise of good intentions. This theme serves as a cautionary tale about the dangers of unchecked moral superiority.

4.2 The Theme of Judgment and Appearance

The story critiques the tendency to judge others based on appearance, as Miss Strangeworth assumes moral authority by observing superficial behaviors. Her outward dignity contrasts with her inner malice, highlighting the disconnect between appearance and reality. The townspeople, unaware of her true nature, exemplify how easily evil can hide in plain sight, disguised by a facade of respectability and social conformity.

4.3 The Idea of Moral Dilemmas

The story explores moral dilemmas through Miss Strangeworth’s belief in her self-appointed duty to expose evil, which she accomplishes by sending malicious letters. Her actions blur the line between good intentions and harmful behavior, highlighting the complexity of moral choices. The townspeople’s unawareness of her true nature further emphasizes the difficulty of discerning right from wrong, especially when evil is disguised as virtue or concern.

Symbolism in “The Possibility of Evil”

The story uses roses as symbols of hidden evil, contrasting their beauty with the darkness within. The small town setting represents a deceptive facade of innocence, while Miss Strangeworth’s letters symbolize the secret evil lurking beneath the surface of ordinary life.

5.1 The Symbolism of Roses

In The Possibility of Evil, roses symbolize the duality of good and evil. Their beauty and fragrance contrast with the malicious intentions of Miss Strangeworth, who tends them meticulously. The roses represent the deceptive nature of evil, which can appear harmless yet conceal darkness. This symbolism underscores Jackson’s theme that evil often hides behind seemingly innocent appearances, much like the roses that Miss Strangeworth nurtures with care.

5.2 The Significance of the Small Town Setting

The small town in The Possibility of Evil serves as a backdrop for exploring insidious evil. Its idyllic, close-knit atmosphere contrasts with the darker undertones of Miss Strangeworth’s actions. The setting highlights how evil can thrive in seemingly innocent communities, where familiarity breeds trust and blind acceptance. The town’s inability to recognize Miss Strangeworth’s true nature underscores Jackson’s critique of complacent societies and the facades that hide moral depravity. This setting amplifies the story’s chilling realism.

5.3 The Use of Letters as a Symbol of Hidden Evil

In The Possibility of Evil, Miss Strangeworth’s letters symbolize hidden malice, serving as tools of manipulation and control. The letters, filled with false concern and veiled insults, represent the subtle, insidious nature of evil; They mask her true intent, highlighting how evil can be disguised as benevolence. The letters also symbolize the destructive power of words, revealing how seemingly harmless actions can cause profound harm. This element underscores Jackson’s exploration of moral ambiguity and deception.

Literary Devices and Techniques

Shirley Jackson employs irony, foreshadowing, and dialogue to highlight the moral complexities of her characters, creating a tense atmosphere that underscores the subtle presence of evil in everyday life.

6.1 Irony in the Story

The story is rich with irony, as Miss Strangeworth, who appears virtuous, harbors malicious intentions. Her letters, meant to expose others’ flaws, ultimately reveal her own hypocrisy. This situational irony highlights the disconnect between her self-image and true nature, emphasizing the theme that evil often disguises itself as righteousness. Jackson’s use of irony creates a subtle yet powerful critique of self-righteous judgment.

6.2 The Use of Foreshadowing

Shirley Jackson masterfully employs foreshadowing to hint at the underlying darkness in Miss Strangeworth’s character. The description of her roses as “prickly” and “fragrant” subtly suggests the duality of beauty and evil. Additionally, her locked desk and the townspeople’s obliviousness to her true nature foreshadow the revelation of her malicious letters. These subtle cues prepare readers for the unfolding of her insidious actions, emphasizing the story’s themes of hidden evil and moral complexity.

6.3 Jackson’s Use of Dialogue

Shirley Jackson skillfully uses dialogue to reveal character traits and underlying tensions. Miss Strangeworth’s polite yet probing conversations with townspeople, such as her questions about the strawberries, mask her true intent. Her exchanges often contrast with her private thoughts, exposing her manipulative nature. The dialogue also highlights the townsfolk’s naivety, creating a sense of irony and deepening the story’s exploration of hidden evil and moral duplicity, central to its themes.

The Story’s Message

The story warns against evil disguised as virtue and emphasizes the need for self-reflection to avoid moral decay and the consequences of unchecked evil.

7.1 The Warning Against Evil in Disguise

Shirley Jackson’s tale underscores the dangers of evil hidden behind a mask of innocence. Miss Strangeworth, a seemingly kind elderly woman, conceals her malicious intent through polite demeanor and town involvement. Her anonymous letters reveal the dark truth, serving as a cautionary tale about the insidious nature of evil that can lurk unnoticed in ordinary people, emphasizing the need for vigilance and self-awareness to combat such hidden malice.

7.2 The Importance of Self-Reflection

Shirley Jackson’s story highlights the necessity of self-reflection in recognizing personal flaws and moral ambiguities. Miss Strangeworth’s actions, though well-intentioned in her mind, reveal a lack of introspection, leading to harm. The narrative serves as a reminder that true morality requires examining one’s own biases and assumptions, rather than solely judging others. Self-awareness is crucial to prevent unchecked self-righteousness and the perpetuation of hidden evils.

7.3 The Consequences of Unchecked Evil

The story underscores the destructive nature of evil when left unchecked. Miss Strangeworth’s malicious letters, though seemingly harmless, create lasting harm and tension in the community. Jackson illustrates how unchecked evil can erode trust, damage relationships, and perpetuate cycles of negativity. The tale serves as a warning that even subtle forms of malice can have profound consequences, emphasizing the need for accountability and moral awareness to prevent such damage.

The Relevance of the Story Today

The story’s timeless themes of hidden evil, judgment, and self-righteousness resonate in modern society, reminding us of the dangers of unchecked malice and the importance of self-reflection.

8.1 The Timelessness of the Themes

The story’s exploration of evil, judgment, and moral dilemmas remains timeless, resonating with contemporary issues like misinformation and intolerance. Its themes of human frailty and self-righteousness are universal, transcending time and culture. The subtle portrayal of evil in ordinary life serves as a mirror to modern society, reminding us of the importance of awareness and reflection in navigating moral complexities.

8.2 The Story’s Resonance in Modern Society

The story’s themes of judgment, self-righteousness, and hidden evil remain strikingly relevant today. In a world grappling with misinformation, intolerance, and anonymity, Jackson’s portrayal of insidious evil resonates deeply. The PDF version highlights how ordinary individuals can harbor darkness, a concept that aligns with modern societal struggles. The tale serves as a timeless warning about the dangers of unchecked judgment and the universality of human frailty.

8.3 The Universality of the Message

The story’s exploration of evil, judgment, and moral complexity transcends time and culture, making its message universally relatable. The PDF version emphasizes how ordinary individuals can harbor darkness, a theme that resonates globally. Jackson’s portrayal of insidious evil reflects fundamental human frailties, ensuring the tale’s relevance across generations and societies. Its universal appeal lies in its ability to challenge readers to reflect on their own moral judgments and actions.

Resources for Further Study

Find the PDF version of “The Possibility of Evil” online for deeper analysis. Explore recommended literary critiques, study guides, and discussion questions to enhance understanding of the story.

9.1 Where to Find the PDF Version

The PDF version of “The Possibility of Evil” can be found on various online platforms. Websites like LitCharts and Scribd offer free access to the story. Additionally, it is available on educational platforms and online libraries. Students and readers can also download it from academic databases or purchase it through e-book platforms. Ensure to use reliable sources to access the authentic version of Shirley Jackson’s work for study purposes.

9.2 Recommended Literary Analysis

For a deeper understanding, explore LitCharts and SparkNotes analyses of “The Possibility of Evil.” These resources provide insights into themes like self-righteousness and symbolism, such as the roses. They also examine Miss Strangeworth’s character and motivations, offering a comprehensive breakdown of the story’s moral dilemmas. Additionally, eNotes features detailed summaries and critical essays, making it an excellent resource for academic study and discussion.

9.3 Study Guides and Discussion Questions

Enhance your understanding with study guides and discussion questions available online. Resources like LitCharts and SparkNotes offer detailed summaries, analysis, and thought-provoking questions. These guides explore themes, character motivations, and literary devices, such as irony and symbolism. Discussion topics include the morality of Miss Strangeworth’s actions and the impact of her letters. PDF study guides provide structured questions for classroom or personal use, fostering deeper reflection on the story’s moral dilemmas and themes.

journeys through the radiant citadel pdf

Journeys Through the Radiant Citadel is a groundbreaking D&D anthology offering 13 stand-alone adventures, crafted by a diverse team of writers, exploring vibrant cultures and myths.

Overview of the Book

Journeys Through the Radiant Citadel is a captivating anthology of 13 stand-alone D&D adventures, designed for characters of levels 1-14. Each adventure is set in unique, vibrant lands, offering diverse cultural and mythological experiences. The book is linked by its connection to the Radiant Citadel, a mysterious floating city in the Ethereal Plane, which serves as a unifying theme. Compatible with the 2024 Core Rules, it represents Wizards of the Coast’s commitment to inclusive storytelling, featuring contributions from a diverse team of writers.

Importance of the Radiant Citadel in D&D

The Radiant Citadel holds a central role in D&D as a symbol of cultural richness and storytelling diversity. This floating city in the Ethereal Plane serves as a hub connecting 13 adventures, each showcasing unique world experiences. Its importance lies in its ability to bridge gaps between different cultures and myths, offering players and DMs alike a gateway to explore diverse narratives. This anthology highlights the potential for inclusive storytelling in D&D, setting a new standard for future content.

Background and Release Details

Journeys Through the Radiant Citadel was released by Wizards of the Coast on July 19, 2022, as a collection of 13 stand-alone adventures for D&D 5e.

Publisher and Release Date

Journeys Through the Radiant Citadel was published by Wizards of the Coast and officially released on July 19, 2022. This book is a significant addition to D&D 5e, offering 13 stand-alone adventures that cater to characters of levels 1 through 14. It is the first D&D sourcebook written entirely by a team of 16 writers of color, marking a milestone in the game’s commitment to inclusivity. The anthology is compatible with the 2024 Core Rules, ensuring seamless integration into existing campaigns while introducing fresh, diverse perspectives to the game.

Compatibility with D&D 5e Core Rules

Journeys Through the Radiant Citadel is fully compatible with the Dungeons & Dragons 5th Edition core rules, specifically the 2024 Core Rulebooks. This ensures seamless integration into existing campaigns, allowing Dungeon Masters and players to incorporate its content effortlessly. The anthology’s adventures, spanning levels 1-14, align perfectly with the game’s current mechanics and balance. Wizards of the Coast designed this book to enhance gameplay without requiring additional rules or adjustments, making it a versatile and accessible resource for all D&D enthusiasts.

Structure and Content

Journeys Through the Radiant Citadel offers 13 stand-alone adventures for levels 1-14, each set in unique, vibrant lands linked by the Radiant Citadel’s mystical presence.

13 Stand-alone Adventures

Journeys Through the Radiant Citadel presents 13 stand-alone adventures for levels 1-14. Each adventure is set in distinct, vibrant lands, offering unique cultural experiences and mythological explorations. Designed to be flexible, these adventures can be easily integrated into any campaign. They feature diverse themes, from whimsical hunts to epic quests, ensuring a wide range of playstyles. The anthology provides a wealth of creative scenarios, crafted by a diverse team of writers, making it a must-have for both players and Dungeon Masters seeking fresh and inclusive content.

Levels of Play (1-14)

Levels of Play (1-14) ensures accessibility for players of all skill levels. Adventures are tailored for characters from level 1 to 14, offering challenges that grow in complexity. This range allows new players to ease into the game while providing seasoned adventurers with epic challenges. The scalability of these adventures makes them adaptable to any campaign, ensuring dynamic gameplay for diverse groups. This inclusive approach caters to a broad audience, making Journeys Through the Radiant Citadel a versatile resource for Dungeon Masters and players alike.

Cultural and Mythological Themes

Cultural and Mythological Themes are central to the anthology, with each adventure exploring rich, diverse cultures and myths from various realms, creating immersive and vibrant story experiences.

Diverse Cultures and World Experiences

Journeys Through the Radiant Citadel celebrates diverse cultures and world experiences, offering 13 unique adventures that introduce players to vibrant, immersive settings inspired by global mythologies.

Exploration of Myths and Legends

Journeys Through the Radiant Citadel delves into the exploration of myths and legends, offering 13 adventures that bring global mythologies to life. Players embark on quests inspired by diverse cultural tales, encountering whimsical creatures and legendary artifacts. The Radiant Citadel, a mystical hub, connects these stories, inviting adventurers to uncover secrets tied to ancient lore. This anthology provides fresh perspectives on classic myths, blending fantasy with real-world influences to create unforgettable experiences for players of all levels.

Inclusive and Diverse Writing Team

Journeys Through the Radiant Citadel features a diverse team of 16 writers of color, marking a historic first for D&D. Their contributions enrich the game’s inclusivity.

Writers of Color and Their Contributions

The anthology Journeys Through the Radiant Citadel is a milestone in D&D history, featuring a team of 16 writers of color. Their unique perspectives and storytelling styles bring fresh, vibrant narratives to the game, reflecting diverse cultures and experiences. Each writer contributes distinctive voice, enriching the adventures and setting a new standard for inclusivity in D&D content. This collaborative effort showcases the power of representation, offering players and DMs alike a richer, more dynamic gaming experience.

Impact on D&D’s Inclusivity

Journeys Through the Radiant Citadel marks a significant step forward for D&D’s inclusivity. By featuring a writing team entirely composed of people of color, it sets a new precedent for representation in the industry. This anthology not only diversifies storytelling but also broadens the cultural narratives within the game, making it more accessible and appealing to a wider audience. The initiative underscores Wizards of the Coast’s commitment to fostering inclusivity, ensuring that D&D reflects the diverse world we live in.

Reception and Reviews

Journeys Through the Radiant Citadel received widespread acclaim for its creative adventures and cultural depth, becoming the first D&D book nominated for a Nebula Award.

Critical Acclaim and Community Feedback

Journeys Through the Radiant Citadel has been praised for its innovative storytelling and cultural richness, marking a milestone as the first D&D module nominated for a Nebula Award.

Players and DMs alike have celebrated its diverse voices and fresh perspectives, though some note variations in adventure balance. The book’s success highlights the importance of inclusivity in shaping D&D’s future.

Awards and Nominations

Journeys Through the Radiant Citadel made history as the first tabletop RPG to be nominated for a Nebula Award, recognizing its groundbreaking storytelling and cultural depth in 2022.

This nomination highlighted the book’s innovative approach to inclusivity and its impact on the D&D community, setting a new standard for tabletop role-playing games.

Resources and Downloads

Journeys Through the Radiant Citadel is available as a PDF download, offering 13 adventures and compatible with D&D 5e core rules for enhanced gameplay.

PDF Availability and Safety Tips

The Journeys Through the Radiant Citadel PDF is available for download from platforms like Scribd and personal websites. Ensure you download from reputable sources to avoid malware risks.

  • Always verify file authenticity before downloading.
  • Keep your device updated with antivirus software.
  • Avoid suspicious links to protect your data.

Safe downloading ensures a secure and enjoyable experience for D&D enthusiasts.

Additional Materials and Community Resources

Additional materials and community resources for Journeys Through the Radiant Citadel enhance gameplay and creativity. DMs can find maps, PDFs, and supplementary settings in the pinned resources post.

  • Maps and custom content are available online.
  • Community-driven resources expand adventure possibilities.
  • Engage with forums and communities for new ideas.

These resources enrich the D&D experience, offering fresh perspectives and tools for players and DMs alike.

Journeys Through the Radiant Citadel is a celebration of diverse creativity and inclusive storytelling. This anthology offers 13 adventures across 14 levels, inspiring countless epic journeys. A pivotal release in D&D’s journey towards inclusivity.

Final Thoughts on the Book’s Significance

Journeys Through the Radiant Citadel stands as a testament to the power of diverse storytelling in D&D. Its 13 stand-alone adventures, spanning levels 1-14, offer unparalleled variety and cultural depth. The book’s inclusive authorship, featuring 16 writers of color, marks a significant step forward for the game’s representation. By blending vibrant settings, rich myths, and engaging challenges, it not only broadens the D&D universe but also sets a new standard for inclusive and imaginative content.

mr steam manual

Welcome to the MrSteam Manual, your comprehensive guide to installing, operating, and maintaining steam systems․ This manual ensures safety, efficiency, and optimal performance for your steam experience․

1․1․ Overview of MrSteam Products and Systems

MrSteam offers a wide range of premium steam bath generators and accessories designed for residential and commercial use․ Their product lineup includes advanced steam generators like the CU Series and MS SUPER models, which provide efficient and reliable steam production․ These systems are complemented by a variety of control options, including digital and programmable controls, to enhance user convenience․ Additionally, MrSteam provides accessories such as steam-proof lighting, aromatherapy systems, and maintenance kits to optimize the steam bath experience․ Each product is engineered to ensure safety, durability, and energy efficiency, making MrSteam a leader in the steam bath industry․ Their innovative solutions cater to diverse needs and preferences․

1․2․ Importance of Following the Manual

Adhering to the MrSteam Manual is crucial for ensuring the safe and efficient operation of your steam bath system․ Proper installation, maintenance, and usage practices outlined in the manual help prevent accidents and system damage․ Failure to follow guidelines may result in unsafe conditions, such as excessive steam temperature or improper electrical connections․ Additionally, not following the manual can void warranties and lead to premature system wear․ Always refer to the manual for specific instructions tailored to your model, ensuring optimal performance and longevity of your steam bath system․ This guide is your key to a safe and enjoyable steam experience․

Installation and Operation

Proper installation and operation of your MrSteam system ensure safety, efficiency, and optimal performance․ Always follow the manual’s guidelines for setup, maintenance, and usage to avoid common issues․

2․1․ Pre-Installation Checklist

Before installing your MrSteam system, ensure all prerequisites are met․ Verify room dimensions, electrical requirements, and plumbing connections․ Check for compatibility with local building codes and regulations․ Ensure proper ventilation and drainage systems are in place․ Confirm the steam generator size matches the room volume using the MrSteam sizing guide․ Review all safety warnings and guidelines provided in the manual․ Ensure necessary tools and materials are available․ Consult professionals if unsure about any step․ This checklist ensures a smooth and safe installation process, preventing potential issues down the line․ Always refer to the official MrSteam manual for detailed instructions․

2․2․ Steam Generator Sizing Guide

Proper sizing of your steam generator is crucial for optimal performance․ Refer to the MrSteam sizing guide to determine the appropriate model for your steam room․ The guide considers factors such as room volume, insulation, and desired steam output․ Ensure the generator’s power matches the room’s dimensions to avoid underperformance or energy waste․ The sizing guide also provides recommendations for specific models, such as the CU SERIES or MS SUPER 4E․ Always verify the total adjusted room volume, which allows for up to 60 cubic feet per 1E equivalent․ Proper sizing ensures efficient operation and a superior steam experience․ Consult the manual for detailed calculations and model specifications․

2․3․ Step-by-Step Installation Requirements

Ensure a safe and efficient installation by following the detailed steps in the MrSteam Manual․ Begin by verifying the steam generator sizing using the provided guide․ Next, inspect the site for proper ventilation and electrical connections․ Avoid using black iron or galvanized pipes for steam lines․ Mount the generator according to the manual’s specifications, ensuring level placement․ Connect the steam line to the generator and the steam room outlet․ Secure all connections tightly to prevent leaks․ Refer to the manual for specific wiring instructions and control system installation․ Finally, test the system to ensure proper operation before first use․ Always follow the manufacturer’s guidelines to guarantee reliability and safety․

Safety Precautions and Warnings

Always read and follow all safety guidelines in the MrSteam Manual․ Ensure proper ventilation and avoid exposing children under 16 to unsupervised steam use․ Never touch hot surfaces․

3․1․ General Safety Guidelines

For safe operation, always follow the instructions in the MrSteam Manual․ Ensure proper ventilation in the steam room to prevent excessive moisture buildup․ Never touch steam outlets or hot surfaces, as they can cause burns․ Keep children under 16 away from unsupervised steam use․ Avoid entering the steam room if you have certain health conditions without medical approval․ Regularly inspect the system for leaks or damage․ Always turn off the steam generator when not in use․ Follow recommended temperature and humidity levels to ensure a safe and enjoyable experience․ Proper maintenance, as outlined in the manual, is crucial for long-term safety and efficiency․

3․2․ Specific Warnings and Cautions

Adhere to specific warnings in the MrSteam Manual to prevent hazards․ Avoid using black iron or galvanized pipes for steam lines, as they can corrode․ Ensure steam generators are installed by licensed professionals․ Never modify or tamper with the system’s components․ Keep the steam room door closed during operation to maintain proper steam levels․ Do not exceed recommended steam temperatures to avoid scalding․ Regularly check for leaks and ensure all connections are secure․ Follow the manual’s guidelines for electrical components to prevent shocks or fires․ Always heed the peel-and-stick warnings provided with the unit․ Failure to comply may void the warranty or lead to unsafe conditions․ Proper adherence ensures a safe and reliable steam experience․

Maintenance and Troubleshooting

Regular maintenance ensures optimal performance and longevity․ Daily checks include cleaning the steam generator and verifying water levels․ Weekly, drain and descale the unit to prevent mineral buildup․ Address any issues promptly to avoid system malfunctions․ Refer to the manual for troubleshooting common problems like low steam output or error codes․ Proper upkeep guarantees a safe and efficient steam experience․

4․1․ Routine Maintenance Tasks

Routine maintenance is essential for ensuring the longevity and efficiency of your MrSteam system․ Begin by inspecting the steam generator monthly, checking for any signs of wear or corrosion․ Clean the exterior and interior regularly to prevent mineral buildup and bacterial growth․ Drain and descale the unit every 1-3 months, depending on usage and water hardness․ Replace water filters quarterly or as recommended to maintain water quality․ Ensure all steam lines are clear and properly insulated to avoid heat loss․ Additionally, check the control systems and accessories for proper function and update software if necessary․ Keep a maintenance log to track activities and stay ahead of potential issues․ This regular upkeep ensures a safe, reliable, and enjoyable steam experience․

4․2․ Troubleshooting Common Issues

Identifying and addressing issues promptly ensures optimal performance of your MrSteam system․ Common problems include low steam output, which may result from improper sizing or clogged steam lines․ Check for mineral buildup and descale if necessary․ If the generator isn’t heating, verify electrical connections and ensure the water level is adequate․ Leaks in steam lines or connections should be repaired immediately to prevent energy loss․ For control malfunctions, refer to the control manual or reset the system․ Strange noises could indicate loose parts or scale buildup, requiring inspection and cleaning․ Always consult the MrSteam manual or contact support for complex issues to ensure safety and effectiveness․ Regular maintenance can prevent many of these problems․

Control Systems and Accessories

The MrSteam control systems offer advanced features like temperature regulation and timer functions․ Accessories include steam generators, controls, and sensors, ensuring a seamless steam experience․

5․1․ Types of MrSteam Controls

MrSteam offers a variety of control systems designed for ease and functionality․ These include wall-mounted controls, which are ideal for in-shower installation, and ․touchscreen controls, providing advanced features like temperature adjustment and timer settings․ Additional options encompass wireless controls for remote operation and smart home integrations, allowing users to manage their steam experience through mobile apps․ Each control type is engineered to enhance user convenience while maintaining safety and efficiency․ By selecting the right control system, users can optimize their steam bath experience according to personal preferences and lifestyle needs․

5․2․ Accessories and Their Functions

MrSteam offers a range of accessories to enhance your steam bath experience; The AromaSteam system allows for essential oil infusion, creating a relaxing atmosphere․ ChromaSteam integrates LED lighting to customize ambiance with color․ Additionally, temperature controls ensure precise heat management, while steam heads distribute vapor evenly․ timers and remote controls provide convenience․ These accessories are designed to maximize comfort and personalization, ensuring a luxurious and safe steam experience tailored to individual preferences․ Each accessory is engineered to complement MrSteam systems seamlessly, offering enhanced functionality and user satisfaction․

Warranty and Support Information

MrSteam products are backed by a comprehensive warranty, covering parts and labor for specific durations․ Visit mrsteam․com for detailed terms and conditions․ Dedicated customer support is available․

6․1․ Warranty Terms and Conditions

MrSteam offers a limited warranty for its steam generators and accessories, ensuring protection against defects in materials and workmanship․ The warranty period varies by product, typically ranging from 1 to 5 years, depending on the model and usage․ Proper installation, as outlined in the manual, is required for warranty validity․ Exclusions include damage from misuse, improper maintenance, or unauthorized modifications․ To file a claim, contact MrSteam customer support with proof of purchase and detailed issue description․ Visit mrsteam․com for full terms and conditions․ Registration may be required for certain models to activate warranty benefits․

6․2․ Customer Support and Resources

MrSteam provides comprehensive customer support to ensure a seamless experience․ Visit mrsteam․com for downloadable manuals, troubleshooting guides, and FAQs․ The Virtual Tech platform offers electricians and technicians detailed instructions for servicing steam generators․ For assistance, contact MrSteam’s support team via phone, email, or live chat․ Registered users gain access to exclusive resources, including warranty registration and product updates․ MrSteam’s commitment to customer satisfaction extends through reliable service and extensive online support, helping users maintain and optimize their steam systems effectively․

fintie keyboard user guide

Product Overview

The Fintie Keyboard is a sleek, ultra-thin Bluetooth-enabled device designed for efficiency and portability. It features a built-in touchpad, customizable backlight settings, and compatibility with multiple devices. The package includes the keyboard, USB charging cable, and user manual, ensuring a seamless setup experience.

1.1 Package Contents

The Fintie Keyboard package includes essential items to ensure a seamless user experience. Inside the box, you’ll find:

  • The Fintie Bluetooth Keyboard, designed with a sleek and ultra-thin profile for portability.
  • A USB charging cable for convenient battery replenishment.
  • A detailed user manual, providing step-by-step guidance for setup, features, and troubleshooting.

Some models may also include a protective carrying case to safeguard the keyboard during travel. These components are thoughtfully packaged to meet all your typing needs.

1.2 Key Features of the Fintie Keyboard

The Fintie Keyboard stands out with its impressive array of features, combining functionality and style. It boasts a built-in touchpad, allowing for intuitive navigation without needing a separate mouse. The keyboard supports Bluetooth connectivity, enabling seamless pairing with devices like tablets, smartphones, and laptops. Additionally, it features customizable backlight settings, offering a comfortable typing experience in low-light environments. The ultra-thin design ensures portability, while the rechargeable battery provides extended use on a single charge. With its compact layout and responsive keys, the Fintie Keyboard is designed to enhance productivity and convenience for users on the go. Its versatile features make it an ideal choice for both professional and casual use.

1.3 Design and Build Quality

The Fintie Keyboard is crafted with a focus on durability and elegance. Its ultra-thin and lightweight design makes it highly portable, while the aluminum alloy frame ensures sturdiness. The keys are responsive and feature a scissor-switch mechanism for precise typing. The keyboard also includes a built-in multi-touch touchpad, allowing for intuitive navigation. The sleek, modern aesthetic complements its functional design, making it a stylish addition to any workspace. Built with high-quality materials, the Fintie Keyboard is designed to withstand regular use while maintaining a premium feel. Its compact layout and ergonomic design promote comfort during extended typing sessions, ensuring a seamless user experience.

Pairing the Fintie Keyboard

Pairing the Fintie Keyboard involves turning it on, entering pairing mode, and connecting via Bluetooth. The keyboard features indicators to guide the pairing process smoothly.

2.1 Step-by-Step Pairing Instructions

To pair the Fintie Keyboard, start by turning it on using the power switch. Next, press and hold the Fn + C keys simultaneously to enter pairing mode. The Bluetooth indicator light will begin to blink blue, signaling that the keyboard is ready to connect. On your device, navigate to the Bluetooth settings menu and ensure Bluetooth is enabled. Your device will search for nearby devices, and the Fintie Keyboard will appear in the list. Select the keyboard from the list to initiate the connection. Once paired, the Bluetooth indicator will stop blinking, confirming the successful pairing. Follow these steps to connect the keyboard to your device effortlessly.

2.2 Connecting to Multiple Devices

The Fintie Keyboard supports seamless connectivity to multiple devices, enhancing productivity for users with various gadgets. To connect to a second device, ensure the keyboard is powered on and in pairing mode by pressing Fn + C. On your second device, navigate to Bluetooth settings and select the Fintie Keyboard from the available devices list. The keyboard will automatically pair with the new device, and the Bluetooth indicator will stop blinking once connected. You can switch between paired devices easily, making it ideal for multitasking. This feature allows users to streamline their workflow across different devices without the hassle of repeated pairing processes, ensuring a smooth and efficient experience.

2.3 Bluetooth Indicators and Status Lights

The Fintie Keyboard features Bluetooth indicators and status lights to provide clear feedback during operation. When in pairing mode, the Bluetooth indicator blinks blue rapidly, signaling that the keyboard is ready to connect to a device. Once successfully paired, the blue light will turn off, indicating an active connection. If the keyboard disconnects, the light will blink intermittently. Additionally, a red light will illuminate when the battery level is low, reminding you to recharge. These indicators ensure easy monitoring of the keyboard’s status, allowing you to troubleshoot or recharge as needed. The intuitive design of these lights enhances user experience by providing immediate visual cues for connectivity and battery status.

Customizing Your Fintie Keyboard

Customize your Fintie Keyboard to enhance productivity. Adjust backlight settings for optimal visibility, activate sleep mode to conserve battery, and utilize the touchpad for intuitive navigation and control.

3.1 Adjusting Backlight Settings

To adjust the backlight settings on your Fintie Keyboard, press and hold the designated backlight keys. Use the FN key combined with brightness controls to increase or decrease the light intensity. The keyboard offers multiple brightness levels to suit your environment, ensuring optimal visibility in both bright and low-light conditions. Additionally, the backlight automatically turns off after a period of inactivity to conserve battery life. You can customize this feature by adjusting the timeout duration or disabling it entirely through the keyboard’s settings menu. This feature enhances your typing experience while providing energy efficiency.

3.2 Activating Sleep Mode

The Fintie Keyboard automatically enters Sleep Mode after 30 minutes of inactivity to conserve battery life. To activate Sleep Mode manually, press the power button or leave the keyboard idle. When in Sleep Mode, all functions are paused, but the keyboard remains paired with your device. To wake the keyboard, press any key or move the touchpad. It will reconnect within 2 seconds. This feature ensures energy efficiency without interrupting your workflow when you return to typing. Sleep Mode is a convenient way to extend battery life and maintain connectivity, making the Fintie Keyboard a reliable choice for daily use.

3.4 Using the Touchpad

The Fintie Keyboard features a built-in touchpad, designed for intuitive navigation and control. It supports multi-touch gestures, allowing you to scroll, zoom, and navigate with ease. To use the touchpad, simply glide your finger across the surface for cursor movement. Pinch to zoom, swipe to scroll, and tap to click. The touchpad is seamlessly integrated into the keyboard, providing a laptop-like experience on your tablet or smartphone. For optimal performance, ensure the touchpad is clean and free from obstructions. You can also disable the touchpad if needed, following the instructions in the user manual. This feature enhances productivity, making the Fintie Keyboard a versatile tool for both work and entertainment.

Troubleshooting Common Issues

Experience issues? Restart your device, ensure Bluetooth is enabled, and check connections. Refer to the user manual for detailed solutions to connectivity or battery life problems.

4.1 Resolving Connectivity Problems

If your Fintie keyboard isn’t connecting, ensure Bluetooth is enabled on your device. Press Fn + C to enter pairing mode, and check that the keyboard is fully charged. Restart both devices, then pair again. If issues persist, reset the keyboard by turning it off and on. Ensure no other devices are interfering and that your device is searching for available Bluetooth connections. Select the Fintie keyboard from the list to establish a connection. If problems continue, refer to the user manual for advanced troubleshooting steps.

4.2 Fixing Battery Life Issues

To address battery life concerns, ensure the keyboard is charged properly using the provided USB cable. Avoid overcharging, as this can degrade the battery. Enable sleep mode to conserve power when the keyboard is idle. Dim the backlight to reduce energy consumption. Check for firmware updates, as they often improve battery efficiency. If issues persist, reset the keyboard by turning it off and on. Ensure no other devices are interfering with the connection, which can drain the battery. Refer to the user manual for additional tips on optimizing battery performance and troubleshooting common power-related problems.

Maintenance and Care

Regularly clean the Fintie keyboard with a soft, dry cloth to prevent dust buildup. Avoid using liquids, as they may damage the electronics. Store the keyboard in a cool, dry place when not in use to maintain its performance and longevity.

5.1 Cleaning the Keyboard

To maintain your Fintie keyboard’s performance and appearance, clean it regularly. Turn the keyboard off and unplug it before cleaning. Use a soft, dry cloth to gently wipe down the keys and surfaces. For stubborn spots, lightly dampen the cloth with water, but avoid getting moisture into the openings. Avoid harsh chemicals or liquids, as they may damage the keyboard. For dust between keys, use compressed air in short bursts, holding the can upright. Allow the keyboard to dry completely before turning it back on. Regular cleaning prevents dust buildup and ensures optimal functionality; Always handle the keyboard with care to maintain its longevity and aesthetic appeal.

5.2 Storing the Keyboard Properly

When not in use, store your Fintie keyboard in a protective case to prevent scratches and damage. Place it in a cool, dry environment, avoiding extreme temperatures or humidity. Ensure the keyboard is turned off or in sleep mode to conserve battery life. Avoid stacking heavy objects on top of it, as this may cause structural damage. Clean the keyboard thoroughly before storage to prevent dust buildup. Store the USB charging cable separately in a dry place to maintain its integrity. Proper storage ensures your Fintie keyboard remains in optimal condition, ready for use when needed. Always handle the keyboard with care to prolong its lifespan and functionality.

1 41 42 43 44 45 46