it band syndrome stretches pdf

IT Band Syndrome is a common condition causing knee pain in runners and cyclists. It occurs due to inflammation of the iliotibial band, often from overuse or improper training. Managing ITBS requires a combination of targeted stretches, strengthening exercises, and proper recovery techniques to alleviate symptoms and prevent recurrence.
What is IT Band Syndrome?
IT Band Syndrome, or ITBS, is an overuse injury causing pain on the outside of the knee. It occurs when the iliotibial band, a ligament-like structure, becomes inflamed or irritated. This condition is common in runners, cyclists, and hikers due to repetitive knee bending. Symptoms include lateral knee pain, swelling, and tightness, often worsening during activity. Rest typically alleviates pain, but it may return with continued stress.
Common Causes and Risk Factors
IT Band Syndrome is often caused by repetitive friction between the iliotibial band and the lateral femoral condyle. Risk factors include overuse in activities like running or cycling, weak hip muscles, poor training techniques, and inadequate recovery. Tight or imbalanced muscles, such as the tensor fasciae latae, can also contribute. Addressing these factors is key to prevention and effective management.

Understanding the IT Band and Its Function
The iliotibial (IT) band is a ligament running down the thigh, connecting the hip to the knee. It stabilizes the knee during movement, aiding in activities like running and cycling.
Anatomy of the IT Band
The IT band is a thick, fibrous ligament extending from the ilium to the patella and tibia. Composed of connective tissue, it provides lateral thigh stability. It originates from the Tensor Fasciae Latae muscle and gluteus maximus, playing a crucial role in knee movement and hip abduction. Its structure is integral to movement efficiency and joint protection.
The Role of the IT Band in Movement
The IT band plays a vital role in movement by stabilizing the knee and aiding in hip abduction. It helps track the patella during knee flexion and extension, essential for activities like running and cycling. Its function is crucial for maintaining proper gait mechanics and preventing excessive lateral movement of the knee joint during physical activities.
Best Stretches for IT Band Syndrome
Effective IT band stretches include side-lying, standing, and crossed-leg stretches. These exercises target the iliotibial band and connected muscles, reducing tension and alleviating pain. Regular stretching helps improve flexibility and prevent recurrence of symptoms.
The side-lying IT band stretch targets the iliotibial band and tensor fasciae latae. Lie on your side with the affected leg on top. Cross the affected leg over the other, keeping the foot flexed. Gently lean away from the stretch, holding for 20-30 seconds. This stretch relieves tension and improves flexibility, helping to alleviate IT band syndrome symptoms effectively. The standing IT band stretch is an effective way to relieve tension. Cross the affected leg behind the other, bending the knee slightly. Lean gently away from the stretch until you feel a pull on the outer thigh. Hold for 20-30 seconds, then repeat 2-3 times. This stretch improves flexibility and reduces discomfort associated with IT band syndrome. This stretch targets the IT band effectively. Cross your legs, placing the affected leg behind the other. Slowly lean to the side of the unaffected leg until a gentle stretch is felt on the outer thigh. Hold for 20-30 seconds, then switch legs. Repeat 2-3 times for optimal relief and improved flexibility in the IT band. Strengthening exercises target weak hip muscles, often a root cause of ITBS. Focus on clamshells, side-lying leg lifts, and step-ups to build strength and stability. Hip strengthening exercises are crucial for IT Band Syndrome recovery. Focus on clamshell exercises, side-lying leg lifts, and step-ups to improve hip abductor strength. These exercises target weak hip muscles often linked to ITBS. Perform 2-3 sets of 15-20 repetitions, ensuring proper form to maximize effectiveness. Stronger hips help reduce strain on the IT band, preventing future inflammation. Strengthening the Tensor Fasciae Latae (TFL) muscle is essential for IT Band Syndrome recovery. The TFL plays a key role in hip stabilization and movement. Exercises like side-lying leg lifts and clamshell exercises target the TFL, improving its strength and reducing IT band tension. Perform these exercises 2-3 times weekly, focusing on controlled movements to enhance muscle function and promote healing. Consistency is vital for long-term relief. Foam rolling is effective for relieving IT band tension. Use a foam roller to gently roll the IT band and surrounding muscles, promoting circulation and reducing inflammation. Consistency in foam rolling can enhance recovery and complement stretching routines. Proper foam rolling involves using controlled, slow movements to target the IT band and surrounding muscles. Start by positioning the foam roller on the outer thigh, applying moderate pressure. Roll from the hip down to the knee, focusing on tender areas. Avoid rolling too quickly or applying excessive force, which can cause discomfort or injury. Repeat the process 2-3 times, ensuring consistent coverage for optimal relief. This method helps reduce muscle tension and improves circulation, aiding in recovery and reducing IT band syndrome symptoms effectively. For optimal IT band relief, foam rolling should be performed 2-3 times weekly, or daily if symptoms persist. Each session should last 1-2 minutes per leg, focusing on slow, controlled movements. Start with lighter pressure and gradually increase as needed. Consistency is key to reducing inflammation and improving mobility. Adjust frequency based on symptom severity and recovery progress. A well-structured guide provides clear instructions and visuals for effective IT band stretches, helping users understand their condition and manage symptoms through practical exercises and recovery tips. An effective guide includes detailed step-by-step instructions, high-quality images, and clear diagrams to illustrate each stretch. It should also provide information on proper posture, breathing techniques, and the duration of each exercise. Including tips on modifying stretches for different fitness levels ensures accessibility for all users. Additionally, incorporating a routine schedule helps maintain consistency. Clear images and diagrams are essential for demonstrating proper stretch techniques. Step-by-step instructions ensure users understand each movement. Videos or GIFs can enhance learning, while arrows and labels on images highlight key focus areas. Including modifications for different fitness levels makes the guide inclusive and practical for a wide audience. Detailed descriptions prevent misunderstandings; Preventing IT Band Syndrome involves consistent stretching, strengthening, and proper warm-up routines. Gradually increasing activity intensity and improving running mechanics can reduce strain. Regular foam rolling and addressing muscle imbalances also play a crucial role in long-term management and maintaining knee health. Modifying activities is essential to prevent ITBS. Reducing running frequency and intensity can minimize stress on the IT band. Incorporating low-impact exercises like cycling or swimming helps maintain fitness without aggravating symptoms. Ensuring proper footwear and gradually increasing workout intensity are key preventive measures. Additionally, avoiding repetitive knee-bending movements and incorporating strength training can significantly reduce the risk of recurrence. Consistent stretching and strengthening are crucial for managing ITBS. Regular stretching reduces inflammation and improves flexibility, while strengthening the hips and TFL muscles enhances stability. Over time, these practices prevent recurrence and promote long-term recovery. Without consistent effort, symptoms may persist, especially in active individuals. A balanced routine ensures sustained relief and supports overall lower body function. Recovery and rehabilitation strategies for ITBS focus on rest, ice therapy, and targeted exercises. Professional guidance ensures proper healing and prevents future injuries effectively. Rest and ice therapy are crucial for managing ITBS symptoms. Ice reduces inflammation and eases pain when applied for 15-20 minutes several times daily. Allowing the IT band to rest prevents further irritation. Combining these methods with gentle stretching accelerates recovery and helps restore normal movement without causing additional strain. Physical therapy plays a vital role in treating ITBS by addressing muscle imbalances and improving flexibility. A professional therapist can create a personalized plan, focusing on stretching and strengthening exercises tailored to your needs. They also guide proper techniques to avoid overuse injuries, ensuring a holistic approach to recovery and long-term prevention. Evidence-based treatments for ITBS include targeted stretches and strengthening exercises. The American Association of Hip and Knee Surgeons recommends a home exercise program focusing on these methods. Research indicates that ITBS is often linked to hip weakness and tightness. Studies suggest that combining stretching with strengthening exercises, particularly for the hip muscles, can effectively reduce symptoms. Foam rolling and physical therapy are also supported as complementary treatments. Consistency in these practices is key to long-term recovery and prevention of recurrence. Experts recommend consistent stretching routines to alleviate ITBS symptoms. Side-lying stretches and standing stretches are highly effective. Incorporating foam rolling can enhance flexibility and reduce tension in the IT band. Combining stretching with strengthening exercises, particularly for the hip muscles, is advised for optimal recovery and prevention of recurrence. Effective management of ITBS requires consistent stretching and strengthening exercises. Dedication to these practices, along with proper recovery techniques, ensures long-term relief and prevents recurrence of symptoms. Effective ITBS management involves a combination of targeted stretching, strengthening exercises, and proper recovery techniques. Consistency in practicing IT band stretches, like side-lying and standing stretches, is crucial. Strengthening the hip muscles and tensor fasciae latae (TFL) helps alleviate symptoms. Incorporating foam rolling and rest prevents further inflammation. Long-term management requires modifying activities and maintaining a routine to ensure lasting relief and prevent recurrence. Consistency is key to managing ITBS effectively. By dedicating just a few minutes daily to stretching and strengthening exercises, you can significantly reduce symptoms and prevent recurrence. Developing a routine and staying committed will lead to faster recovery and improved mobility. Remember, small efforts today can result in long-term relief and a healthier, pain-free lifestyle. Explore detailed PDF guides and expert-recommended resources for ITBS management. Websites like dartmouth-hitchcock.org offer comprehensive exercise plans and recovery tips. Utilize these tools to enhance your treatment plan effectively. For in-depth guidance, visit www.dartmouth-hitchcock.org and www.aahks.org. These sites offer evidence-based exercises and recovery tips. Download the ITBS PDF guide from AAHKS, which includes detailed stretches and strengthening routines. Explore these resources to enhance your understanding and treatment plan for IT Band Syndrome effectively. Download comprehensive IT Band Syndrome PDF guides from trusted sources like AAHKS or physical therapy websites. These guides include detailed stretches, strengthening exercises, and foam rolling techniques. Printable worksheets help track progress and maintain consistency. Look for guides with visual aids like photos and diagrams to ensure proper form. Many resources are free and easily accessible online for immediate use.Side Lying IT Band Stretch
Standing IT Band Stretch
IT Band Stretch with Crossed Legs
Strengthening Exercises for IT Band Syndrome
Hip Strengthening Exercises
Tensor Fasciae Latae (TFL) Strengthening

Foam Rolling Techniques for IT Band Relief
Proper Foam Rolling Methods
Frequency and Duration of Foam Rolling

Creating a Comprehensive IT Band Syndrome Stretching PDF Guide
Key Components of an Effective Guide
Visual Aids and Instructions

Preventive Measures and Long-Term Management
Modifying Activities to Prevent ITBS
Importance of Consistent Stretching and Strengthening

Recovery and Rehabilitation Strategies
Rest and Ice Therapy
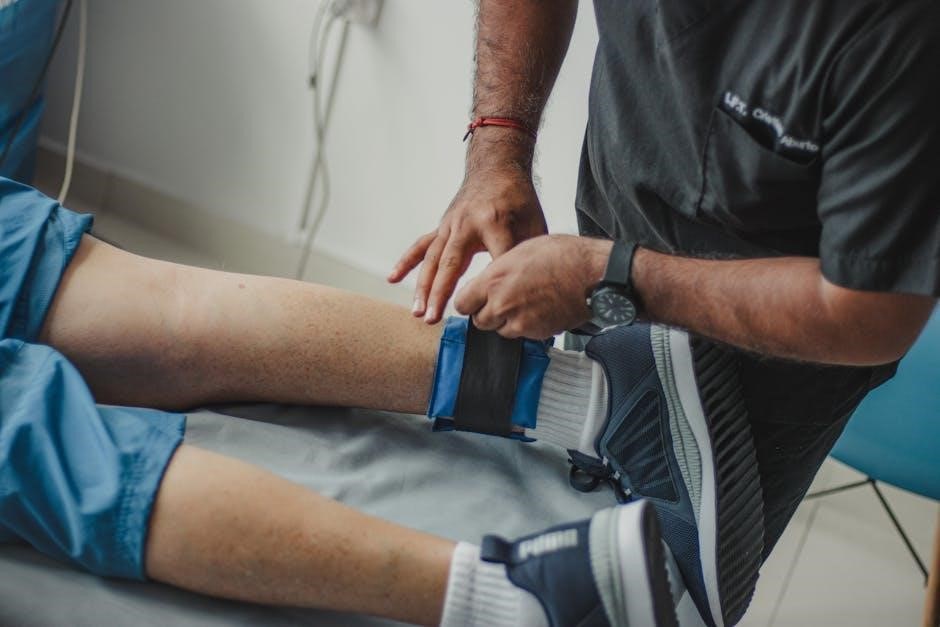
Physical Therapy and Professional Guidance

Evidence-Based Stretching and Treatment Options
Scientific Research on ITBS Treatments
Expert Recommendations for Stretching
Encouragement for Consistent Practice
Additional Resources and References
Recommended Reading and Websites
PDF Guides and Printable Worksheets