singer sewing machine user guide

Welcome to the Singer Sewing Machine User Guide‚ your ultimate resource for mastering your sewing machine. This guide provides detailed instructions‚ troubleshooting tips‚ and maintenance advice to enhance your sewing experience. With models ranging from basic to advanced‚ Singer machines offer versatility and precision. Whether you’re a beginner or an experienced sewer‚ this guide will help you unlock your machine’s full potential and achieve professional-quality results. Happy sewing!
1.1 Importance of Reading the User Manual
Reading your Singer sewing machine user manual is essential for safe and effective operation. It provides detailed instructions on machine setup‚ threading‚ and stitch selection. The manual also offers troubleshooting tips and maintenance guidelines to ensure optimal performance. Additionally‚ it outlines warranty information and proper care procedures; Singer now provides manuals exclusively online as part of their Green Initiative‚ with a Quick Start Guide included for initial setup. This ensures you make the most of your sewing experience while maintaining machine longevity.
1.2 Overview of Singer Sewing Machine Models
Singer offers a wide range of sewing machine models‚ from basic to advanced‚ catering to all skill levels. Popular models include the Singer Simple 3116‚ known for its ease of use‚ and the Singer Quantum Stylist 9960‚ featuring advanced stitching capabilities. Each model is designed with unique features like automatic buttonholes‚ free arms‚ and variable stitch settings; Comprehensive manuals for these models are available online‚ ensuring easy access to guidance and troubleshooting tips. Explore the full lineup to find the perfect machine for your sewing needs.
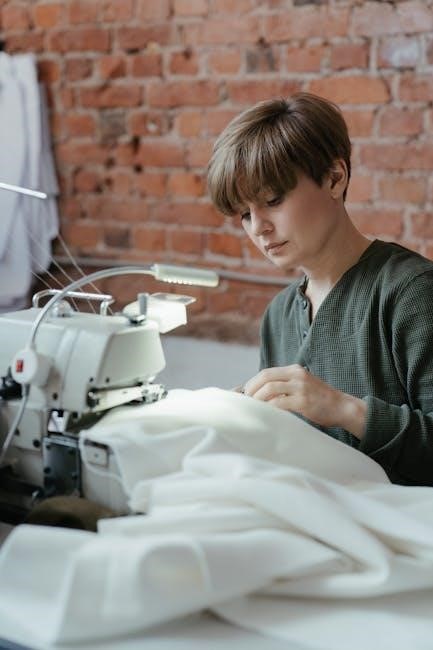
Understanding the Parts of Your Singer Sewing Machine
Familiarize yourself with your Singer sewing machine’s key components‚ such as the free arm‚ stitch selector‚ and tension dials. Knowing these parts will enhance your sewing experience.
2.1 Main Components of the Machine
Your Singer sewing machine features essential components like the free arm‚ stitch selector‚ tension dials‚ and bobbin compartment. The free arm allows easy sewing of cylindrical items‚ while the stitch selector enables you to choose from various stitch patterns. Tension dials adjust thread tightness‚ ensuring even stitching. The bobbin compartment holds the lower thread‚ and the presser foot controls fabric movement. Understanding these parts is crucial for efficient and precise sewing operations.
2.2 Accessories and Attachments Overview
Singer sewing machines come with a variety of accessories to enhance your sewing experience. These include presser feet for specific tasks like zippers‚ buttons‚ and quilting‚ as well as extension tables for larger projects. Additional attachments‚ such as the free arm‚ provide convenience for sewing cuffs and sleeves. The Quick Start Guide offers basic setup steps‚ while full manuals are available online. Optional attachments like the MOMENTO Cutting Machine expand your creative possibilities‚ ensuring versatility and precision for every project.
Threading Your Singer Sewing Machine
Proper threading is essential for smooth operation. Follow step-by-step guides for upper thread and bobbin setup. Ensure tension is balanced to avoid tangled stitches or uneven sewing.
3.1 Step-by-Step Guide to Threading the Upper Thread
Thread your Singer sewing machine’s upper thread by first placing the spool on the spool pin. Pull the thread through the take-up lever‚ then insert it into the tension discs. Guide the thread through the channel‚ looping it around the machine’s metal guide. Finally‚ pull the thread gently to seat it properly. Ensure the thread is not too tight or loose for optimal stitching quality and smooth machine operation.
3.2 Proper Bobbin Threading Techniques
To properly thread the bobbin‚ place it on the bobbin winder and pull the thread gently to wind it evenly. Insert the wound bobbin into the bobbin case‚ ensuring it’s seated correctly. Guide the thread through the bobbin case’s notch‚ pulling it to create the right tension. Close the bobbin case securely and test the thread by sewing a few stitches to ensure smooth operation. Proper threading ensures consistent stitches and prevents tangling or loose threads during sewing.

Setting Up Your Sewing Machine
Setting up your Singer sewing machine involves preparing your workspace‚ selecting the right needle and thread‚ and adjusting tension dials. Start by clearing a flat‚ clean surface and gathering your tools. Choose a needle suitable for your fabric type‚ such as sharp for cotton or heavy-duty for denim. Match your thread color to the fabric for seamless stitches or use contrasting thread for visibility. Adjust tension dials to achieve even stitching‚ testing on scrap fabric if necessary. Proper setup ensures smooth operation and professional results.
4.1 Preparing Your Work Area
Preparing your work area is essential for a smooth sewing experience. Clear a flat‚ stable surface and ensure good lighting to minimize eye strain. Cover your worktable with an anti-slip mat or fabric to prevent the machine from moving. Keep your sewing tools‚ such as scissors‚ pins‚ and thread‚ within easy reach. Plug in your Singer sewing machine and ensure it is placed on a firm‚ even surface. Test your machine on scrap fabric before starting your project to ensure proper operation. A tidy workspace helps maintain efficiency and focus while sewing.
4.2 Selecting the Right Needle and Thread
Selecting the right needle and thread ensures optimal performance and prevents damage to your Singer sewing machine. Choose needles based on fabric type—sharp for woven fabrics‚ blunt for knits. Use high-quality‚ lint-free threads to avoid breakage. Regularly replace needles (every 8-10 hours of use) to maintain stitch quality. Match thread weight and type to your fabric for consistent results. Proper needle and thread selection enhances sewing efficiency and prevents common issues like thread breakage or uneven stitching.
4.3 Adjusting Tension Dials
Properly adjusting the tension dials on your Singer sewing machine ensures balanced stitching and prevents issues like loose threads or puckering. Start by threading the machine and sewing a test fabric scrap. Check the stitches and tweak the upper and bobbin tension dials as needed. Turn dials slightly clockwise for tighter tension or counterclockwise for looser. Refer to your machine’s manual for specific guidance‚ as settings vary by model. Correct tension ensures smooth sewing and professional-looking results every time.
Basic Sewing Operations
Master essential sewing skills with your Singer machine‚ including starting your first stitch‚ sewing forward and backward‚ and utilizing the free arm for versatile fabric handling.
5.1 Starting Your First Stitch
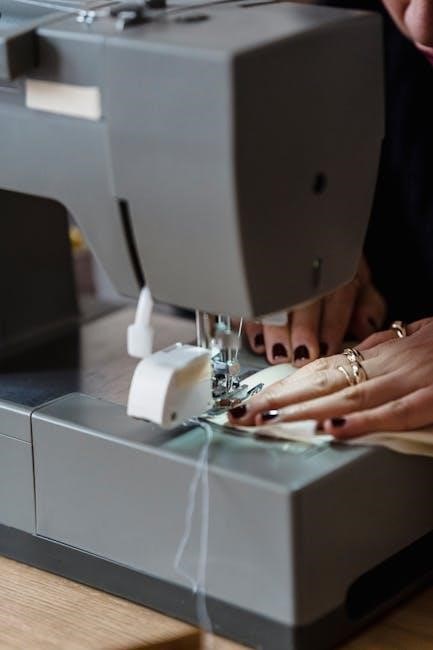
Begin by locating the start/stop button and ensuring your machine is set to a straight stitch. Place your fabric under the needle‚ lower the presser foot‚ and gently pull the thread. Use the handwheel to align the needle just above the fabric. Press the start button or turn the handwheel to create your first stitch. Sew slowly‚ guiding the fabric smoothly. Always use the thread cutter to trim excess thread and backstitch at the end for a secure finish.
5.2 Sewing Forward and Backward
To sew forward‚ select the desired stitch and gently guide the fabric under the needle. Use the foot pedal to maintain steady speed. For backward sewing‚ press the reverse button or lever‚ then sew a few stitches to secure the seam. Always keep fabric taut but not stretched. This ensures even stitching and prevents fabric bunching.
Practice sewing forward and backward to master smooth transitions and achieve professional-looking results.
5.3 Using the Free Arm
The free arm on your Singer sewing machine allows easy sewing of cylindrical items like sleeves and pant legs. To use it‚ remove the detachable arm and attach the free arm accessory. This feature provides better visibility and control when sewing hard-to-reach areas. Simply guide the fabric smoothly around the free arm‚ ensuring even stitching; This handy tool is perfect for intricate projects‚ offering precision and convenience for both beginners and experienced sewists.

Stitch Selection and Customization
Explore various built-in stitches for diverse sewing needs. Adjust stitch length and width for customization. Create unique combinations to personalize your projects‚ ensuring precise and professional results every time.
6.1 Types of Built-In Stitches
Singer sewing machines feature a variety of built-in stitches‚ including straight‚ zigzag‚ and decorative options. These stitches cater to different fabrics and sewing tasks‚ from basic repairs to intricate designs. Many models also include automatic buttonhole stitches and stretch stitches for knits. With such versatility‚ you can achieve professional-quality results for any project‚ whether it’s garment construction‚ home decor‚ or crafting. Explore the stitch library to discover the perfect option for your next creation.
6.2 Adjusting Stitch Length and Width
To customize your sewing experience‚ Singer machines allow easy adjustment of stitch length and width. Locate the stitch length dial‚ typically near the handwheel‚ and turn it to increase or decrease the length. Higher numbers usually mean longer stitches. For width‚ use the dial on the top or side‚ adjusting as needed for different fabrics. Some models offer digital controls for precise adjustments. Always test settings on scrap fabric and refer to the user guide for specific instructions. Regular machine maintenance ensures smooth operation of these controls.
6.3 Creating Custom Stitch Combinations
Customize your sewing projects by creating unique stitch combinations on your Singer machine. Use the stitch length and width dials to tailor settings for different fabrics. Some models offer advanced features like digital stitch customization. Experiment with various patterns and save your favorites for quick access. Refer to your user guide for model-specific instructions; Testing on scrap fabric ensures the perfect stitch every time. Regular machine maintenance keeps these features running smoothly‚ enhancing your creative sewing experience.

Advanced Features of Singer Sewing Machines
Explore advanced features like automatic buttonholes‚ free arm sewing‚ and speed control. These innovations enhance efficiency and creativity‚ making complex projects easier and faster to complete.
7.1 Using the Automatic Buttonhole Feature
The automatic buttonhole feature on Singer sewing machines simplifies creating perfect buttonholes. Models like the Singer Simple and Quantum Stylist offer 1-step buttonhole functionality. To use this feature‚ select the buttonhole stitch‚ place your fabric under the needle‚ and let the machine create consistent‚ professional-looking buttonholes. This feature saves time and ensures uniform results‚ ideal for garments and home decor projects. Always use genuine Singer needles for optimal performance and adjust settings as needed for different fabric types.
7.2 Sewing with the Free Arm
The free arm feature on Singer sewing machines allows for easy sewing of cylindrical items like sleeves or pant legs. To use it‚ remove any attachments and slide the fabric around the free arm‚ guiding it smoothly under the needle. This feature provides excellent visibility and control‚ making it ideal for delicate or hard-to-reach areas. It’s a versatile tool for both beginners and experienced sewers‚ enhancing your ability to tackle a variety of sewing projects with precision and ease.
7.3 Speed Control and Sewing Efficiency
Singer sewing machines often feature speed control‚ allowing you to adjust sewing speed to suit your project. This feature is especially useful for delicate fabrics or complex stitching. By maintaining consistent speed‚ you can achieve precise results and improve overall sewing efficiency. Additionally‚ speed control enables better handling of heavy fabrics and multiple layers‚ ensuring professional-quality output every time. This feature enhances your sewing experience‚ making it easier to manage diverse projects with confidence and accuracy.

Maintenance and Troubleshooting
Regular cleaning and oiling ensure optimal performance. Check for thread tangles and proper bobbin installation. Consult the manual for troubleshooting common issues like uneven stitches or machine jams.
8.1 Cleaning and Oiling the Machine
Regular cleaning and oiling are essential for maintaining your Singer sewing machine. Turn off and unplug the machine before cleaning. Use a soft brush to remove lint and debris from the bobbin area and tension discs. Apply a few drops of sewing machine oil to moving parts‚ following the manual’s instructions. Avoid harsh chemicals‚ as they can damage components. Wipe excess oil with a microfiber cloth to prevent residue buildup. Proper maintenance ensures smooth operation and extends the machine’s lifespan.
8.2 Common Issues and Solutions
Common issues with Singer sewing machines include tangled stitches‚ thread breakage‚ or improper stitching. Check tension settings and ensure correct threading. If fabric isn’t moving‚ inspect for blockages or worn presser feet. For uneven stitches‚ clean the machine and re-oil moving parts. Always use genuine Singer needles‚ as incorrect sizes can cause damage. Refer to your manual for specific solutions‚ and visit Singer’s official website for troubleshooting guides and expert support to resolve issues quickly and effectively.
8.3 When to Contact Professional Support
If your Singer sewing machine experiences persistent issues despite troubleshooting‚ contact professional support. This includes complex mechanical repairs‚ electrical malfunctions‚ or warranty claims. Singer offers expert assistance through their official website‚ where you can access support pages‚ manual downloads‚ and contact forms. For severe damage or advanced technical needs‚ visit an authorized service center. Remember to register your machine and keep your warranty information handy for streamlined support. Professional help ensures your machine operates optimally and maintains its longevity.
Mastering your Singer sewing machine unlocks endless creative possibilities. Refer to this guide for tips‚ troubleshooting‚ and maintenance. Happy sewing with Singer!
9.1 Final Tips for Optimal Sewing Experience
To ensure a seamless sewing experience‚ always use genuine Singer needles and keep your machine well-maintained. Regularly clean and oil your machine‚ and refer to the user manual for specific care instructions. Experiment with different stitches and settings to explore creative possibilities. For troubleshooting‚ consult Singer’s online resources or contact professional support. By following these tips‚ you’ll extend your machine’s lifespan and achieve professional-quality results. Happy sewing with Singer!