aviva blood glucose meter manual
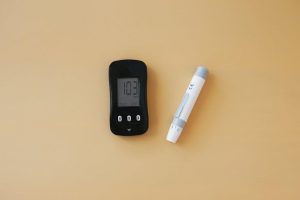
The Aviva Blood Glucose Meter is a compact, portable device designed to help individuals with diabetes monitor their blood sugar levels accurately and effortlessly․
1․1 Overview of the Aviva Blood Glucose Meter
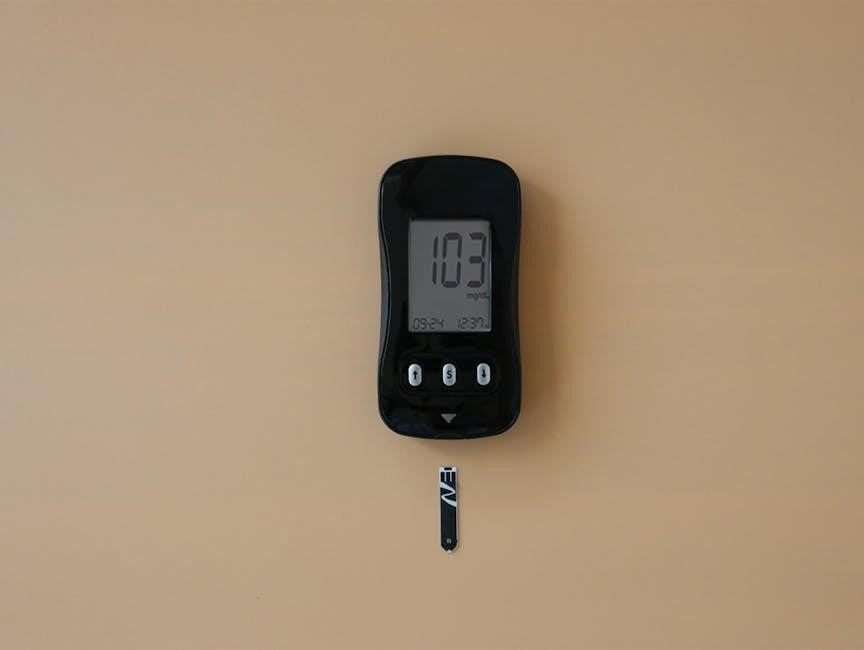
The Aviva Blood Glucose Meter is a compact and portable medical device designed to measure blood sugar levels in individuals with diabetes․ It operates using Accu-Chek Aviva test strips, providing accurate and reliable results․ The meter is user-friendly, making it ideal for self-monitoring blood glucose levels․ Its design ensures ease of use, with clear display features and simple navigation․ The Aviva meter is intended for both personal and professional use, offering a practical solution for managing diabetes effectively․ It measures glucose in capillary blood samples, helping users maintain tight blood sugar control and improve overall health outcomes․
1․2 Importance of Monitoring Blood Sugar Levels
Monitoring blood sugar levels is crucial for managing diabetes effectively․ Regular testing helps individuals track glucose fluctuations, enabling timely adjustments to diet, exercise, and medication․ This practice prevents hyperglycemia and hypoglycemia, which can lead to serious health complications if left unmanaged․ By using the Aviva Blood Glucose Meter, users can obtain accurate readings, facilitating informed decision-making․ Consistent monitoring also aids in identifying patterns and trends, allowing for personalized care plans․ Overall, regular blood sugar monitoring is essential for maintaining optimal health and preventing long-term complications associated with diabetes․
Key Features of the Aviva Blood Glucose Meter
The Aviva Blood Glucose Meter is known for its compact design, ease of use, and compatibility with specific test strips, ensuring accurate and reliable blood sugar monitoring․
2․1 Compact Design and Portability
The Aviva Blood Glucose Meter features a sleek, lightweight design, making it highly portable․ Its compact size allows users to carry it effortlessly in a pocket or bag, ensuring convenient blood sugar monitoring on the go․ The meter’s small footprint and durable construction make it ideal for active individuals who need to manage their diabetes without being encumbered by bulky devices․ This portability, combined with its ease of use, makes the Aviva meter a practical choice for daily monitoring, especially for those with busy lifestyles or frequent travel․
2․2 Ease of Use for Self-Monitoring
The Aviva Blood Glucose Meter is designed with user-friendly features to simplify self-monitoring․ Its intuitive interface and clear instructions guide users through each step, making it easy for individuals to test their blood sugar levels accurately․ The meter requires only a small blood sample, and its straightforward process ensures quick results․ Additionally, the large display and audible feedback enhance accessibility, especially for those with visual impairments․ The device also provides step-by-step guidance, reducing errors and making it ideal for both new and experienced users․ This ease of use ensures consistent and reliable blood sugar monitoring, supporting effective diabetes management․
2․3 Compatibility with Test Strips
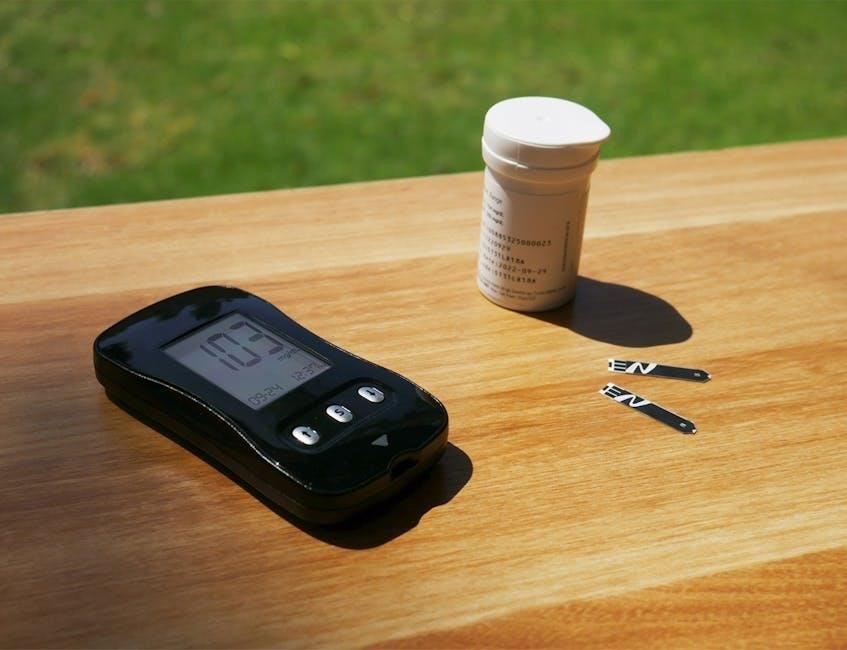
The Aviva Blood Glucose Meter is specifically designed to work with Aviva test strips, ensuring accurate and reliable blood sugar measurements․ Using these strips guarantees compatibility and optimal performance․ The meter automatically turns on when a strip is inserted, streamlining the testing process․ The test strips feature a yellow window for blood application, making it easy to collect the correct sample size․ Compatibility with these strips ensures precise results, which are essential for effective diabetes management․ Always use Aviva test strips to maintain accuracy and avoid potential errors caused by incompatible products․
Setting Up the Aviva Blood Glucose Meter
Setting up the Aviva Blood Glucose Meter involves inserting the battery, setting the date and time, and completing the initial setup process to ensure accurate functionality․
3․1 Inserting the Battery
To insert the battery into the Aviva Blood Glucose Meter, locate the battery compartment on the back․ Open it by sliding the cover downwards․ Insert the CR2032 lithium battery with the plus sign facing upwards․ Close the compartment securely․ Turn on the meter to ensure proper installation․ If it doesn’t power on, check the battery orientation and connections․ Refer to the user manual for detailed guidance or diagrams to confirm the correct procedure․
3․2 Setting the Date and Time
To set the date and time on the Aviva Blood Glucose Meter, press and hold the Power/Set button until the menu appears․ Use the Up and Down arrows to navigate to the “Date & Time” option, then press the OK button to select it․ Use the arrows to adjust the year, month, day, hour, and minute․ Press OK after each adjustment to save your settings․ Once completed, the meter will return to the main screen․ Ensure the date and time are accurate for proper recording of blood glucose results․
3․3 Initial Meter Setup
Turn on the Aviva Blood Glucose Meter by pressing and holding the Power/Set button until the display lights up․ Perform a quality check by inserting a control solution strip to ensure the meter is functioning correctly․ Refer to the control solution package for specific instructions․ Next, insert a test strip into the meter to activate it․ The meter will automatically detect the strip and display a flashing blood drop symbol, indicating it is ready for a blood sample․ This initial setup ensures accurate and reliable blood glucose measurements for proper diabetes management․

Performing a Blood Glucose Test
Prepare the Aviva Blood Glucose Meter by inserting a test strip․ Obtain a blood sample using a lancet, and apply it to the test strip․ The meter will display your blood glucose level, enabling you to monitor and manage your diabetes effectively․
4․1 Preparing the Meter for Testing
Before performing a blood glucose test, ensure the Aviva Blood Glucose Meter is properly prepared․ Insert a compatible Accu-Chek Aviva test strip into the meter, following the manufacturer’s instructions․ Turn on the meter, which will automatically activate when the test strip is inserted․ Ensure the battery is fully charged or replace it if necessary․ Perform a control solution test to verify the meter’s accuracy and functionality․ Properly handle the meter to avoid contamination, and inspect it for any damage or blood residue․ This preparation ensures accurate and reliable blood glucose readings, helping you manage your diabetes effectively and safely․
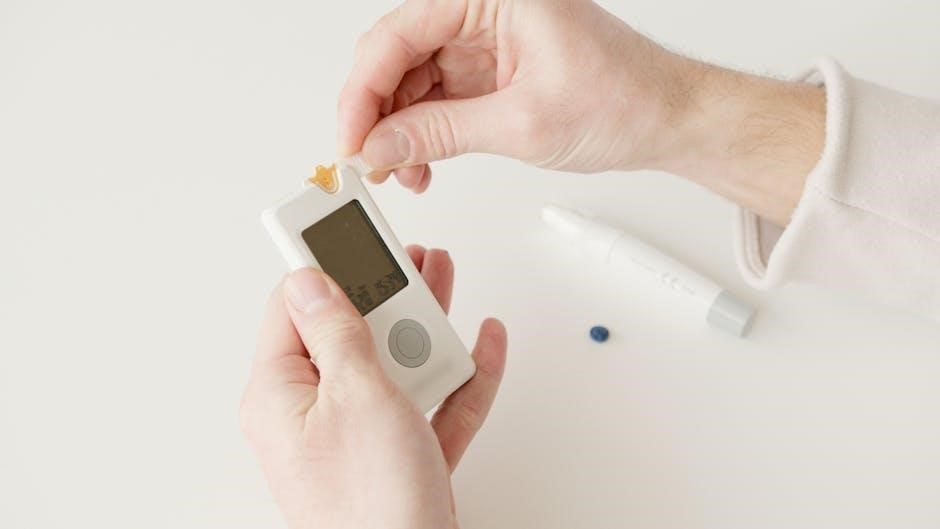
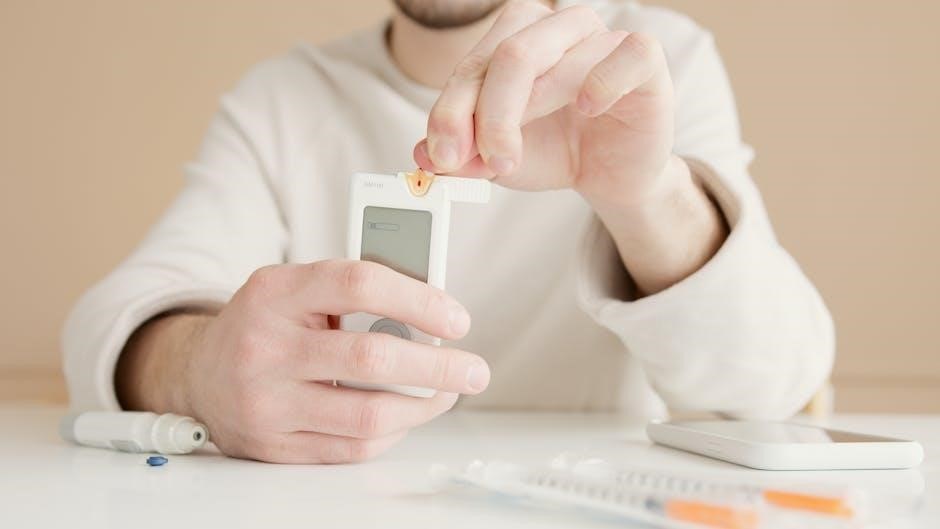
4․2 Using Test Strips
Insert an Accu-Chek Aviva test strip into the meter, ensuring it clicks securely into place․ Always use unexpired, undamaged strips to guarantee accuracy․ Handle strips by the edges to avoid contamination․ After inserting, the meter will automatically turn on and display a blood drop symbol․ Gently touch the test strip’s edge to a blood sample, ensuring adequate coverage․ The meter will analyze the sample and display your blood glucose level․ Dispose of used strips properly and use a new strip for each test to maintain hygiene and precision․ Proper test strip usage ensures reliable results for effective diabetes management․
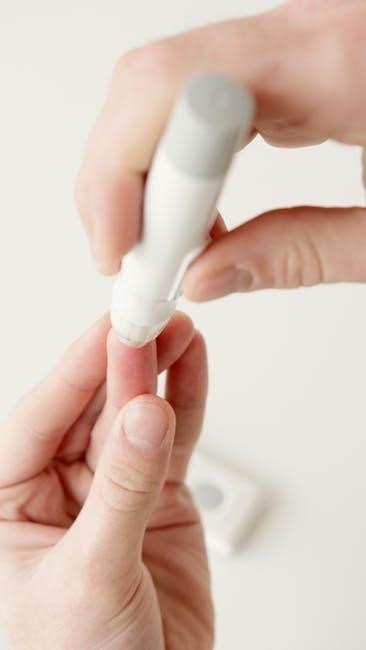
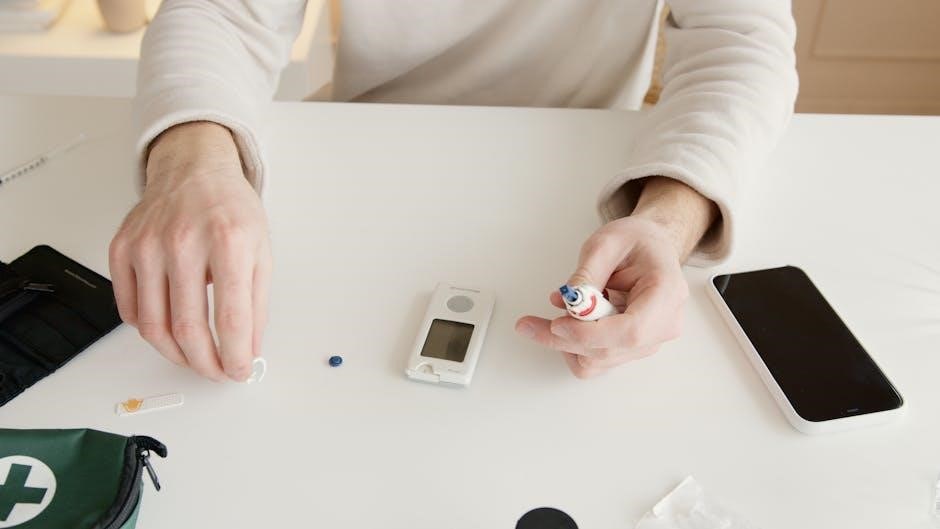
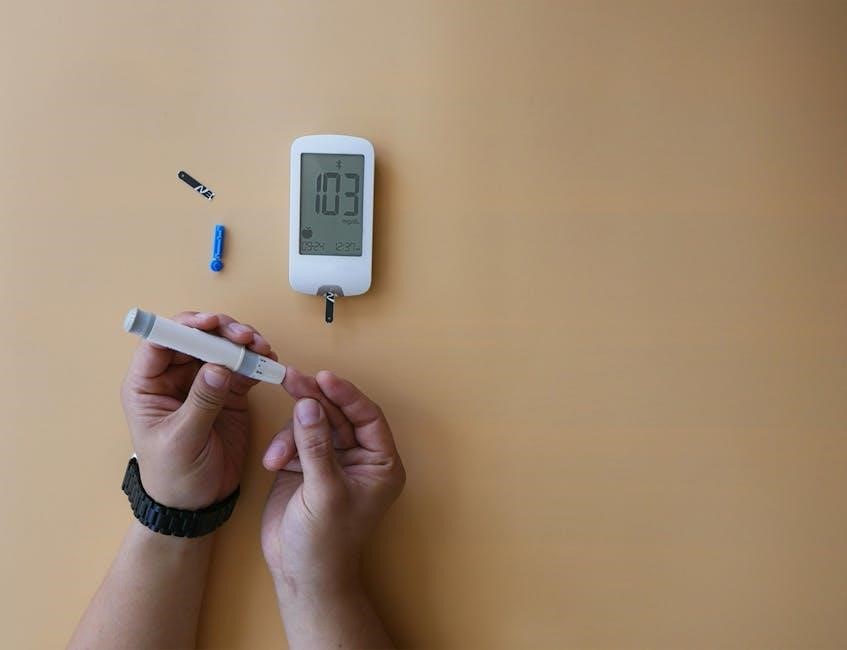
4․3 Obtaining a Blood Sample
Wash and dry your hands before obtaining a blood sample․ Use the lancing device to prick the side of your fingertip, as this area is less sensitive․ Gently press the finger to encourage a small blood drop․ Avoid squeezing too hard, as this can alter the sample․ If needed, use an alternative site like the palm, forearm, or upper arm, though timing may vary․ Always use a new sterile lancet for each test to prevent infection․ Ensure the blood drop is large enough to cover the test strip’s yellow window for accurate results․ Proper sampling technique is crucial for reliable blood glucose readings․
4․4 Reading and Interpreting Results
Once the blood sample is applied to the test strip, the Aviva Blood Glucose Meter will display your reading in 5 seconds․ The result will be shown in mg/dL, indicating your current blood glucose level․ Use the color-coded target range on the meter or in the manual to interpret the result․ A reading within your target range means your levels are under control․ Elevated levels may indicate the need for adjustments in diet, exercise, or medication․ Consistently high or low readings should be discussed with your healthcare provider to prevent complications․ Always record your results for tracking and future reference․
Maintenance and Troubleshooting
Regularly clean the meter with a soft, dry cloth to prevent contamination․ Store it in a cool, dry place to maintain accuracy․ Refer to the user manual for troubleshooting common errors and understanding error messages to ensure proper functionality․
5․1 Cleaning and Storing the Meter
To maintain the Aviva Blood Glucose Meter’s accuracy and longevity, clean it regularly with a soft, lint-free cloth․ Avoid using harsh chemicals or wet wipes, as they may damage the device․ Store the meter in a cool, dry place, away from direct sunlight and moisture․ Ensure the meter is protected from extreme temperatures and physical damage․ Proper storage and cleaning prevent contamination and ensure reliable performance․ Always refer to the user manual for detailed cleaning and storage instructions to maintain optimal functionality and extend the life of your device․
5․2 Resolving Common Errors
Common errors with the Aviva Blood Glucose Meter, such as incorrect test strip insertion or expired strips, can be resolved by restarting the device or replacing the strips․ Ensure the meter is turned off before reinserting the test strip․ If an error code appears, refer to the user manual for specific solutions․ Cleaning the meter with a soft cloth and avoiding extreme temperatures can prevent malfunctions․ If issues persist, contact customer support or consult the troubleshooting section in the manual for detailed guidance on resolving specific error messages and ensuring accurate readings․ Proper maintenance and adherence to guidelines can minimize errors and extend the meter’s lifespan․
5․3 Understanding Error Messages
The Aviva Blood Glucose Meter displays error messages to indicate issues such as “E-1” or “LO,” which signify specific problems like incorrect test strip insertion or low battery․ Always refer to the user manual to understand the meaning of each error code․ Common errors include test strip expiration, insufficient blood samples, or meter malfunction․ Solutions may involve restarting the device, cleaning the meter, or replacing the battery․ If an error persists, consult the troubleshooting guide or contact customer support for assistance․ Understanding these messages ensures accurate readings and optimal device performance․ Regularly reviewing the manual helps in resolving issues quickly and effectively․