Masterbuilt Turkey Fryer Manual⁚ A Comprehensive Guide
This comprehensive guide provides detailed instructions and safety information for using your Masterbuilt turkey fryer. It covers everything from assembly and preparation to cooking, draining, and cleaning. Whether you’re a seasoned deep fryer or a first-timer, this manual will help you create a delicious and safe Thanksgiving feast.
Introduction
Welcome to the world of deep-fried turkey, a culinary tradition that delivers crispy skin and succulent meat. Your Masterbuilt turkey fryer is your key to achieving this delectable dish, offering a convenient and efficient way to cook a perfect Thanksgiving centerpiece. This manual serves as your comprehensive guide to using your Masterbuilt turkey fryer safely and effectively. Whether you’re a seasoned chef or a novice cook, this guide provides detailed instructions, safety precautions, and helpful tips to ensure a successful and enjoyable frying experience.
From the initial assembly to the final clean-up, this manual covers every step of the process, empowering you to confidently navigate the world of deep-frying. We’ll explore essential safety measures, provide insights on choosing and preparing your turkey, and guide you through the proper techniques for filling the fryer, cooking the bird, and ensuring safe draining and resting. We’ll also delve into important aspects like temperature and time, as well as troubleshooting tips to address any unexpected challenges you might encounter.
This manual is your companion throughout your deep-frying journey, offering valuable information to make your turkey frying experience a success. So, let’s embark on this culinary adventure together and unlock the secrets to creating a truly unforgettable Thanksgiving feast.
Safety Precautions
Deep-frying a turkey is a rewarding experience, but safety must always be paramount. Your Masterbuilt turkey fryer is designed for safe operation, but understanding and adhering to these essential precautions is crucial for a successful and accident-free experience.
Never leave the fryer unattended while it’s in operation. Hot oil is extremely dangerous, and even a momentary lapse in attention can lead to serious accidents. Always maintain a watchful eye and stay near the fryer to monitor the cooking process. Be sure to keep children and pets away from the fryer, as it poses a significant burn risk.
Ensure a stable and level surface. Place your fryer on a flat, stable surface away from combustible materials. Avoid placing it near overhangs or areas where it could accidentally be tipped over.
Use proper safety gear. Wear heat-resistant gloves when handling hot parts of the fryer or the cooked turkey. Avoid loose clothing or jewelry that could come into contact with the hot oil. Always use a long-handled tool to lower the turkey into the oil, minimizing the risk of burns.
Avoid overfilling the fryer. Never fill the fryer beyond the designated maximum fill line. Overfilling can result in hot oil spilling over the sides, creating a serious fire hazard.
Be prepared for emergencies. Keep a fire extinguisher readily available in case of an accidental fire. Know the location of your nearest fire hydrant and be familiar with emergency procedures in case of an emergency.
Following these safety precautions will help ensure a safe and enjoyable deep-frying experience. Remember, safety is paramount, and by taking these steps, you can enjoy the deliciousness of a deep-fried turkey without compromising your well-being.
Assembly and Preparation
Setting up your Masterbuilt turkey fryer is a straightforward process, but it’s important to follow the instructions carefully to ensure a safe and efficient operation. Before you start, gather all the components included in your kit, including the fryer pot, burner, propane tank, turkey basket, and any other accessories.
Read the manual thoroughly. Familiarize yourself with the assembly instructions, safety precautions, and operating procedures. This will help you understand the proper setup and usage of your fryer.
Assemble the fryer. Connect the burner assembly to the fryer pot, making sure the connections are secure and tight. Attach the propane tank to the burner, following the manufacturer’s instructions for safe and proper connection.
Choose a suitable location. Select a flat, level surface away from flammable materials and overhangs. Ensure that the fryer is positioned on a stable and sturdy surface to prevent accidental spills or tipping.
Prepare the turkey. Thoroughly thaw the turkey in the refrigerator, allowing ample time for it to defrost completely. Remove any giblets or packaging from inside the turkey cavity. Pat the turkey dry with paper towels to remove excess moisture.
Pre-heat the oil. Fill the fryer pot with the recommended amount of cooking oil, ensuring it reaches the designated fill line. Turn on the burner and allow the oil to heat to the specified temperature, usually between 350°F and 375°F.
By following these steps, you’ll be ready to safely and effectively use your Masterbuilt turkey fryer for a delicious deep-fried turkey experience.
Choosing and Preparing Your Turkey
Selecting the right turkey and preparing it properly is essential for a successful deep-frying experience. Here’s what you need to know⁚
Turkey size. Choose a fresh, whole turkey that fits comfortably in your fryer basket. A turkey weighing between 10 and 14 pounds is generally ideal for most turkey fryers.
Turkey type. Fresh turkeys are preferred for deep-frying as they cook more evenly and retain moisture better than frozen turkeys.
Turkey preparation. Thoroughly thaw the turkey in the refrigerator, allowing ample time for it to defrost completely. Remove any giblets or packaging from inside the turkey cavity. Pat the turkey dry with paper towels to remove excess moisture.
Seasoning. Season the turkey according to your preference. You can use a dry rub, marinade, or inject the turkey with a flavorful brine.
Turkey injection. Injecting the turkey with a marinade can enhance its flavor and moisture. Use a turkey injector to evenly distribute the marinade throughout the breast and thighs.
Pat dry. After injecting the turkey, pat it dry with paper towels to remove any excess marinade. This will prevent the oil from sputtering and create a crispy skin;
Prepare the turkey for frying. Place the turkey in the fryer basket, ensuring it fits comfortably and doesn’t touch the sides. Secure the turkey in the basket using the provided clips or hooks.
By following these guidelines, you’ll ensure that your turkey is perfectly prepared for a delicious deep-fried feast.
Filling the Fryer with Oil
Choosing the right oil and filling the fryer correctly is crucial for safe and successful deep-frying. Here’s a step-by-step guide⁚
Oil selection. Peanut oil is the most commonly recommended oil for deep-frying turkeys due to its high smoke point and neutral flavor. Other suitable options include canola oil, vegetable oil, and a blend of oils specifically designed for deep-frying.
Oil quantity. Refer to your fryer’s manual for the recommended oil level. Typically, you’ll need enough oil to completely submerge the turkey without overflowing the fryer when the basket is lowered.
Preheating the oil. Preheat the oil to the temperature specified in your fryer’s manual. This is usually around 350-375°F (175-190°C). Use a thermometer to check the oil temperature for accurate readings.
Safe oil filling. Never fill the fryer while it’s plugged in or heated. Always fill the fryer with oil before turning it on or connecting it to a propane tank.
Avoid overfilling. Never overfill the fryer with oil. Leave enough space between the oil level and the top of the fryer to prevent spills and potential hazards.
Oil quality. Use fresh, high-quality oil for optimal results. Avoid using old or reused oil as it can affect the taste and quality of your deep-fried turkey.
By following these guidelines, you’ll ensure that your fryer is properly filled with the right oil for a safe and delicious deep-frying experience.
Cooking the Turkey
Once the oil is preheated and the turkey is prepared, you’re ready to cook! Follow these steps for a perfectly cooked deep-fried turkey⁚
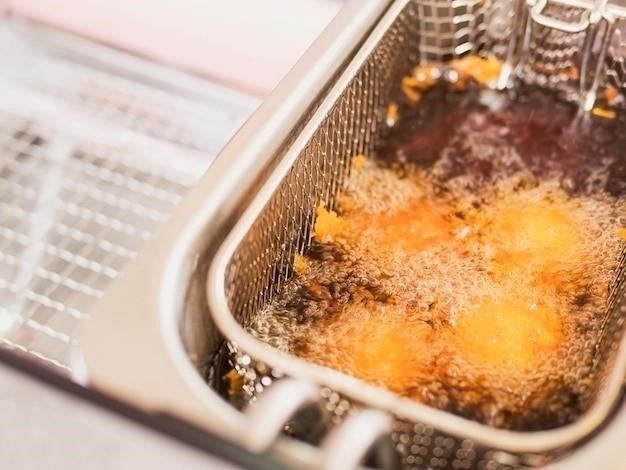
Lower the turkey. Gently lower the turkey into the hot oil, ensuring it’s fully submerged. Use a turkey fryer basket to safely lower and lift the turkey.
Monitor oil temperature. Keep a close eye on the oil temperature. It should remain within the recommended range throughout the cooking process. If the temperature drops significantly, adjust the heat source accordingly.
Avoid overcrowding. Do not overcrowd the fryer. Ensure there’s enough space between the turkey and the sides of the fryer to allow for even cooking.
Cooking time. The cooking time for a deep-fried turkey varies depending on its size. Generally, it takes about 3 to 4 minutes per pound. Consult your fryer’s manual for specific time guidelines.
Internal temperature. Use a meat thermometer to check the internal temperature of the turkey. The safe internal temperature for a cooked turkey is 165°F (74°C) in the thickest part of the breast.
Avoid overcooking. Overcooked turkey can be dry and tough. Monitor the cooking time and internal temperature closely to ensure the turkey is cooked to perfection.
Safety precautions. Always exercise caution when handling hot oil and the turkey. Use oven mitts and a turkey fryer basket to prevent burns.
By following these steps, you’ll ensure that your deep-fried turkey is cooked to perfection and safe for consumption.
Temperature and Time
Achieving the perfect deep-fried turkey hinges on maintaining the right temperature and cooking time. Here’s a breakdown to ensure your turkey is cooked to perfection⁚
Oil Temperature⁚ The ideal temperature for deep-frying a turkey is 350-375°F (177-191°C). Ensure the oil reaches this temperature before lowering the turkey into the fryer.
Cooking Time⁚ The cooking time depends on the size of the turkey. A general rule of thumb is to cook for 3 to 4 minutes per pound of turkey. For instance, a 12-pound turkey would take approximately 36 to 48 minutes to cook.
Temperature Monitoring⁚ Use a deep-fry thermometer to monitor the oil temperature throughout the cooking process. If the temperature drops, adjust the heat source accordingly to maintain the ideal temperature range.
Internal Temperature⁚ The turkey is fully cooked when the internal temperature reaches 165°F (74°C) in the thickest part of the breast. Use a meat thermometer to check the internal temperature after the calculated cooking time.
Resting Time⁚ After cooking, allow the turkey to rest for at least 10 minutes before carving. This allows the juices to redistribute, resulting in a more flavorful and moist turkey.
Safety Precautions⁚ Always exercise caution when handling hot oil and the turkey. Use oven mitts and a turkey fryer basket to prevent burns.
By diligently monitoring the temperature and cooking time, you’ll ensure a delicious and safe deep-fried turkey for your next gathering.
Draining and Resting
Once your turkey has reached the desired internal temperature and the cooking time is complete, it’s time to remove it from the hot oil and allow it to rest. This crucial step ensures the turkey’s juices redistribute, resulting in a succulent and flavorful final product.
Draining the Turkey⁚ Carefully lift the turkey basket out of the hot oil using a sturdy hook or lifting device. Position the basket over a large container to catch the dripping oil. Allow the turkey to drain for a few minutes, ensuring excess oil is removed.
Resting the Turkey⁚ Transfer the turkey to a cutting board or a platter lined with paper towels. Cover it loosely with aluminum foil and let it rest for at least 10 minutes. This allows the juices to redistribute throughout the turkey, preventing the meat from drying out.
Internal Temperature⁚ After the resting period, use a meat thermometer to double-check the internal temperature. The internal temperature should remain at 165°F (74°C) in the thickest part of the breast.
Carving the Turkey⁚ Once the turkey has rested sufficiently, it’s ready to be carved. Use a sharp carving knife and a cutting board to slice the turkey into portions. Be careful to avoid any remaining hot oil.
Serving the Turkey⁚ Serve the carved turkey hot or cold, accompanied by your favorite sides and sauces. Enjoy your delicious and safely cooked deep-fried turkey!
Cleaning and Maintenance
Proper cleaning and maintenance are essential to ensure your Masterbuilt turkey fryer remains in optimal condition and lasts for years to come; Follow these steps to keep your fryer clean and functional⁚
Immediately After Use⁚
- Allow the fryer to cool completely⁚ Never attempt to clean the fryer while it’s still hot. This can cause burns or damage to the unit.
- Remove any excess oil⁚ Carefully dispose of the used oil according to local regulations.
- Wipe down the exterior⁚ Use a damp cloth to clean the exterior of the fryer, removing any spills or splatters.
Deep Cleaning⁚
- Clean the inner pot⁚ Wash the inner pot with warm, soapy water. Avoid using abrasive cleaners or scouring pads, as these can damage the pot’s surface.
- Clean the basket⁚ Wash the basket with warm, soapy water, ensuring all food particles are removed.
- Dry all parts thoroughly⁚ Before storing, ensure all parts are completely dry to prevent rust or mildew formation.
Storage⁚
- Store in a cool, dry place⁚ Keep the fryer in a dry, well-ventilated area to prevent damage from moisture.
- Inspect for damage⁚ Regularly inspect the fryer for any signs of wear or damage, such as cracks in the pot or loose connections. Contact Masterbuilt customer service if you notice any issues.
Troubleshooting
While Masterbuilt turkey fryers are designed for reliable performance, occasional issues might arise. This section provides guidance on resolving common problems⁚
Fryer Won’t Heat⁚
- Check the power source⁚ Ensure the fryer is plugged into a working outlet and the power cord is properly connected.
- Inspect the fuse or circuit breaker⁚ A blown fuse or tripped circuit breaker can prevent the fryer from heating.
- Verify the thermostat setting⁚ Make sure the thermostat is set to the desired temperature and is not malfunctioning.
Oil Leaking⁚
- Check the seal⁚ Inspect the seal around the inner pot for any damage or wear. A damaged seal can cause oil to leak.
- Ensure the pot is properly seated⁚ Ensure the inner pot is securely fitted into the outer shell, as a loose fit can lead to leaks.
Uneven Cooking⁚
- Maintain proper oil level⁚ Ensure the oil level is between the MIN and MAX lines on the fryer. Too little oil can lead to uneven heating, and too much oil can cause overflowing.
- Rotate the turkey⁚ During cooking, periodically rotate the turkey to ensure even browning and cooking.
If you encounter persistent issues, contact Masterbuilt customer service for further assistance.
Warranty Information
Masterbuilt offers a limited warranty on its turkey fryers, providing peace of mind for your purchase. The specifics of the warranty may vary depending on the model and purchase date, so it’s essential to refer to the warranty information provided with your fryer or available on the Masterbuilt website.
Generally, the warranty covers defects in materials and workmanship for a specified period. It typically excludes damage caused by improper use, neglect, accidents, or modifications. To validate your warranty, you may need to register your product with Masterbuilt within a certain timeframe after purchase.
If you encounter any defects covered under the warranty, contact Masterbuilt customer service. They will guide you through the warranty claim process and may require you to provide proof of purchase and documentation of the issue. Masterbuilt may repair or replace the defective product at its discretion.
For a complete understanding of the warranty terms and conditions, carefully review the warranty document accompanying your Masterbuilt turkey fryer or visit the Masterbuilt website.