hot springs portable spa owner’s manual

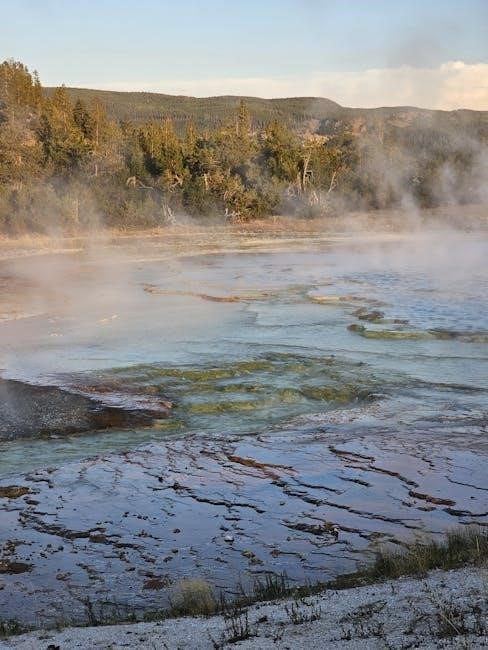
Portable hot spring spas offer relaxation and therapeutic benefits, mirroring natural hot springs in a convenient, accessible format for homeowners everywhere.

Accessing Outlook email, calendar, and Office apps enhances spa ownership, providing organization for maintenance schedules and relaxation time planning.

These spas, detailed in owner’s manuals, combine portability with the soothing experience of a traditional hot spring, promoting wellness and stress relief.

What is a Portable Hot Spring Spa?

Portable hot spring spas represent a modern evolution of traditional soaking pools, designed for convenient home use. Unlike permanently installed in-ground spas, these units are engineered for easy setup and relocation, offering flexibility to spa enthusiasts.

Typically constructed with durable, inflatable or hard-sided shell materials, they feature integrated heating and filtration systems. The owners manual details these components, explaining how they mimic the natural warmth and mineral-rich environment of genuine hot springs.

Accessing Outlook and Office apps, as mentioned online, can aid in managing spa maintenance schedules and tracking water chemistry readings – crucial aspects detailed within the manual. These spas provide a readily available escape, promoting relaxation and therapeutic benefits without the complexities of permanent installations.

They are a self-contained unit, offering a simplified spa experience.

Benefits of Owning a Portable Hot Spring Spa

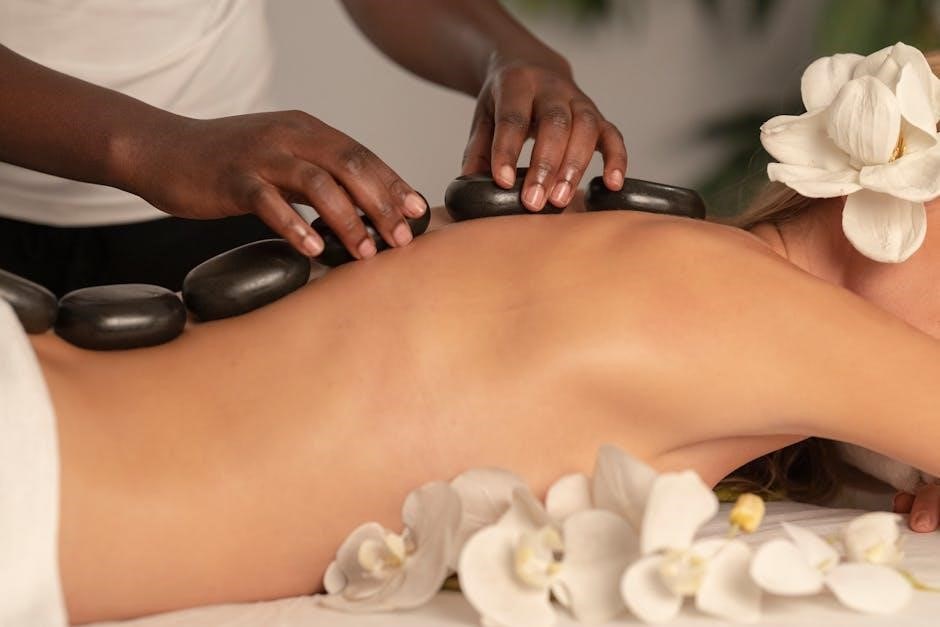
Owning a portable hot spring spa delivers a multitude of wellness advantages, easily accessible in the comfort of your own home. The therapeutic warmth soothes aching muscles, reduces stress, and promotes better sleep – benefits outlined in your owners manual.

Beyond relaxation, regular spa use can alleviate joint pain and improve circulation. Managing your spa experience is streamlined with tools like Outlook, aiding in scheduling maintenance and tracking water quality, as highlighted online.

These spas offer a cost-effective alternative to frequent spa visits or expensive home renovations. The portability allows enjoyment year-round, easily moved for seasonal use or storage. A portable spa truly enhances your lifestyle, providing a personal oasis for rejuvenation and well-being.

Setting Up Your Portable Hot Spring Spa

Proper setup, detailed in your owners manual, ensures optimal performance and longevity. Accessing Outlook online aids in scheduling installation and tracking equipment delivery.

Careful preparation guarantees a relaxing and trouble-free spa experience from the very beginning.

Choosing the Right Location

Selecting the ideal location is crucial, as outlined in your portable spa owner’s manual. A level surface is paramount, capable of supporting the filled spa’s considerable weight – remember to consult weight specifications!

Consider proximity to a grounded electrical outlet, adhering strictly to electrical safety guidelines. Avoid direct sunlight for extended periods to minimize heating costs and UV damage to the spa shell.

Privacy is also key; a secluded area enhances the relaxation experience. Ensure easy access for maintenance, filter changes, and water testing. Utilizing Outlook for scheduling pre-installation site checks can streamline the process. Finally, think about the surrounding landscape – a visually appealing setting adds to the overall enjoyment.

Preparing the Base

Proper base preparation, detailed in your portable spa owner’s manual, is vital for longevity and stability. A solid, level foundation prevents uneven stress and potential damage. Consider a reinforced concrete pad, at least 4 inches thick, exceeding the spa’s dimensions by several inches on all sides.

Alternatively, a compacted gravel base, properly prepared with landscape fabric, can suffice, though concrete is preferred. Ensure the base is free of rocks, roots, or debris. Utilizing Outlook calendar reminders for base preparation stages aids organization.

Confirm the base is perfectly level using a spirit level; even slight inclines can cause operational issues. A well-prepared base safeguards your investment and ensures years of relaxing soaks.

Inflating and Filling the Spa

Inflating your portable spa, as outlined in the owner’s manual, typically involves an integrated air blower. Ensure the spa is placed on its prepared base and free from obstructions. Begin inflation, monitoring pressure carefully to avoid over-inflation, which can damage seams.

Once inflated, locate the fill port and begin adding water, using a garden hose with a filter to prevent debris. Simultaneously, add the recommended chemicals, following dosage instructions precisely. Utilizing Outlook for scheduling water testing is beneficial.

Continue filling until the water reaches the designated level, typically indicated inside the spa. Verify all jets are submerged before activating the heater and pump.

Maintaining Water Chemistry

Water chemistry balance, detailed in your owner’s manual, is crucial for sanitation and comfort. Regular testing and adjustments, like accessing Outlook, ensure a safe, enjoyable spa experience.

Understanding pH Levels

Maintaining proper pH levels is fundamental to hot spring spa water care, as outlined in your owner’s manual. pH measures acidity or alkalinity on a scale of 0 to 14, with 7 being neutral.

Ideally, spa water should be maintained between 7.2 and 7.8. A pH below 7.2 is acidic, potentially causing corrosion of spa equipment and irritation to skin and eyes. Conversely, a pH above 7.8 is alkaline, leading to scaling, cloudy water, and reduced sanitizer effectiveness.

Regular testing – ideally several times a week – using a reliable test kit or strips is essential. Adjustments are made using pH increaser (sodium carbonate) to raise pH or pH decreaser (sodium bisulfate) to lower it. Consistent monitoring, much like checking Outlook for updates, ensures optimal water balance and a pleasurable soaking experience.

Sanitization Methods (Chlorine, Bromine, etc.)

Effective sanitization, detailed in your owner’s manual, is crucial for maintaining clean and safe spa water. Common methods include chlorine and bromine, each with distinct advantages;

Chlorine is a powerful, cost-effective sanitizer, but can have a strong odor and may irritate sensitive skin. Bromine offers a milder alternative, particularly suitable for those sensitive to chlorine, and remains stable at higher temperatures. Other options, like mineral systems, can reduce reliance on traditional sanitizers.

Regardless of the chosen method, consistent monitoring and adherence to recommended dosage levels are vital. Like managing your Outlook account securely, proper sanitization prevents bacteria growth and ensures a hygienic and enjoyable spa experience. Always consult your manual for specific instructions.

Water Testing Frequency

Regular water testing, as outlined in your portable spa owner’s manual, is paramount for maintaining optimal water quality and ensuring a safe, enjoyable experience. Frequency depends on spa usage and bather load.

Ideally, test your water at least twice weekly when the spa is in use. After heavy use, or adding fresh water, immediate testing is recommended. Key parameters to monitor include pH, alkalinity, sanitizer levels (chlorine or bromine), and calcium hardness.

Consistent testing, much like regularly checking your Outlook email for important updates, allows for proactive adjustments, preventing imbalances and potential issues. Utilize test strips or a liquid test kit for accurate results, and record findings for tracking trends.

Filter Maintenance

Regular filter cleaning, detailed in your portable spa owner’s manual, is crucial for optimal performance and water clarity, ensuring a consistently enjoyable spa experience.

Maintaining a clean filter, like a well-organized Outlook inbox, prevents issues and extends the life of your spa’s components.

Cleaning the Filter Cartridge

Regular cleaning of your filter cartridge, as outlined in the hot spring portable spa owner’s manual, is paramount for maintaining pristine water quality and extending the lifespan of your spa system. Begin by powering down the spa and accessing the filter compartment. Carefully remove the cartridge and use a garden hose with a high-pressure nozzle to dislodge debris from the pleats.

Work from top to bottom, avoiding direct impact that could damage the filter media. For stubborn buildup, a filter cleaning solution specifically designed for spa filters can be employed, following the manufacturer’s instructions diligently. Rinse thoroughly until all traces of the cleaning solution are gone. A clean filter, much like a well-managed Outlook inbox, contributes to a smoother, more enjoyable experience.

Allow the cartridge to air dry completely before reinstalling.

Replacing the Filter Cartridge

The hot spring portable spa owner’s manual will detail when filter cartridge replacement is necessary, typically every 12-18 months, depending on spa usage and water chemistry maintenance. Signs indicating replacement include persistent cloudiness, reduced water flow, or a filter that cannot be adequately cleaned. Before replacing, power down the spa and access the filter compartment.

Carefully remove the old cartridge and note its orientation for correct installation of the new one. Lubricate the O-ring with a silicone-based lubricant to ensure a watertight seal. Insert the new cartridge, ensuring it’s securely seated. Proper filter replacement, similar to organizing your Outlook calendar, ensures optimal performance.

Dispose of the old cartridge responsibly and restart the spa.

Filter Cleaning Schedule

Your hot spring portable spa owner’s manual recommends a consistent filter cleaning schedule for optimal performance. A basic rinse should occur every 2-4 weeks to remove debris. A deep cleaning, utilizing a filter cleaning solution, is advised monthly, or more frequently with heavy spa use. Think of it like managing your Outlook inbox – regular maintenance prevents build-up!

Inspect the filter for damage during each cleaning. If the filter appears worn or damaged, it’s time for replacement. Maintaining a log, similar to tracking appointments, helps adhere to the schedule. Consistent cleaning prevents reduced water flow and extends the filter’s lifespan, ensuring a consistently clean and enjoyable spa experience.

Adherence to this schedule is crucial for water clarity.

Troubleshooting Common Issues

Refer to your hot spring portable spa owner’s manual for solutions to heating, pump, or water clarity problems; quick fixes are often available.

Like resolving Outlook errors, systematic troubleshooting restores spa functionality and enjoyment swiftly.

Heating Problems

If your portable hot spring spa isn’t heating, consult the “Heating Problems” section of your owner’s manual first. Common causes include a tripped circuit breaker, a faulty thermostat, or a malfunctioning heater element.

Verify the power supply is stable, mirroring the troubleshooting steps for Outlook access issues – ensuring a secure connection is paramount. Check the control panel for error codes, as these provide specific diagnostic information.

A failing high-limit switch can also prevent heating; the manual details its location and testing procedure. If the problem persists after these checks, professional service is recommended to avoid electrical hazards or further damage to the heating system.

Remember to always disconnect power before inspecting any electrical components.

Pump Malfunctions

Pump malfunctions in your portable hot spring spa often manifest as reduced jet pressure, unusual noises, or complete pump failure. Your owner’s manual’s “Pump Malfunctions” section is the first resource. Begin by checking the circuit breaker dedicated to the pump; a tripped breaker is a frequent cause.

Inspect the filter for clogs, as restricted water flow strains the pump. Similar to troubleshooting Outlook access, ensure all connections are secure. Air locks can also hinder pump operation – the manual outlines a pump priming procedure;

If the pump hums but doesn’t circulate water, the impeller may be blocked. Professional service is advised for internal pump repairs, prioritizing safety and preventing further damage.

Always disconnect power before any inspection.

Water Cloudiness

Cloudy spa water is a common issue, often stemming from inadequate filtration or imbalanced water chemistry. Your hot spring spa owner’s manual details troubleshooting steps. Initially, verify the filter is clean; a dirty filter drastically reduces water clarity, similar to accessing Outlook with a full inbox.

Shock the water with a non-chlorine shock treatment to oxidize organic contaminants. Ensure proper sanitizer levels (chlorine or bromine) are maintained, as insufficient sanitization fosters bacterial growth and cloudiness.

Check total alkalinity and pH levels, adjusting as needed. Calcium hardness imbalances can also contribute. If cloudiness persists after these steps, a clarifier can help bind small particles for easier filtration.

Regular water testing is crucial.

Winterizing Your Portable Hot Spring Spa

Proper winterization, as outlined in your owner’s manual, protects your spa from freezing damage. Draining, cleaning, and safeguarding equipment are vital steps for longevity.

Securely store components, mirroring the organized access of Outlook email, ensuring a smooth spring startup.

Draining the Spa

Consult your owner’s manual for the specific draining procedure for your portable hot spring spa model, as variations exist. Generally, begin by disconnecting the power supply to prevent any accidental activation of the pump during the process.

Locate the drain valve, often near the base of the spa, and attach a garden hose. Direct the hose to a suitable drainage area, ensuring compliance with local regulations regarding wastewater disposal. Some models may have a two-drain system; utilize both for complete emptying.

Allow the spa to drain completely, which can take several hours depending on the spa’s size and hose diameter. Once drained, use towels to absorb any remaining water in the jets and plumbing lines. This minimizes the risk of freezing and potential damage during winter storage. Remember to access Outlook for scheduling reminders!

Protecting the Equipment

After draining, protecting your portable hot spring spa’s equipment is crucial for longevity. Begin by removing the filter cartridge and cleaning it thoroughly, storing it indoors in a dry location. Disconnect and store the pump, heater, and any other removable components in a climate-controlled environment to shield them from freezing temperatures.

Cover exposed plumbing lines with insulation to prevent cracking. Consider using a spa cover protector to safeguard the cover itself from snow and ice accumulation. Accessing Outlook can help schedule maintenance checks!

Finally, ensure all electrical connections are dry and protected from the elements. Proper preparation, guided by your owner’s manual, will ensure a smooth start-up when warmer weather returns.

Winter Storage Tips

Following the draining process, secure your portable hot spring spa for winter. Store the cleaned filter cartridge indoors, preventing freeze damage. A dry location is essential. Utilize a spa cover to shield the shell from harsh weather, and consider a cover lifter for easier removal.

Disconnect all electrical connections and store them safely. Refer to your owner’s manual for specific instructions regarding the heater and pump. Outlook can assist in scheduling these tasks!

If possible, store the spa indoors, like a garage or shed. If outdoor storage is unavoidable, elevate it slightly off the ground to prevent moisture buildup and potential damage.

Spa Safety Guidelines

Prioritize safety with electrical precautions, secure chemical handling, and constant supervision, especially around children, as detailed in your spa’s owner manual.

Managing your Microsoft account securely, like Outlook access, supports responsible spa ownership.

Electrical Safety

Electrical safety is paramount when operating a portable hot spring spa. Always ensure the spa is connected to a dedicated Ground Fault Circuit Interrupter (GFCI) protected circuit, as outlined in your owner’s manual.

Never use extension cords, as they can overheat and pose a significant shock hazard. Regularly inspect the power cord for any damage – cracks, fraying, or exposed wires – and immediately discontinue use if any are found.

Avoid operating the spa with wet hands or while standing in water.

Keep the electrical panel dry and accessible.

Like securing your Microsoft account through Outlook, diligent electrical checks protect your investment and, more importantly, your well-being.

Consult a qualified electrician for any electrical work or concerns.

Chemical Handling

Proper chemical handling is crucial for maintaining safe and sanitary spa water. Always read and follow the instructions on all chemical containers, as detailed in your portable hot spring spa owner’s manual.

Never mix different chemicals together, as this can create dangerous fumes or reactions. Add chemicals to water, never water to chemicals.

Store chemicals in a cool, dry, well-ventilated area, out of reach of children and pets.

Wear appropriate protective gear – gloves and eye protection – when handling chemicals.

Just as Outlook secures your digital communications, careful chemical management safeguards your spa experience.

Rinse thoroughly after handling and dispose of empty containers responsibly.

Supervision of Children

Constant and vigilant supervision of children is paramount when the portable hot spring spa is in use. Children are particularly susceptible to the dangers of hot water, including overheating and drowning.

Never leave a child unattended in or near the spa, even for a moment. A cover provides a barrier, but is not a substitute for active supervision.

Establish clear spa rules for children and ensure they understand the risks.

Lower the water temperature to a safe level for children, as recommended in your owner’s manual.

Similar to securing your Outlook account, prioritize safety measures.

Consider installing a safety fence around the spa to prevent unsupervised access.

john maxwell 5 levels of leadership pdf

John Maxwell’s 5 Levels of Leadership: A Comprehensive Guide

The 5 Levels of Leadership‚ detailed in a widely available PDF document‚ offers a progressive framework for growth‚ impacting organizations of all sizes and types.

John Maxwell’s renowned 5 Levels of Leadership‚ often explored through a comprehensive PDF guide‚ presents leadership as a journey of progressive growth. This framework‚ born from decades of global experience‚ helps individuals pinpoint their current standing and chart a course for advancement. The PDF details how leadership transcends mere titles‚ emphasizing the power of inspiring and investing in people. It’s a practical roadmap for cultivating effective leadership at every organizational level‚ from small businesses to Fortune 100 companies.

The Core Concept: A Progressive Leadership Journey

The 5 Levels of Leadership‚ thoroughly outlined in the accessible PDF‚ isn’t a static model but a dynamic‚ progressive journey. Maxwell’s framework emphasizes that each level builds upon the last – you don’t abandon previous levels as you ascend. The PDF illustrates that higher levels bring increased ease and access to opportunities. Understanding this progression‚ detailed within the document‚ is key to unlocking leadership potential and fostering team growth.

John C. Maxwell’s Background and Leadership Philosophy

John C. Maxwell developed the 5 Levels of Leadership framework from decades of practical‚ global leadership experience‚ insights readily available in the comprehensive PDF guide. His philosophy centers on inspiring and investing in people‚ moving beyond mere authority. The PDF showcases his belief that effective leadership prioritizes actions over words‚ building trust and fostering a culture of growth within teams and organizations.

Level 1: Position – Leadership by Authority

Level 1‚ outlined in the 5 Levels of Leadership PDF‚ relies on formal authority; followers comply because they “have to‚” fearing potential job loss.

Defining Level 1 Leadership

As detailed within the 5 Levels of Leadership PDF‚ Level 1 represents leadership based solely on one’s position or title. Influence stems from the authority inherent in a role‚ not personal qualities. Individuals follow because of the power dynamic – compliance is expected‚ and consequences may arise from disobedience. This foundational level allows leaders to initially define themselves‚ but sustained growth requires moving beyond mere authority.

Influence Based on Title and Role

The 5 Levels of Leadership PDF clarifies that at Level 1‚ influence is directly tied to the leader’s official title and assigned role within an organization. People adhere to directives because they “have to‚” fearing potential repercussions for non-compliance. This isn’t genuine leadership‚ but rather authority-based control‚ a starting point for developing deeper‚ more impactful influence.

The “Have To” Followership Dynamic

As outlined in the 5 Levels of Leadership PDF‚ Level 1 embodies the “have to” dynamic. Followership stems from positional authority; individuals comply due to the potential for job loss or negative consequences if they don’t. This creates obedience‚ not commitment. While a necessary initial stage‚ true leadership transcends this reliance on enforced adherence‚ requiring a shift towards earned respect.

Upsides and Limitations of Level 1

The 5 Levels of Leadership PDF highlights that Level 1‚ while basic‚ offers a crucial opportunity for self-definition as a leader. However‚ relying solely on authority—as the document explains—limits long-term influence. It’s a starting point‚ not a destination. Upsides include initial control‚ but sustained success demands progression beyond this purely positional power‚ fostering genuine connection and respect.

Level 2: Permission – Leadership by Relationship

The 5 Levels of Leadership PDF emphasizes building trust and rapport; moving beyond authority to earn respect is vital for effective leadership and team growth.

Building Trust and Rapport

As outlined in The 5 Levels of Leadership PDF‚ progressing to Level 2 necessitates a shift from positional authority to earning the right to lead through genuine connection. This involves actively building relationships‚ demonstrating care‚ and consistently showing respect for team members. When a producer invests time in these relationships‚ leadership potential truly blossoms‚ fostering a collaborative and productive environment where individuals willingly follow.

The Importance of Relationship-Building

The 5 Levels of Leadership PDF emphasizes that moving beyond authority requires intentional relationship-building. This isn’t merely about being friendly; it’s about understanding individual needs and motivations. Effective leaders‚ as Maxwell details‚ prioritize connecting with their team‚ fostering trust and rapport. This foundation unlocks greater influence and commitment‚ crucial for sustained success and team growth.

Moving Beyond Authority to Earn Respect

The 5 Levels of Leadership PDF illustrates that Level 1 leadership‚ based on position‚ is limited. To truly lead‚ one must progress to earning respect through genuine connection. Maxwell’s framework highlights that people follow based on who you are‚ not just what you are. Building relationships fosters a “want to” dynamic‚ unlocking greater team engagement and productivity.

The Impact of Level 2 on Leadership Effectiveness

As detailed in The 5 Levels of Leadership PDF‚ reaching Level 2 – Permission – significantly boosts leadership. When a producer builds relationships‚ leadership truly takes off. This fosters trust and rapport‚ moving beyond mere authority. Effective leaders understand people believe actions more than words‚ creating a more engaged and productive team environment.

Level 3: Influence – Leadership by Character

The 5 Levels of Leadership PDF highlights that Level 3 leaders gain credibility by leading with integrity and modeling desired behaviors for their teams.

Developing Personal Credibility

As outlined in The 5 Levels of Leadership PDF‚ reaching Level 3 necessitates building personal credibility. This isn’t about position‚ but about who you are. Effective leaders demonstrate integrity‚ consistently aligning actions with values. People believe what you do more than what you say‚ establishing trust.

Productivity also sets the standard; a productive leader inspires a productive team. This level moves beyond simply holding authority to earning genuine respect through consistent character.

Leading by Example and Integrity

The 5 Levels of Leadership PDF emphasizes that Level 3 leadership hinges on modeling desired behaviors. Leaders must “walk the talk‚” demonstrating the values they expect from their teams. This isn’t about issuing directives‚ but about embodying integrity in every action.

Credibility blossoms when leaders consistently demonstrate strong character‚ inspiring trust and respect within the organization.

The Power of Modeling Desired Behaviors

As highlighted in The 5 Levels of Leadership PDF‚ effective leaders at Level 3 understand people believe in actions more than words. Productive leaders set the standard for their teams through consistent‚ exemplary behavior.

This modeling isn’t just about work ethic; it’s about demonstrating integrity and inspiring others to follow suit‚ fostering a culture of excellence.

How Productivity Sets the Standard

The 5 Levels of Leadership PDF emphasizes that leaders at Level 3 demonstrate influence through character‚ and productivity is central to this. Productive leaders aren’t just efficient; they exemplify a work ethic that inspires their teams.

This sets a clear standard‚ showing followers what’s expected and achievable‚ fostering a high-performance environment.

Level 4: People Development – Leadership by Investing in Others

The 5 Levels of Leadership PDF highlights mentoring and coaching as key to empowering team members and cultivating future leaders within the organization.

Mentoring and Coaching

The 5 Levels of Leadership PDF emphasizes that Level 4 leadership centers on actively developing others. This involves dedicated mentoring and coaching‚ shifting focus from personal achievement to empowering team members. Investing in people isn’t simply a nice gesture; it’s a strategic imperative.

By intentionally guiding and supporting growth‚ leaders create a ripple effect‚ fostering a culture of continuous improvement and building a pipeline of future leadership talent‚ as outlined in the document.

Empowering Team Members

The 5 Levels of Leadership PDF highlights that true Level 4 leadership isn’t about control‚ but about empowerment. It’s about providing team members with the resources‚ autonomy‚ and support they need to excel. This fosters ownership and accountability‚ unlocking potential and driving innovation.

Effective leaders‚ as detailed in the framework‚ understand that empowered teams are more engaged‚ productive‚ and resilient‚ contributing to long-term success.

Creating Future Leaders

The 5 Levels of Leadership PDF emphasizes that Level 4 leadership actively cultivates the next generation of leaders. This involves mentoring‚ coaching‚ and providing opportunities for growth and development within the team. Investing in others isn’t just beneficial for individuals; it strengthens the entire organization.

Maxwell’s framework shows that developing leaders ensures lasting impact.

The Long-Term Benefits of People Development

As outlined in The 5 Levels of Leadership PDF‚ prioritizing people development yields substantial long-term rewards. Empowering team members fosters loyalty‚ increases engagement‚ and builds a sustainable leadership pipeline. This investment extends beyond immediate productivity‚ creating a culture of growth and innovation;

Effective leaders understand lasting success relies on others.

Level 5: Pinnacle – Leadership by Legacy

The 5 Levels of Leadership PDF reveals Pinnacle leaders are followed for their character and impact‚ gaining access to unique opportunities and experiences.

Character as the Foundation of Pinnacle Leadership

The 5 Levels of Leadership PDF emphasizes that at Pinnacle‚ leadership isn’t about position or permission‚ but deeply rooted in character. Leaders at this level inspire because of who they are‚ not just what they do.

This foundational integrity unlocks access to broader leadership networks‚ organizations‚ and invaluable experiences‚ fostering a lasting and positive influence beyond immediate reach. It’s a legacy built on trust.

Impact and Lasting Influence

As detailed within The 5 Levels of Leadership PDF‚ Pinnacle leaders aren’t merely effective; they create a ripple effect of positive change. Their influence extends far beyond their tenure‚ shaping future generations of leaders and leaving a demonstrable legacy.

This enduring impact stems from consistent character and a commitment to developing others‚ solidifying their place as true pioneers in their field.

Access to Opportunities and Experiences

The 5 Levels of Leadership PDF highlights that Level 5 leaders unlock exclusive access. They gain entry to leadership circles‚ impactful organizations‚ and unique experiences unavailable to those at lower levels‚ fostering continued growth.

This privileged position allows them to mentor emerging leaders‚ broadening their reach and amplifying their positive influence within and beyond their immediate sphere.

The Highest Level of Leadership Achievement

According to the 5 Levels of Leadership PDF‚ Pinnacle leadership represents the culmination of a leader’s journey. It’s defined not by position‚ but by enduring character and a lasting impact on others‚ creating a powerful legacy.

Reaching Level 5 signifies a profound influence that extends far beyond immediate results‚ inspiring future generations and shaping a positive future.

Key Principles of the 5 Levels Framework

The 5 Levels of Leadership PDF highlights progressive growth; you can’t skip levels‚ and higher levels become easier‚ as detailed within the document.

You Can’t Skip Levels: Progressive Growth

As outlined in the 5 Levels of Leadership PDF‚ growth isn’t instantaneous. Maxwell emphasizes a sequential journey; you must master each level before advancing. You can move up a level‚ building upon prior foundations‚ but never abandon those earlier skills.

Each level builds upon the last‚ creating a solid base for sustained leadership effectiveness. Skipping levels compromises long-term success and genuine influence‚ as detailed in the resource.

Individual Differences in Leadership Levels

The 5 Levels of Leadership PDF highlights that not everyone progresses at the same pace or reaches the same level. Individuals possess unique strengths and experiences influencing their leadership journey. You won’t be on the same level with every person you encounter‚ as detailed within the framework.

Recognizing these differences is crucial for effective team building and personalized development strategies‚ fostering growth for all members.

The Ease of Leadership at Higher Levels

As outlined in The 5 Levels of Leadership PDF‚ ascending through the levels simplifies the leadership process. The higher you climb‚ the easier it becomes to lead‚ building upon established trust and influence. Leaders at Level 5 gain access to exclusive opportunities‚ organizations‚ and experiences.

This access amplifies their impact and facilitates further growth.

Applications of the 5 Levels of Leadership

The 5 Levels of Leadership PDF is utilized in corporate training‚ nonprofit leadership development‚ and small business growth strategies for impactful results.

Corporate Leadership Training

The 5 Levels of Leadership PDF serves as a cornerstone for corporate leadership programs‚ fostering growth from positional authority to influential leadership. Companies‚ including Fortune 100 firms‚ leverage this framework to cultivate effective leaders at every level. Training focuses on building relationships‚ character‚ and investing in team members’ development‚ ultimately enhancing productivity and achieving lasting organizational impact. The PDF provides a structured approach to assess and improve leadership capabilities within the corporate environment.

Nonprofit Organization Leadership

The 5 Levels of Leadership PDF is invaluable for nonprofits seeking to enhance volunteer and staff leadership. It provides a clear roadmap for moving beyond simply directing tasks to inspiring genuine commitment. Utilizing the framework helps nonprofits build trust‚ develop character-based influence‚ and empower volunteers – fostering a sustainable leadership pipeline crucial for achieving their missions. The PDF’s principles translate effectively to resource-constrained environments.

Small Business Leadership Development

The 5 Levels of Leadership PDF offers small business owners a practical guide to scaling their impact. It moves beyond traditional authority‚ emphasizing relationship-building and character development to foster a highly engaged team. By investing in people‚ as outlined in the PDF‚ small businesses can cultivate future leaders and ensure sustainable growth‚ even with limited resources.

Finding the 5 Levels of Leadership PDF

The 5 Levels of Leadership PDF document is readily accessible through various online sources‚ providing a structured approach to leadership self-assessment.

Reliable Sources for the PDF Document

Locating the 5 Levels of Leadership PDF requires discerning credible sources. While numerous websites offer downloads‚ verifying authenticity is crucial. Official Maxwell Leadership resources and reputable online bookstores often provide legitimate copies. Be cautious of unofficial sites potentially hosting outdated or incomplete versions. Exploring leadership development platforms and professional training providers can also yield access to the complete PDF document‚ ensuring you receive the full benefit of Maxwell’s insights.

Understanding PDF Content and Structure

The 5 Levels of Leadership PDF systematically outlines Maxwell’s framework‚ beginning with ‘Position’ and ascending to ‘Pinnacle.’ Expect a clear progression detailing each level’s characteristics‚ influence dynamics‚ and growth strategies. The document emphasizes that leadership isn’t solely about title‚ but about inspiring others. Key principles‚ like the inability to skip levels‚ are highlighted‚ providing a roadmap for continuous self-assessment and development.

Utilizing the PDF for Self-Assessment

The 5 Levels of Leadership PDF serves as a powerful tool for personal evaluation. Reflect on your current influence – is it based on position‚ permission‚ or character? Identify areas for growth and consider how to invest in others. The PDF’s insights help pinpoint where you are on the journey and what steps are needed to elevate your leadership impact.

Criticisms and Considerations

The 5 Levels of Leadership framework‚ while insightful‚ may oversimplify complex leadership dynamics and requires adaptation based on specific contexts and cultures.

Potential Oversimplification of Leadership

The 5 Levels of Leadership‚ presented in the PDF‚ provides a valuable structure‚ but critics suggest it might oversimplify the nuances of real-world leadership. Leadership isn’t always linear; situational factors‚ personality differences‚ and organizational complexities can influence effectiveness. The model doesn’t fully account for transformational or servant leadership styles‚ potentially overlooking crucial aspects of inspiring and empowering teams beyond the defined levels. It’s a helpful starting point‚ but not a complete picture.

The Importance of Contextual Leadership

While John Maxwell’s 5 Levels of Leadership – detailed within the accessible PDF – offers a strong foundation‚ effective leadership is heavily contextual. The ideal level of influence shifts based on organizational culture‚ team dynamics‚ and external pressures. A rigid adherence to the framework without considering these factors can hinder success. Adapting your approach‚ rather than strictly ascending levels‚ is often crucial for navigating complex leadership challenges.

Adapting the Framework to Different Cultures

The John Maxwell 5 Levels of Leadership‚ outlined in the comprehensive PDF‚ must be culturally adapted for global effectiveness. Concepts like ‘permission’ (Level 2) and ‘influence’ (Level 3) manifest differently across cultures. Hierarchical structures and communication styles vary significantly‚ impacting how authority and respect are earned. A nuanced understanding of local norms is vital for successful implementation.

The 5 Levels of Leadership PDF emphasizes continuous growth‚ self-awareness‚ and investing in others—key elements for lasting impact and legacy building.

Continuous Growth and Development

The 5 Levels of Leadership PDF underscores that leadership isn’t a destination‚ but a journey of perpetual refinement. Maxwell’s framework highlights you can’t skip levels; each builds upon the last.

Progressive growth means never abandoning foundational levels while ascending. This continuous development‚ detailed within the PDF‚ fosters adaptability and resilience‚ crucial for navigating evolving challenges and maximizing leadership potential over time.

The Value of Self-Awareness

The 5 Levels of Leadership PDF emphasizes that understanding your current level is paramount for targeted growth. Recognizing where you stand – Position‚ Permission‚ Influence‚ Development‚ or Pinnacle – allows for focused effort.

Self-assessment‚ facilitated by the PDF’s insights‚ reveals strengths and weaknesses‚ guiding you toward impactful improvements. This awareness isn’t just personal; it informs how you lead and invest in others’ development‚ too.

Inspiring and Investing in Others for Lasting Impact

The 5 Levels of Leadership PDF highlights that true leadership extends beyond personal achievement; it’s about cultivating future leaders. Level 4‚ People Development‚ is crucial‚ as mentoring and coaching create a ripple effect of positive change.

By empowering team members‚ as outlined in the PDF‚ you build a legacy that transcends your tenure‚ ensuring sustained success and a thriving organizational culture.

nordictrack c700 manual

NordicTrack C700 Manual: A Comprehensive Guide

This guide provides detailed instructions for the NordicTrack C700 treadmill, covering setup, operation, maintenance, and troubleshooting.
It references available manuals and support resources.

Welcome to the NordicTrack C700 treadmill! This model offers a fantastic fitness experience, blending convenience with effective workout capabilities. This introduction serves as your starting point for understanding and maximizing the potential of your new treadmill. The NordicTrack C700 is designed for home use, providing a robust and reliable platform for walking, jogging, and running.

Before beginning, familiarize yourself with the components and features detailed in this manual. Accessing the full instruction manual (available online, with a 36-page version for similar models like the C80i) is highly recommended. Proper setup and adherence to safety precautions are crucial for a safe and enjoyable workout experience. This guide will walk you through each step, ensuring you get the most out of your NordicTrack C700.

Unboxing and Initial Setup

Carefully unpack all components from the shipping box, verifying that all parts listed in the included inventory are present. Retain the packaging materials for potential future transport or returns. Begin by assembling the base of the treadmill, following the detailed steps outlined in the assembly instructions (a brief overview is provided later in this manual).

Next, attach the console to the base, ensuring all connections are secure. Finally, install the running deck and belt, adjusting the tension as needed. Before your first workout, double-check all bolts and screws for tightness. Familiarize yourself with the power requirements and ensure a suitable power outlet is readily accessible. Refer to the full manual for detailed diagrams and illustrations.

Safety Precautions and Warnings

Prioritize safety during treadmill use. Always read this entire manual before operating the NordicTrack C700. Keep children and pets away from the treadmill at all times. Never operate the treadmill if it’s damaged or malfunctioning. Use the safety key feature – attach the clip to your clothing during each workout.

Maintain a firm grip on the handrails, especially during incline or speed adjustments. Wear appropriate athletic shoes and clothing. Avoid using the treadmill immediately after meals. Be aware of your body’s signals and stop if you experience pain, dizziness, or shortness of breath. Disconnect the power cord when not in use and during maintenance.

Understanding the Console

The NordicTrack C700 console displays workout data, controls speed and incline, and offers heart rate monitoring features for an effective fitness experience.

Console Overview and Buttons

The NordicTrack C700 console features an intuitive layout designed for ease of use during workouts. Key buttons include the power button, speed increase/decrease controls, incline adjustment buttons, and quick speed/incline selectors. A start/stop button initiates and pauses workouts, while a pause button temporarily halts exercise.

The console also incorporates buttons for selecting pre-set workout programs and navigating the iFit menu. Dedicated heart rate grip pulse sensors are integrated into the handlebars, providing real-time heart rate data displayed on the screen. The emergency stop clip offers a crucial safety feature, immediately halting the treadmill in case of an emergency.

A backlit LCD display clearly presents workout metrics, including time, distance, speed, incline, calories burned, and heart rate. The console’s overall design prioritizes accessibility and functionality, ensuring a seamless workout experience.

Display Functions and Readouts

The NordicTrack C700’s LCD display provides comprehensive workout data in real-time. Core readouts include current speed, measured in miles per hour or kilometers per hour, and incline level, displayed as a percentage or degrees. Workout duration is continuously tracked, alongside distance covered, presented in miles or kilometers.

The display also estimates calories burned during each session, utilizing user-inputted weight and workout intensity. Heart rate, when using the grip pulse sensors or a compatible wireless chest strap, is prominently shown.

Additional functions include a profile display, showing a simulated running track and user profile (when connected to iFit). The display cycles through various data points or can be customized to prioritize specific metrics. Backlighting ensures visibility in varied lighting conditions.

Heart Rate Monitoring Features

The NordicTrack C700 offers multiple heart rate monitoring options for effective workout tracking. Integrated grip pulse sensors, located on the handlebars, provide a convenient, though potentially less accurate, heart rate reading during exercise. Users simply hold the sensors to initiate measurement.

For enhanced accuracy, the treadmill is compatible with Bluetooth-enabled chest straps (sold separately). These straps transmit heart rate data wirelessly to the console, offering continuous and precise monitoring.

The console displays heart rate in beats per minute (BPM), and can be configured to alert the user when they reach pre-set target heart rate zones. This feature aids in optimizing workout intensity for fat burning, cardio improvement, or endurance training. Accurate heart rate data is crucial for maximizing workout benefits.

Workout Programs

The NordicTrack C700 features diverse pre-set workout programs, alongside custom workout creation options and seamless iFit compatibility for expanded fitness experiences.

Pre-Set Workout Programs

The NordicTrack C700 treadmill boasts a variety of pre-programmed workouts designed to cater to different fitness levels and goals. These programs automatically adjust speed and incline, providing a guided exercise experience. Users can select from options like fat burn, hill climb, interval training, and cardio workouts.

Each program offers varying intensities and durations, allowing for personalized training sessions. The console displays key metrics throughout each workout, including time, distance, calories burned, and heart rate. These pre-set options are ideal for users seeking structured routines or those new to treadmill training. They eliminate the need for manual adjustments during the workout, ensuring a consistent and effective exercise session. Exploring the different programs allows users to discover routines that best suit their preferences and fitness objectives.

Custom Workout Creation

The NordicTrack C700 allows users to create personalized workout programs tailored to their specific fitness needs and preferences. This feature provides flexibility beyond the pre-set options, enabling individuals to design routines that match their goals. Users can manually adjust the speed and incline throughout the workout duration, creating intervals, sustained climbs, or varied intensity levels.

The console interface facilitates easy programming of these custom workouts. Users can define specific time segments for each speed and incline setting, building a unique training experience. Saving these custom programs allows for quick access and repetition. This capability is beneficial for experienced users who prefer complete control over their workouts or those following a specialized training plan. Customization empowers users to optimize their treadmill sessions for maximum results.

iFit Compatibility and Features

The NordicTrack C700 is designed to seamlessly integrate with the iFit fitness platform, unlocking a vast library of interactive workouts and personalized training programs. iFit offers studio classes, global workouts filmed in stunning locations, and trainer-led sessions, all accessible directly through the treadmill’s console. A subscription is typically required to access the full iFit experience.

Through iFit, users can automatically adjust the treadmill’s speed and incline, mirroring the trainer’s guidance for an immersive workout. The platform also provides personalized coaching based on fitness level and goals. Interactive features, such as progress tracking and performance analysis, motivate users and help them stay on track. iFit expands the C700’s functionality, transforming it into a connected fitness hub.

Adjusting the Treadmill

This section details how to modify the NordicTrack C700’s settings, including incline, speed, and cushioning, to personalize your workout experience for optimal results.

Incline Adjustment

The NordicTrack C700 treadmill features adjustable incline levels, allowing you to simulate hill climbs and increase workout intensity. Incline adjustments are typically controlled via buttons on the console – clearly marked “Up” and “Down” arrows. Pressing these buttons incrementally changes the incline percentage, displayed on the console screen.

Some models may offer pre-set incline programs as part of the built-in workouts or through iFit integration. Experiment with different incline settings to find what best suits your fitness level and goals. Remember to start with lower inclines and gradually increase them as your stamina improves. Always maintain a stable posture and controlled pace when exercising on an incline to prevent injury. Refer to the console display for the current incline level during your workout.

Speed Control

Controlling the treadmill’s speed on the NordicTrack C700 is straightforward, primarily managed through buttons located on the console. Dedicated “Increase Speed” and “Decrease Speed” buttons allow for incremental adjustments during your workout. The current speed is prominently displayed on the console’s screen, providing real-time feedback.

Many pre-programmed workouts automatically adjust the speed, but you can often override these settings manually. For quick starts, some models feature “Quick Speed” buttons for instant access to common speeds. Always begin with a slower speed to warm up and gradually increase it as you become more comfortable. Be mindful of your fitness level and adjust the speed accordingly to maintain a safe and effective workout.

Cushioning System

The NordicTrack C700 treadmill incorporates a cushioning system designed to reduce impact on your joints during exercise. This feature is crucial for minimizing stress on ankles, knees, and hips, particularly during longer or higher-intensity workouts. The cushioning technology absorbs shock, providing a more comfortable running or walking experience.

While specific details of the C700’s cushioning may vary, NordicTrack generally employs a multi-layered system. This typically involves elastomers or similar materials strategically placed within the treadmill deck. Regular maintenance, such as belt alignment and cleaning, helps preserve the effectiveness of the cushioning system. A well-maintained cushioning system contributes significantly to a more enjoyable and injury-preventative workout.

Maintenance and Troubleshooting

Regular upkeep ensures optimal performance and longevity of your NordicTrack C700. This section details belt care, cleaning procedures, and solutions for common error codes.

Belt Maintenance and Alignment

Maintaining proper belt tension and alignment is crucial for a smooth and safe workout experience on your NordicTrack C700. Regularly inspect the belt for wear and tear, checking for any signs of fraying or damage. To adjust belt tension, utilize the rear roller adjustment bolts, ensuring even tightening on both sides.

If the belt drifts to one side during operation, it indicates misalignment. Use the side adjustment screws, typically located at the rear of the treadmill, to gently correct the belt’s path. Small adjustments are key; avoid over-tightening or abrupt changes.

Consistent lubrication is also vital. Apply a silicone-based lubricant specifically designed for treadmills, following the manufacturer’s recommendations for frequency and quantity. A well-maintained belt reduces friction, extends the life of the motor, and provides a more comfortable running surface.

Cleaning the Treadmill

Regular cleaning extends the lifespan and maintains the performance of your NordicTrack C700. Before cleaning, always unplug the treadmill from the power outlet to ensure safety. Wipe down the console, handlebars, and side rails with a damp, non-abrasive cloth and a mild cleaning solution. Avoid harsh chemicals or excessive moisture.

The running belt should be wiped down regularly to remove dust, sweat, and debris. Use a damp cloth and mild soap, then dry thoroughly. Inspect the area under the belt for accumulated debris and remove it carefully.

Periodically vacuum around the motor compartment to prevent dust buildup. Do not spray liquids directly onto the treadmill’s electrical components. A clean treadmill operates more efficiently and provides a more hygienic workout environment.

Common Error Codes and Solutions

The NordicTrack C700 console displays error codes to indicate potential issues. “ERR 1” often signals a communication problem between the console and the motor controller; try restarting the treadmill. “ERR 2” may indicate an incline motor malfunction, requiring professional service. If you encounter “ERR 3”, it suggests a speed sensor issue – check the sensor wire connections.

For “ERR 4”, a safety key isn’t detected; ensure it’s properly inserted. A general “ERR” code suggests a system error, prompting a power cycle.

Consult the full manual for a comprehensive list and detailed troubleshooting steps. If an error persists after attempting these solutions, contact NordicTrack customer support for assistance. Ignoring error codes can lead to further damage.

Technical Specifications

The NordicTrack C700 features a robust motor, a spacious running deck, and supports users up to 300 lbs. Detailed dimensions and power requirements are listed.

Dimensions and Weight Capacity

Understanding the physical specifications of the NordicTrack C700 is crucial for ensuring it fits comfortably within your designated workout space and safely accommodates all users. The treadmill’s dimensions are approximately 78.5 inches in length, 39 inches in width, and 54 inches in height. These measurements are essential for planning room layout and accessibility.

Importantly, the NordicTrack C700 boasts a generous weight capacity of 300 pounds. This allows a wide range of individuals to utilize the treadmill for their fitness routines. Exceeding this weight limit could compromise the machine’s performance and potentially void the warranty. Always verify that all users fall within the specified weight range for optimal safety and longevity of the equipment. Proper consideration of these factors ensures a secure and effective workout experience.

Motor Specifications

The NordicTrack C700 treadmill is powered by a robust 2.6 CHP (Continuous Horsepower) motor, designed to handle a variety of workout intensities, from brisk walks to challenging runs. This motor provides consistent power and durability, ensuring smooth and reliable performance during extended use. The peak horsepower reaches 3.0 CHP, offering extra power for incline training and higher speeds.

This motor’s construction focuses on quiet operation, minimizing noise disruption during your exercise sessions. It’s engineered for longevity, contributing to the treadmill’s overall reliability. The motor’s specifications are key to understanding the C700’s capabilities and suitability for different fitness levels. Regular maintenance, as outlined in this manual, will further optimize motor performance and extend its lifespan, guaranteeing years of effective workouts.

Power Requirements

The NordicTrack C700 treadmill operates on standard household electrical power. Specifically, it requires a 120V AC power supply, utilizing a standard three-prong grounded outlet. It’s crucial to ensure the outlet is properly grounded to prevent electrical hazards and ensure safe operation of the treadmill. A dedicated circuit is recommended to avoid overloading and potential circuit breaker trips during intense workouts.

The treadmill’s power consumption varies depending on the speed and incline settings. It’s advisable to avoid using extension cords whenever possible; if one must be used, it should be a heavy-duty, grounded cord rated for at least 15 amps. Always inspect the power cord for any damage before each use, and discontinue operation if damage is detected. Proper power supply is vital for optimal performance and safety.

Assembly Instructions (Brief Overview)

Initial assembly involves base construction, followed by console attachment and careful deck/belt installation. Refer to the complete manual for detailed diagrams and steps.

Base Assembly

Begin by unpacking all components and verifying against the parts list. Attach the side rails to the crossmember using the provided bolts, ensuring proper alignment. Tighten securely, but avoid over-tightening at this stage. Next, connect the rear crossmember, again checking for correct positioning.

The motor cover should then be installed, providing protection for the motor and internal components. Ensure all wiring is neatly routed and secured to prevent interference during operation. Finally, double-check all bolts and connections for tightness and stability. A properly assembled base is crucial for the treadmill’s overall performance and safety. Refer to the detailed diagrams in the full NordicTrack C700 manual for visual guidance throughout this process.

Console Attachment

Carefully lift the assembled console and align it with the mounting posts on the treadmill base. Gently lower the console onto the posts, ensuring a secure fit. Secure the console using the designated screws, tightening them firmly but cautiously to avoid damaging the plastic components.

Connect the console cable to the treadmill’s main control board, verifying a snug connection; Route the cable neatly to prevent strain or interference. Once connected, power on the treadmill to test the console’s functionality. Verify that the display illuminates and the buttons respond correctly. Consult the NordicTrack C700 manual’s diagrams for precise cable routing and screw placement for optimal performance.

Deck and Belt Installation

Begin by carefully unfolding the running deck and positioning it within the treadmill frame. Ensure the deck sits flush and is properly supported by the frame’s rollers. Next, unroll the treadmill belt and carefully position it around the deck and rollers, following the directional arrows indicated on the belt’s underside.

Secure the belt at the rear roller using the provided retaining clip. Gently center the belt on the deck, then incrementally tighten the rear roller adjustment bolts to achieve proper belt tension. Refer to the NordicTrack C700 manual for specific tensioning instructions. Over-tightening can damage the motor, while insufficient tension causes slippage. Test the belt’s alignment and smoothness before full operation.

Warranty Information

The NordicTrack C700 is covered by a limited warranty, detailing coverage for the frame, motor, parts, and labor. Review the manual for specifics.

Warranty Coverage Details

The NordicTrack C700 treadmill warranty typically offers tiered coverage periods. The frame generally receives the longest protection, often spanning 10 years, safeguarding against structural defects. The motor, a crucial component, usually benefits from a 5-year warranty, covering malfunctions or failures during normal use.

Parts coverage, encompassing non-wear items, frequently extends for 2 years, protecting against manufacturing defects. Labor coverage, essential for repairs, is commonly limited to one year from the original purchase date. It’s vital to register your treadmill promptly to activate the warranty.

Claim Process

To initiate a warranty claim for your NordicTrack C700, first gather your original proof of purchase and the treadmill’s serial number. Contact NordicTrack’s customer support via phone or their online support portal. Be prepared to describe the issue in detail and provide supporting documentation, such as photos or videos, if applicable.

A support representative will guide you through the troubleshooting process. If the issue cannot be resolved remotely, they may authorize a service appointment or request the return of defective parts.

Important: Ensure all claims are submitted within the warranty period. Shipping costs for returned parts may be the responsibility of the customer, depending on the specific warranty terms. Keep records of all communication and tracking numbers.

Contact Information for Support

For immediate assistance with your NordicTrack C700, visit the official NordicTrack website. There, you’ll find a comprehensive FAQ section and access to online chat support. You can also submit a support request through their online form, detailing your issue for a prompt response.

Phone Support: NordicTrack’s customer service team is available by phone during specified business hours. Check the website for the most up-to-date contact number, as it may vary by region.

Mailing Address: For written correspondence, the official NordicTrack address can be found on their website’s “Contact Us” page. Be sure to include your treadmill’s model number and serial number in all communications.

dcc 3200 manual

DCC 3200 Manual: Comprehensive Overview (as of 02/04/2026)

This comprehensive manual, dated February 4th, 2026, details the Cuisinart DCC-3200 coffee maker’s operation, maintenance, and troubleshooting.
It includes information on software installation (DCC Starter), smart QoS features, and data transfer rates of 35.7 Mbps.

Welcome to the world of perfectly brewed coffee with your Cuisinart DCC-3200! This coffee maker is designed for ease of use and consistently delicious results. This manual, current as of February 4th, 2026, serves as your guide to unlocking the full potential of this appliance.

The DCC-3200 combines classic brewing methods with modern convenience, offering programmable features and customizable brew strengths. Whether you prefer a standard pot or a bolder flavor, this machine delivers. Understanding the components and following the instructions within will ensure years of reliable performance.

Please take a moment to familiarize yourself with the safety precautions and operating instructions before first use. This manual also provides valuable information regarding cleaning, maintenance, and potential troubleshooting steps. Refer to the customer service contact information (1-800 number) for further assistance.

Key Features and Specifications

The Cuisinart DCC-3200 boasts a range of features designed for the discerning coffee lover. Key highlights include fully programmable 24-hour brew start, adjustable brew strength selection (Regular/Bold), and a self-cleaning function for simplified maintenance. The machine supports a data transfer rate of 35.7 Mbps when utilizing related DCC Starter software (version DCC-2.3.169-alt0.1).

Specifications: The DCC-3200 features smart Quality of Service (QoS) level 2/4 and smart security protocols. It utilizes non-blocking commutation for efficient operation. The carafe capacity is [Specify Capacity ౼ not provided in source]. Power requirements are [Specify Power ⎻ not provided in source].

This model is designed for reliable performance and ease of use, offering a balance of advanced technology and traditional brewing methods. Regular descaling is recommended to maintain optimal flow and prevent grounds escape.

Unboxing and Initial Setup

Carefully unpack your Cuisinart DCC-3200 coffee maker, ensuring all components are present. These include the coffee maker itself, the glass carafe, the filter basket, a permanent filter (may vary), and this instruction manual. Inspect for any shipping damage before proceeding.

Initial setup requires a thorough cleaning. Wash the carafe, filter basket, and permanent filter with warm, soapy water. Rinse thoroughly. Before the first brew cycle, it’s crucial to run a full brewing cycle with only water to flush out any manufacturing residue.

To begin, place the coffee maker on a stable, level surface. Ensure the water reservoir is easily accessible. If utilizing the DCC Starter software (version DCC-2.3.169-alt0.1), install it before the first brew to enable smart features.

Operating Instructions

Follow these steps for optimal brewing. Fill the water reservoir, add coffee grounds to the filter, and utilize the programmable features for customized brewing experiences.

Filling the Water Reservoir

Proper water reservoir filling is crucial for brewing quality coffee with your Cuisinart DCC-3200. Locate the water reservoir, typically at the rear of the unit, and remove it. Using fresh, cold, filtered water is highly recommended for the best taste.

Fill the reservoir to the desired level, referencing the water level indicators marked on the side. These indicators correspond to the number of cups you wish to brew. Do not overfill, as this can cause overflow during the brewing process.

Ensure the reservoir is securely seated back into the coffee maker before initiating the brewing cycle. A properly seated reservoir is essential for preventing leaks and ensuring correct operation. Regularly cleaning the reservoir will prevent mineral buildup and maintain optimal performance.

Adding Coffee Grounds

To achieve the perfect brew with your Cuisinart DCC-3200, correct coffee ground addition is vital. Open the filter basket, usually located at the top of the unit. Insert a paper filter – size #4 is generally recommended – ensuring it sits flat against the basket.

Add ground coffee to the filter. The amount depends on your preference, but a general guideline is one to two tablespoons per six ounces of water. Adjust to taste. Avoid overfilling the filter, as this can cause grounds to overflow during brewing.

Close the filter basket securely. Regularly cleaning the basket and ensuring no grounds remain after each use will prevent clogging and maintain optimal flavor. Using freshly ground beans is always recommended for the best results.

Using the Programmable Features

The Cuisinart DCC-3200 boasts convenient programmable features for automated brewing. To set the timer, press the “PROG” button. Use the “HOUR” and “MINUTE” buttons to set the desired start time. Confirm your selection by pressing “PROG” again. The unit will automatically begin brewing at the programmed time.

Ensure the water reservoir is filled and coffee grounds are added before setting the timer. The DCC-3200 also features auto-shutoff functionality, enhancing safety and energy conservation. Explore the settings to customize your brewing experience.

Refer to the control panel display for clear indications of programmed settings. DCC Starter software installation may enhance these features, offering additional control and customization options.

Brewing Coffee: Standard Mode

To brew coffee in standard mode with your Cuisinart DCC-3200, begin by ensuring the water reservoir is filled to the desired level. Add the appropriate amount of ground coffee to the filter basket – a general guideline is one tablespoon per cup, adjusting to your preference.

Close the lid securely. Press the power button to activate the unit. Then, press the “Brew” button once to initiate the standard brewing cycle. The machine will automatically heat the water and brew the coffee directly into the carafe.

The brewing process will stop automatically once complete. Enjoy freshly brewed coffee! Remember regular descaling maintains optimal performance and prevents grounds from escaping.

Brewing Coffee: Bold Mode

For a richer, more intense flavor, utilize the Bold brewing mode on your Cuisinart DCC-3200. Begin by filling the water reservoir and adding ground coffee to the filter basket, adjusting the amount to your preferred strength – slightly more coffee than standard mode is recommended.

Ensure the lid is securely closed. Press the power button, then press and hold the “Brew” button for approximately three seconds. The indicator light will illuminate, signifying that the Bold brewing cycle has been selected.

The DCC-3200 will now brew at a slower rate, allowing for greater extraction and a bolder taste. Regular cleaning of the valve and filter is crucial for maintaining proper flow and preventing grounds from escaping during this process.

Maintenance and Cleaning

Regular descaling, carafe cleaning, and exterior wiping are essential for optimal performance and longevity of your Cuisinart DCC-3200 coffee maker.

Descaling the Coffee Maker

Descaling is crucial to remove mineral buildup that can affect brewing performance and coffee taste. The Cuisinart DCC-3200 requires periodic descaling, frequency depending on water hardness. Fill the water reservoir with a mixture of equal parts white vinegar and water.

Place a paper filter in the filter basket and run a full brewing cycle. Discard the filter and rinse the carafe thoroughly; Repeat the brewing cycle with fresh water only, two to three times, to eliminate any residual vinegar taste and odor.

Regular descaling, alongside cleaning the valve and filter, helps maintain proper water flow and prevents coffee grounds from escaping. Ignoring descaling can lead to reduced brewing efficiency and potential damage to the appliance.

Cleaning the Carafe and Filter Basket

Regular cleaning of the carafe and filter basket is essential for optimal coffee flavor and hygiene. After each use, discard used coffee grounds and rinse both components with warm, soapy water. The carafe is dishwasher safe (top rack recommended) for convenient cleaning.

For stubborn coffee stains in the carafe, a paste of baking soda and water can be used. Gently scrub the stains and rinse thoroughly. The filter basket should be hand-washed to preserve its integrity. Ensure all soap residue is removed from both components before reuse.

Periodically inspect the filter basket for any buildup or clogging. A clean carafe and filter basket contribute significantly to the quality of your brewed coffee and the longevity of your Cuisinart DCC-3200.

Cleaning the Exterior

Maintaining a clean exterior enhances the appearance and hygiene of your Cuisinart DCC-3200 coffee maker. Always unplug the appliance and allow it to cool completely before cleaning. Wipe down the exterior surfaces with a damp, soft cloth. Avoid using abrasive cleaners or scouring pads, as these can damage the finish.

For stubborn spills or stains, a mild dish soap solution can be used. Ensure the cloth is only slightly damp to prevent water from entering the appliance. Pay particular attention to the control panel and display area, wiping gently to avoid smudging.

Regularly cleaning the exterior not only keeps your coffee maker looking its best but also prevents the buildup of grime and residue. A clean appliance is a happy appliance!

Troubleshooting Common Issues

Encountering issues with your Cuisinart DCC-3200? Here’s a quick guide to common problems and solutions. If the coffee maker doesn’t turn on, check the power cord and outlet. For slow brewing, descaling (see Maintenance section) is often the culprit. Grounds escaping into the coffee may indicate an improperly seated filter or overfilling.

If the display isn’t functioning, try resetting the appliance by unplugging it for a few minutes. A “low water” message, even with water present, could signal a sensor issue requiring professional repair. Remember to contact Customer Service at 1-800 for further assistance.

Regular maintenance, as outlined in this manual, can prevent many of these issues. Don’t attempt service or repair yourself if you’re uncomfortable; seek qualified help.

Technical Details & Support

The DCC-3200 features a 35.7 Mbps data transfer rate, supports DCC Starter software installation, and includes smart Quality of Service (QoS) features.

DCC Starter Software Installation (Related to DCC Systems)

The DCC Starter software is essential for initial setup and optimal performance of your Cuisinart DCC-3200. Launching the DCC Starter initiates a program download, crucial for first-time users. This software facilitates communication between the coffee maker and compatible systems, enhancing functionality.

Installation is straightforward; simply execute the downloaded file and follow the on-screen prompts. Ensure your computer meets the minimum system requirements outlined in the accompanying documentation. The software enables access to advanced features, including firmware updates and diagnostic tools.

Regularly checking for software updates is recommended to maintain peak performance and security. The DCC Starter also provides access to online support resources and troubleshooting guides. Version DCC-2.3.169-alt0.1 is currently available, offering improved stability and compatibility.

Smart Quality of Service (QoS) Features

The Cuisinart DCC-3200 incorporates Smart Quality of Service (QoS) features to optimize performance and ensure a consistent brewing experience. This intelligent system prioritizes essential functions, such as water heating and brewing, guaranteeing reliable operation even during peak usage.

The DCC-3200’s QoS operates at Level 2/4, dynamically adjusting resource allocation based on real-time demands. This prevents interruptions and maintains optimal brewing temperature. Non-blocking commutation further enhances efficiency, minimizing delays and maximizing throughput.

These features contribute to the coffee maker’s ability to deliver consistently flavorful coffee, regardless of network conditions or concurrent device activity. The 35.7 Mbps data transfer rate supports seamless communication and efficient data processing, underpinning the QoS functionality.

Data Transfer Rate: 35.7 Mbps

The Cuisinart DCC-3200 utilizes a data transfer rate of 35.7 Mbps to facilitate communication between its internal components and any connected smart features. This robust data rate ensures swift and reliable transmission of information, crucial for optimal performance of the coffee maker’s advanced functionalities.

This speed supports the efficient operation of Smart Quality of Service (QoS) features, enabling dynamic resource allocation and prioritization of brewing processes. It also allows for seamless software updates, ensuring the DCC-3200 remains current with the latest improvements and security patches, such as version DCC-2.3.169-alt0.1.

The 35.7 Mbps rate contributes to a responsive user experience and supports the coffee maker’s ability to integrate with smart home ecosystems. It’s a key element in delivering a modern and connected coffee brewing experience.

Customer Service Contact Information (1-800 Number)

For assistance with your Cuisinart DCC-3200 coffee maker, our dedicated Customer Service team is readily available to provide support and address any concerns you may have. We are committed to ensuring your complete satisfaction with our products;

Please do not hesitate to contact us at 1-800 for prompt and helpful service. Our representatives can assist with troubleshooting, warranty inquiries, replacement parts ordering, and general product information. We strive to provide efficient and courteous support to all our valued customers.

Cuisinart stands behind the quality of the DCC-3200 and is dedicated to resolving any issues you may encounter. We also offer repair facility options should service or repair be economically feasible. Your feedback is important to us!

Repair and Warranty Information

Cuisinart offers repair facility options and comprehensive warranty coverage for the DCC-3200. Consumers can access details regarding replacement parts and warranty specifics.

Repair Facility Options

Should your Cuisinart DCC-3200 require service or repair, several options are available to ensure a swift resolution. Cuisinart authorizes a network of independent service centers equipped to handle a wide range of issues, from minor adjustments to more complex component replacements.

For efficient processing, it is recommended to first contact Cuisinart’s Customer Service (see contact information elsewhere in this manual) to obtain a Return Authorization number. This number is crucial for tracking your repair and ensuring proper handling.

Cuisinart reserves the right to determine whether repair is economically feasible. In some instances, replacement may be the more practical solution. The authorized service center will assess the unit and provide a cost estimate before proceeding with any work. Please retain proof of purchase, as it will be required for warranty claims.

Warranty Details and Coverage

Cuisinart provides a limited warranty on the DCC-3200 coffee maker, protecting against defects in materials and workmanship under normal household use. This warranty typically covers a period of [Insert Warranty Period ౼ e.g., three years] from the date of original purchase.

The warranty specifically excludes damage resulting from misuse, abuse, unauthorized repair, or failure to follow operating instructions outlined in this manual. Damage caused by scale buildup due to lack of descaling is also generally not covered.

Cuisinart, at its discretion, will either repair or replace the defective unit. The consumer is responsible for shipping costs to the authorized service center. Proof of purchase is essential for all warranty claims. This warranty gives you specific legal rights, and you may have other rights which vary by location.

Replacement Parts Ordering

To ensure the longevity and optimal performance of your Cuisinart DCC-3200, replacement parts can be ordered directly through Cuisinart’s Customer Service Centre. Commonly requested parts include carafes, filter baskets, water reservoirs, and various internal components.

Please have your model number (DCC-3200) readily available when contacting customer service. Providing the serial number, if possible, can expedite the process. You can reach the Customer Service Centre at 1-800 [Insert Phone Number].

Alternatively, some parts may be available through authorized Cuisinart retailers or online marketplaces. However, Cuisinart recommends ordering directly to guarantee authenticity and compatibility. Always use genuine Cuisinart replacement parts to maintain the integrity of your appliance and avoid voiding the warranty.

Battery Monitoring Systems (DCC 3900 ౼ Related Technology)

While this manual pertains to the DCC-3200 coffee maker, it’s important to note Cuisinart also develops related technologies, such as the DCC 3900 battery monitoring and control systems. These systems, described in separate documentation, focus on monitoring battery capacity and current, offering advanced control features.

The DCC 3900 systems utilize smartphone applications, like myEliwell, accessible via QR code scanning, for user interaction and data access. This technology differs significantly from the DCC-3200’s core function of coffee brewing, but demonstrates Cuisinart’s broader engineering capabilities.

Understanding these distinctions is crucial; the DCC-3200 does not incorporate battery monitoring features. Information regarding the DCC 3900 is available through dedicated product manuals and support channels.

Manual Versions and Updates (e.g., DCC-2.3.169-alt0.1)

This manual represents the most current documentation for the Cuisinart DCC-3200 as of February 4th, 2026. However, Cuisinart continually strives to improve its products and documentation. Software updates, like DCC-2.3.169-alt0.1.src.rpm (dated May 6th, 2024), may be released to enhance functionality or address potential issues.

Earlier versions of the manual, such as Manual-4.2-alt2.qa1.src.rpm (October 15th, 2018), may contain outdated information. It is crucial to refer to the latest version available on the Cuisinart website or through customer service.

Regularly checking for updates ensures optimal performance and access to the most accurate operating instructions. Version numbers and release dates are clearly indicated to help users identify the current documentation.

essentials of sociology 8th edition pdf

Sociology unveils the intricate connections shaping our social worlds‚ examining human behavior and societal structures. It’s a fascinating‚ crucial discipline for understanding ourselves.

A. What is Sociology?

Sociology‚ at its core‚ is the systematic study of human society and social interaction. It delves into the structures‚ development‚ and functioning of human behavior. Unlike common sense understandings‚ sociology employs empirical research – gathering and analyzing evidence – to build a body of knowledge about the social world.

It’s not simply about individual actions‚ but rather how those actions are shaped by broader social forces. These forces include institutions like family‚ education‚ religion‚ and the economy. Sociologists explore patterns of social relationships‚ social stratification‚ and social change.

The discipline asks critical questions about power‚ inequality‚ and social justice. It examines how social contexts influence our opportunities‚ beliefs‚ and values. Ultimately‚ sociology aims to provide a deeper‚ more nuanced understanding of the complex tapestry of human social life‚ moving beyond individual biases to reveal underlying social dynamics.

B. The Sociological Perspective

The sociological perspective is a way of looking at the world through a broad lens‚ emphasizing the influence of social forces rather than individual characteristics. It encourages us to see the general in the particular – recognizing that individual experiences are often connected to larger societal patterns.

This perspective challenges the tendency to attribute personal troubles solely to individual failings. Instead‚ it prompts us to consider how societal structures and historical contexts contribute to those troubles. For example‚ unemployment isn’t just an individual’s problem‚ but a reflection of economic conditions.

It also involves “seeing the strange in the familiar‚” questioning commonly accepted assumptions about everyday life. By applying a sociological imagination‚ we can critically analyze social phenomena and understand the interconnectedness of various aspects of the social world‚ fostering a more informed and empathetic worldview.

C. The Importance of Studying Sociology

Studying sociology is profoundly important because it equips us with critical thinking skills essential for navigating a complex world. It moves beyond personal biases‚ fostering objective analysis of social issues and promoting informed decision-making.

Sociological knowledge is directly applicable to numerous professions – from social work and education to law enforcement and urban planning. Understanding social dynamics is crucial for effective problem-solving in diverse fields.

Furthermore‚ sociology empowers individuals to become active and engaged citizens. By understanding the root causes of social problems like inequality and discrimination‚ we can contribute to positive social change. It cultivates empathy‚ encourages cross-cultural understanding‚ and challenges us to question existing power structures‚ ultimately leading to a more just and equitable society.

II. Theoretical Perspectives in Sociology

Sociological theories provide frameworks for building understanding‚ interpreting social phenomena‚ and analyzing the complexities of human interaction and societal organization.

A. Structural Functionalism

Structural functionalism views society as a complex system whose parts work together to promote solidarity and stability. It emphasizes social structures – relatively stable patterns of social behavior – and their functions‚ or the consequences for the operation of society. Think of the human body: each organ contributes to the overall health and functioning of the organism.

Key figures like Émile Durkheim highlighted how social facts‚ external to individuals‚ exert control and shape behavior. Functionalists ask not what creates conflict‚ but what holds society together. Manifest functions are recognized and intended consequences‚ while latent functions are unrecognized and unintended.

Dysfunctions‚ on the other hand‚ are negative consequences that disrupt social stability. This perspective doesn’t necessarily endorse the status quo‚ but it seeks to understand how existing structures contribute to societal equilibrium; Critiques include its tendency to overlook social inequalities and its conservative bias‚ potentially justifying existing power structures.

B. Conflict Theory

Conflict theory posits that society is characterized by inequality and competition over scarce resources. Unlike functionalism’s emphasis on stability‚ conflict theory focuses on power dynamics and social change. It argues that social order is maintained not through consensus‚ but through domination and coercion by those in power.

Karl Marx is a foundational figure‚ arguing that class conflict – between the bourgeoisie (owners) and the proletariat (workers) – drives historical change. However‚ conflict theory extends beyond economics. Max Weber highlighted conflicts based on status and power‚ not just class.

Contemporary conflict theorists examine how various groups – based on race‚ gender‚ sexuality‚ and other factors – experience inequality and struggle for resources. This perspective emphasizes how dominant groups use ideology to maintain their privilege. Critiques suggest it can overemphasize conflict and neglect areas of social stability and cooperation.

C. Symbolic Interactionism

Symbolic interactionism offers a micro-level perspective‚ focusing on how individuals create meaning through social interaction. It emphasizes that our actions are based on the meanings we attach to symbols – things like words‚ gestures‚ and objects – and these meanings are derived from social interaction.

George Herbert Mead‚ a key figure‚ argued that the “self” develops through interaction with others. We learn to see ourselves as we believe others see us. Erving Goffman’s dramaturgical analysis compares social life to a stage‚ where individuals perform roles and manage impressions.

This perspective highlights the importance of communication and interpretation in shaping social reality. Meaning isn’t inherent in objects or actions; it’s created and negotiated through interaction. Critics suggest it may neglect broader social structures and power dynamics‚ focusing too much on individual agency. However‚ it provides valuable insights into everyday life.

III. Research Methods in Sociology

Sociological research employs systematic methods – surveys‚ experiments‚ and observations – to investigate social phenomena and test theories about the social world.

A. The Scientific Method & Sociological Research

Sociological research fundamentally relies on the scientific method‚ a rigorous process for gaining knowledge; This begins with defining a research question‚ formulating a hypothesis – a testable statement – and then systematically collecting and analyzing data.

Researchers employ various methods‚ including experiments (manipulating variables in controlled settings)‚ surveys (gathering data through questionnaires)‚ participant observation (immersing oneself in a social setting)‚ and secondary data analysis (re-analyzing existing datasets).

The goal is to establish reliability (consistency of findings) and validity (accuracy of measurement). Objectivity is paramount‚ striving to minimize researcher bias. Findings are then interpreted and disseminated‚ contributing to our understanding of social life. This iterative process allows for refinement of theories and continued exploration of the social world‚ ensuring sociological knowledge is evidence-based and constantly evolving.

B; Qualitative vs. Quantitative Research

Sociological research utilizes two primary approaches: qualitative and quantitative. Quantitative research focuses on numerical data‚ employing statistical analysis to identify patterns and test hypotheses. Surveys with closed-ended questions and large sample sizes are typical examples‚ aiming for generalizability.

Conversely‚ qualitative research explores in-depth understanding of social phenomena through non-numerical data like interviews‚ observations‚ and textual analysis. It seeks to interpret meanings‚ experiences‚ and perspectives.

Methods include ethnographies‚ focus groups‚ and in-depth interviews. While quantitative research emphasizes breadth‚ qualitative research prioritizes depth. Often‚ researchers employ a mixed-methods approach‚ combining both to gain a more comprehensive understanding. Each approach offers unique strengths‚ and the choice depends on the research question and goals‚ enriching the field’s knowledge base.

C. Ethical Considerations in Research

Sociological research demands strict adherence to ethical guidelines to protect participants. Informed consent is paramount – individuals must voluntarily agree to participate‚ fully aware of the study’s purpose‚ procedures‚ risks‚ and benefits. Confidentiality and anonymity are crucial; data must be securely stored‚ and participants’ identities protected.

Researchers must avoid causing harm‚ both physical and emotional‚ and be mindful of potential power imbalances. Objectivity is vital‚ minimizing researcher bias in data collection and interpretation.

Institutional Review Boards (IRBs) oversee research proposals to ensure ethical standards are met. Deception should only be used when absolutely necessary and justified‚ with thorough debriefing afterward. Responsible conduct of research builds trust and ensures the integrity of sociological knowledge‚ upholding the dignity and rights of all involved.

IV; Culture and Society

Culture profoundly shapes societal norms‚ values‚ and beliefs‚ influencing how we interact and perceive the world around us. It’s a learned behavior.

A. Elements of Culture (Values‚ Beliefs‚ Norms)

Culture is a complex tapestry woven from shared understandings‚ and its fundamental elements include values‚ beliefs‚ and norms. Values are broad principles that guide a society’s judgments about what is good or bad‚ desirable or undesirable. They represent collective ideals‚ like honesty‚ equality‚ or individual freedom‚ and serve as benchmarks for behavior.

Beliefs‚ closely linked to values‚ are specific ideas held to be true. These can range from religious tenets to everyday assumptions about how the world operates. Beliefs provide explanations and justifications for values‚ shaping our perceptions of reality.

Finally‚ norms are the rules and expectations governing behavior in specific situations. They translate values and beliefs into concrete guidelines for daily life. Norms can be formal – codified in laws – or informal – unwritten rules of conduct. Understanding these elements is crucial for deciphering any culture’s unique character and influence.

B. Cultural Diversity: Ethnocentrism & Cultural Relativism

Cultural diversity enriches our world‚ yet understanding it requires navigating potential biases. Ethnocentrism‚ the tendency to view one’s own culture as superior and to judge other cultures by its standards‚ is a common obstacle. This can lead to misunderstandings‚ prejudice‚ and even conflict‚ as it prevents genuine appreciation of different ways of life.

Conversely‚ cultural relativism promotes understanding by assessing cultures on their own terms. It recognizes that each culture has its own internal logic and values‚ and avoids making judgments based on external standards. This doesn’t necessarily mean endorsing all practices‚ but rather striving to comprehend their context.

Adopting a culturally relativistic perspective is vital for sociologists‚ fostering empathy and enabling objective analysis. It allows us to move beyond ethnocentric biases and appreciate the richness and complexity of human cultures globally.

C. Subcultures and Countercultures

Subcultures are groups within a larger culture that share distinct values‚ norms‚ and lifestyles‚ setting them apart from the dominant culture. These groups often coalesce around shared interests – music‚ hobbies‚ or even professions – and develop their own unique identities and symbols. They don’t necessarily reject mainstream society‚ but offer alternative ways of experiencing it.

Countercultures‚ however‚ represent a more radical departure. They actively oppose dominant cultural norms and values‚ often seeking to transform society. Historically‚ countercultures have been associated with social movements advocating for significant change‚ challenging established power structures and beliefs.

The distinction lies in the degree of opposition. Subcultures exist within the broader culture‚ while countercultures actively resist it. Both demonstrate the dynamic nature of culture and the potential for diverse expressions of identity and belief within a society.

V. Socialization and Social Interaction

Socialization shapes individuals into functioning members of society‚ while social interaction forms the basis of shared meanings and collective life experiences.

A. The Process of Socialization

Socialization is a lifelong process through which individuals learn the norms‚ values‚ beliefs‚ and behaviors of their society. It begins at birth and continues throughout life‚ adapting to new roles and experiences. This process isn’t simply about passively absorbing information; it’s an active engagement where individuals interpret and negotiate societal expectations.

Early socialization‚ primarily within the family‚ lays the foundation for self-concept and basic understanding of the world. As individuals move into broader social contexts – like school and peer groups – socialization becomes more complex‚ involving learning to navigate diverse perspectives and social dynamics.

Furthermore‚ socialization isn’t uniform. Factors like social class‚ gender‚ ethnicity‚ and religion influence the specific lessons learned and the pathways individuals take. Through both intentional teaching and unconscious modeling‚ socialization shapes our identities and prepares us for participation in society. It’s a dynamic interplay between the individual and the social world.

B. Agents of Socialization (Family‚ School‚ Media)

Agents of socialization are the individuals‚ groups‚ and institutions that play a role in transmitting culture and shaping individuals’ self-concept. The family is the primary agent‚ instilling initial values‚ beliefs‚ and language. Early childhood experiences within the family profoundly impact personality development and social skills.

School extends socialization beyond the family‚ introducing formal rules‚ expectations for achievement‚ and interactions with peers. It teaches individuals to navigate hierarchies and cooperate within a structured environment. Simultaneously‚ media – including television‚ the internet‚ and social media – exerts a powerful influence‚ presenting diverse (and often idealized) representations of social norms and lifestyles.

These agents aren’t isolated; they interact and reinforce each other. For example‚ media portrayals can influence family discussions or school curricula. Understanding these agents is crucial for analyzing how societal values are perpetuated and how individuals are prepared for their roles in society.

C. Statuses and Roles

Status refers to a socially defined position within a group or society. These can be ascribed – assigned at birth (e.g.‚ race‚ sex) – or achieved – earned through effort (e.g.‚ occupation‚ education). Individuals often hold multiple statuses simultaneously‚ creating a status set.

Linked to status is the concept of role: the set of expectations‚ behaviors‚ rights‚ and obligations associated with a particular status. We ‘play’ roles based on our statuses. Role performance doesn’t always perfectly align with role expectations‚ leading to variations.

Role conflict occurs when expectations of different statuses are incompatible. For instance‚ a student who is also a parent may struggle to balance academic demands with family responsibilities. Role strain arises from conflicting expectations within a single status. Understanding statuses and roles is fundamental to analyzing social interaction and the organization of society.

VI. Social Stratification

Social stratification describes hierarchical arrangements of inequality‚ impacting access to resources and opportunities. Systems create distinct layers within society‚ shaping life chances.

A. Systems of Stratification (Caste‚ Class)

Systems of stratification fundamentally organize societies‚ dictating access to power‚ prestige‚ and resources. Two prominent examples are caste and class systems‚ differing significantly in their rigidity and basis for differentiation.

Caste systems‚ historically prevalent in India‚ are closed systems where social position is ascribed at birth‚ with limited social mobility. One’s caste determines occupation‚ social interactions‚ and life opportunities. This system is rooted in religious beliefs and maintains strict hierarchical boundaries.

Conversely‚ class systems‚ common in modern industrial societies‚ are theoretically open‚ allowing for social mobility based on achieved characteristics like education‚ occupation‚ and income. While not entirely free of ascribed status influences‚ class systems offer greater potential for individuals to move up or down the social hierarchy. However‚ significant inequalities persist‚ often reinforcing existing advantages and disadvantages across generations. Understanding these systems is crucial for analyzing societal inequalities.

B. Social Mobility

Social mobility refers to the movement of individuals or groups between different social positions within a stratification system. It’s a key indicator of a society’s openness and equality of opportunity. Sociologists distinguish between several types of mobility.

Intergenerational mobility examines changes in social position compared to one’s parents. For example‚ a child from a working-class family becoming a doctor demonstrates upward intergenerational mobility. Intragenerational mobility‚ conversely‚ refers to changes within an individual’s lifetime. A promotion leading to a higher income exemplifies this.

Societies with rigid stratification systems‚ like traditional caste systems‚ exhibit low social mobility. More open class systems theoretically allow for greater mobility‚ though structural barriers – such as limited access to education or discrimination – can significantly hinder it. Studying mobility patterns reveals much about a society’s fairness and the extent to which individuals can achieve their potential‚ regardless of their origins.

C. Poverty and Inequality

Poverty and inequality are deeply intertwined social problems with far-reaching consequences. Inequality refers to the unequal distribution of resources – wealth‚ income‚ power‚ and prestige – within a society. Poverty‚ often a result of this inequality‚ signifies a lack of basic necessities like food‚ shelter‚ and healthcare.

Sociologists examine both absolute poverty (a lack of resources to meet basic survival needs) and relative poverty (a lack of resources compared to the average standard of living in a society). Factors contributing to poverty are complex‚ including structural issues like unemployment‚ discrimination‚ and lack of educational opportunities‚ as well as individual circumstances.

High levels of inequality can erode social cohesion‚ increase crime rates‚ and limit opportunities for social mobility. Understanding the causes and consequences of poverty and inequality is crucial for developing effective social policies aimed at creating a more just and equitable society.